Short, complete guides to create customers, prepare quotes with the AI assistant, turn accepted quotes into Factur-X invoices, manage BTP deposits and balances, and connect Pennylane without accounting training.
Application screenshot — demonstration data. 1 — Search Click to enlarge.Application screenshot — demonstration data. 1 — Save profile Click to enlarge.Application screenshot — demonstration data. 1 — Preferences Click to enlarge.
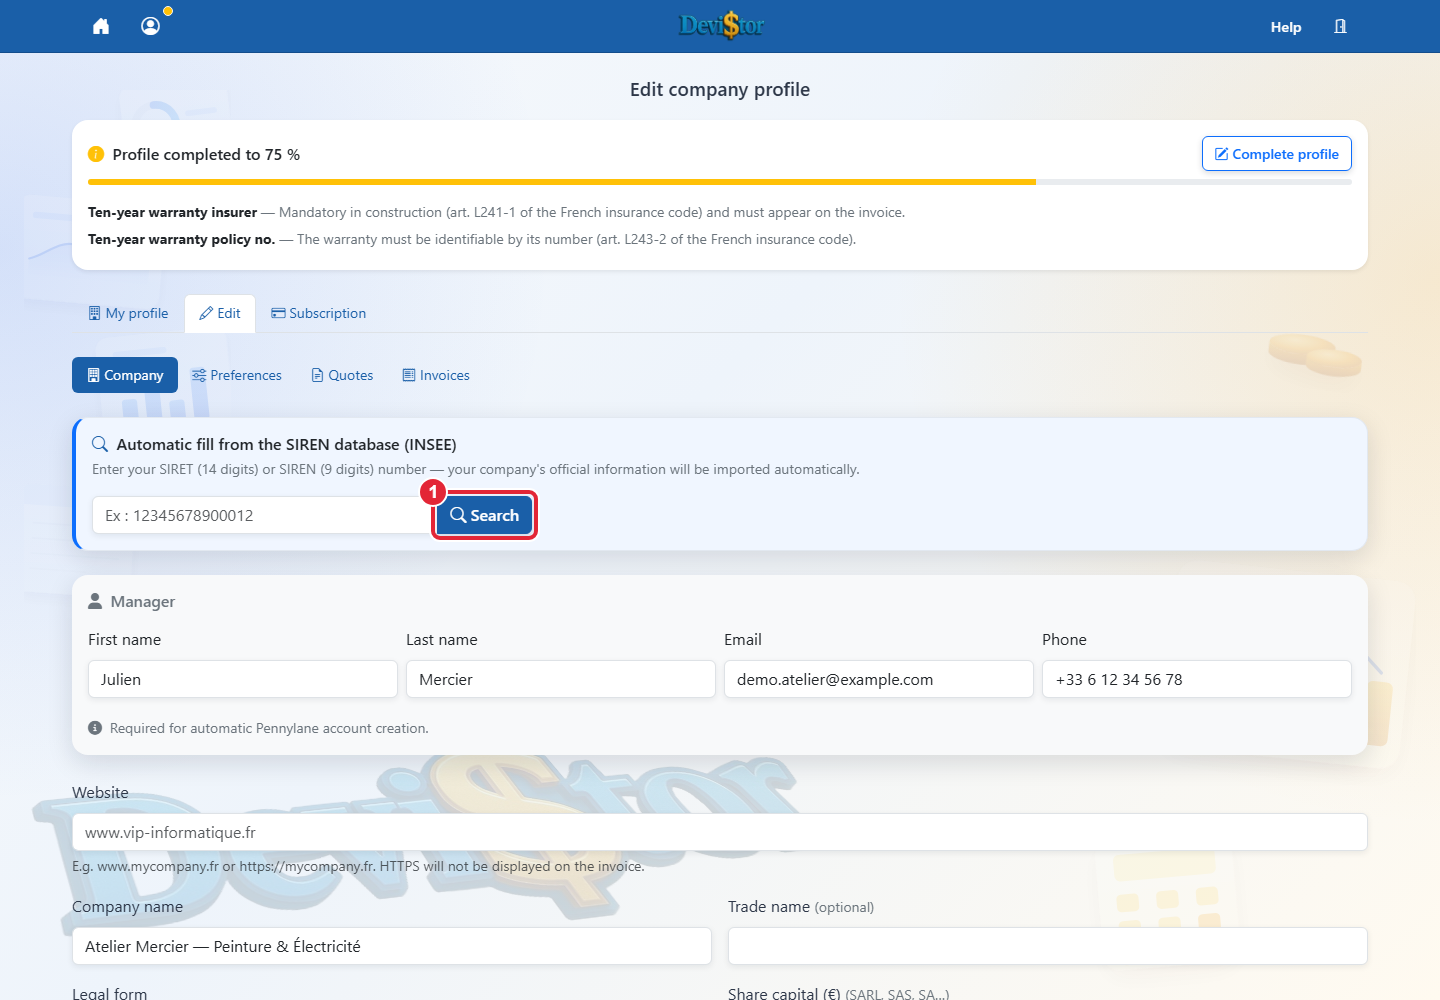
Goal: understand the first screen after registration and account activation, then configure your company profile correctly.
a) Profile tab
Beginner5 minutes
Log in to DeviStor with your email address.
On first launch, you are automatically redirected to the Company profile page.
On a new profile, search by SIREN/SIRET to fill and unlock official company details. Then check the results. Enter your telephone in the profile; registration no longer requests it. Check your email too.
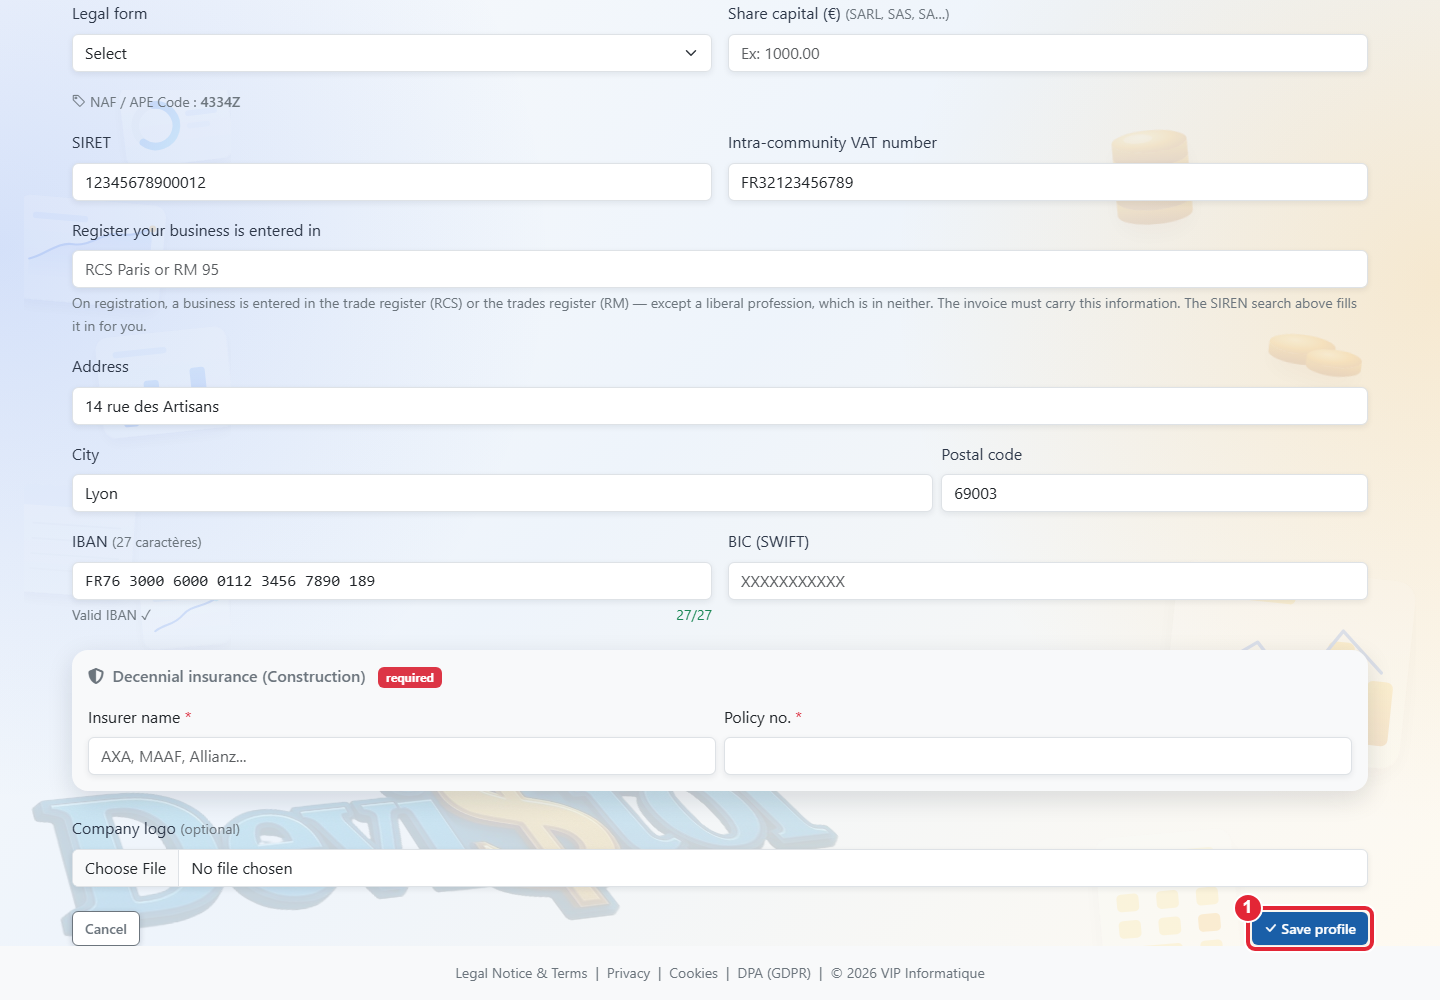
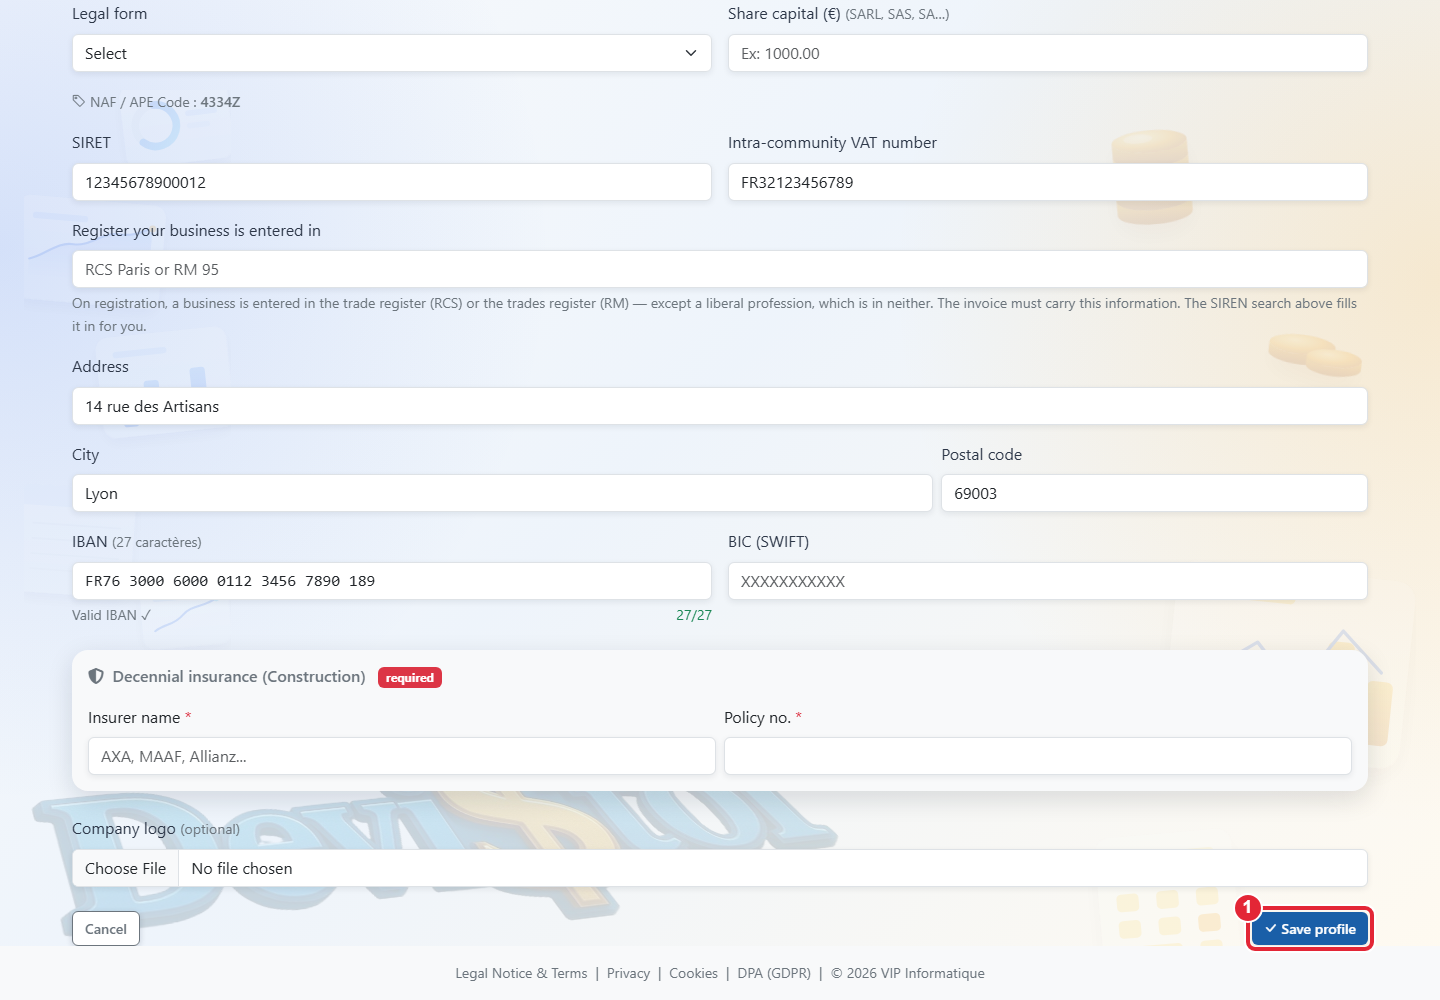
If your company has professional or ten-year insurance, manually fill in the insurer name and policy number. Also fill in your IBAN and BIC (SWIFT): these details are not public and cannot be imported automatically.
Add your company logo so it appears on quote and invoice PDFs.
Click Save profile to save this information.
b) Preferences tab
Beginner5 minutes
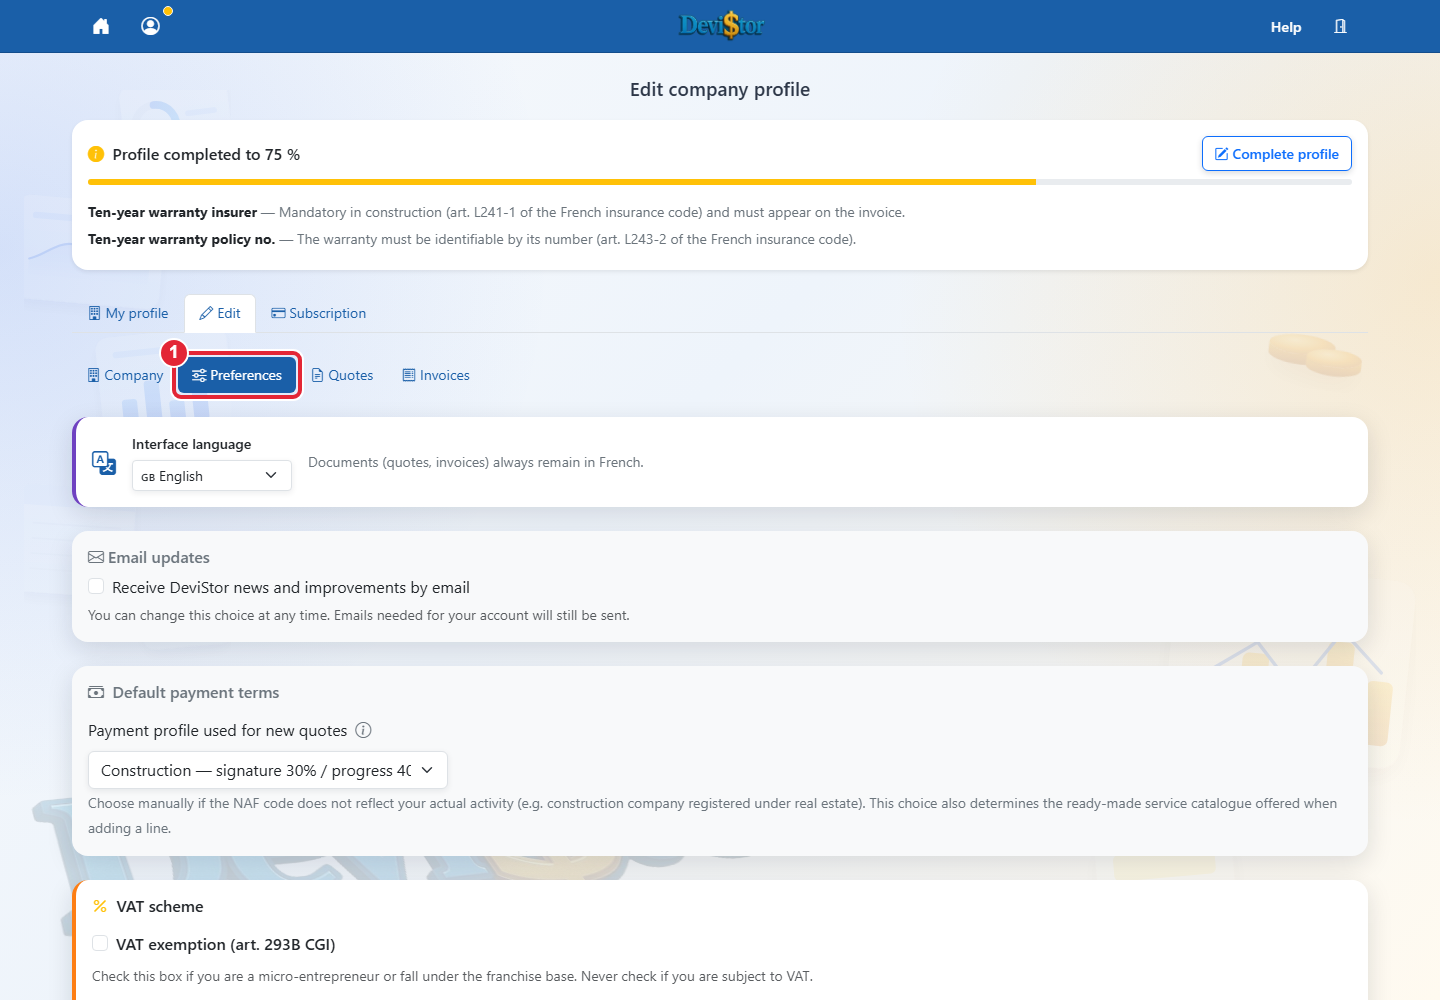
Open the Preferences tab to configure default values used in future quotes and invoices.
Choose the interface language. DeviStor is available in French, English, Polish, Ukrainian and Portuguese.
Check the activity profile: automatic from the NAF code or manual selection. It activates the suitable predefined services catalog and the default payment model for new quotes.
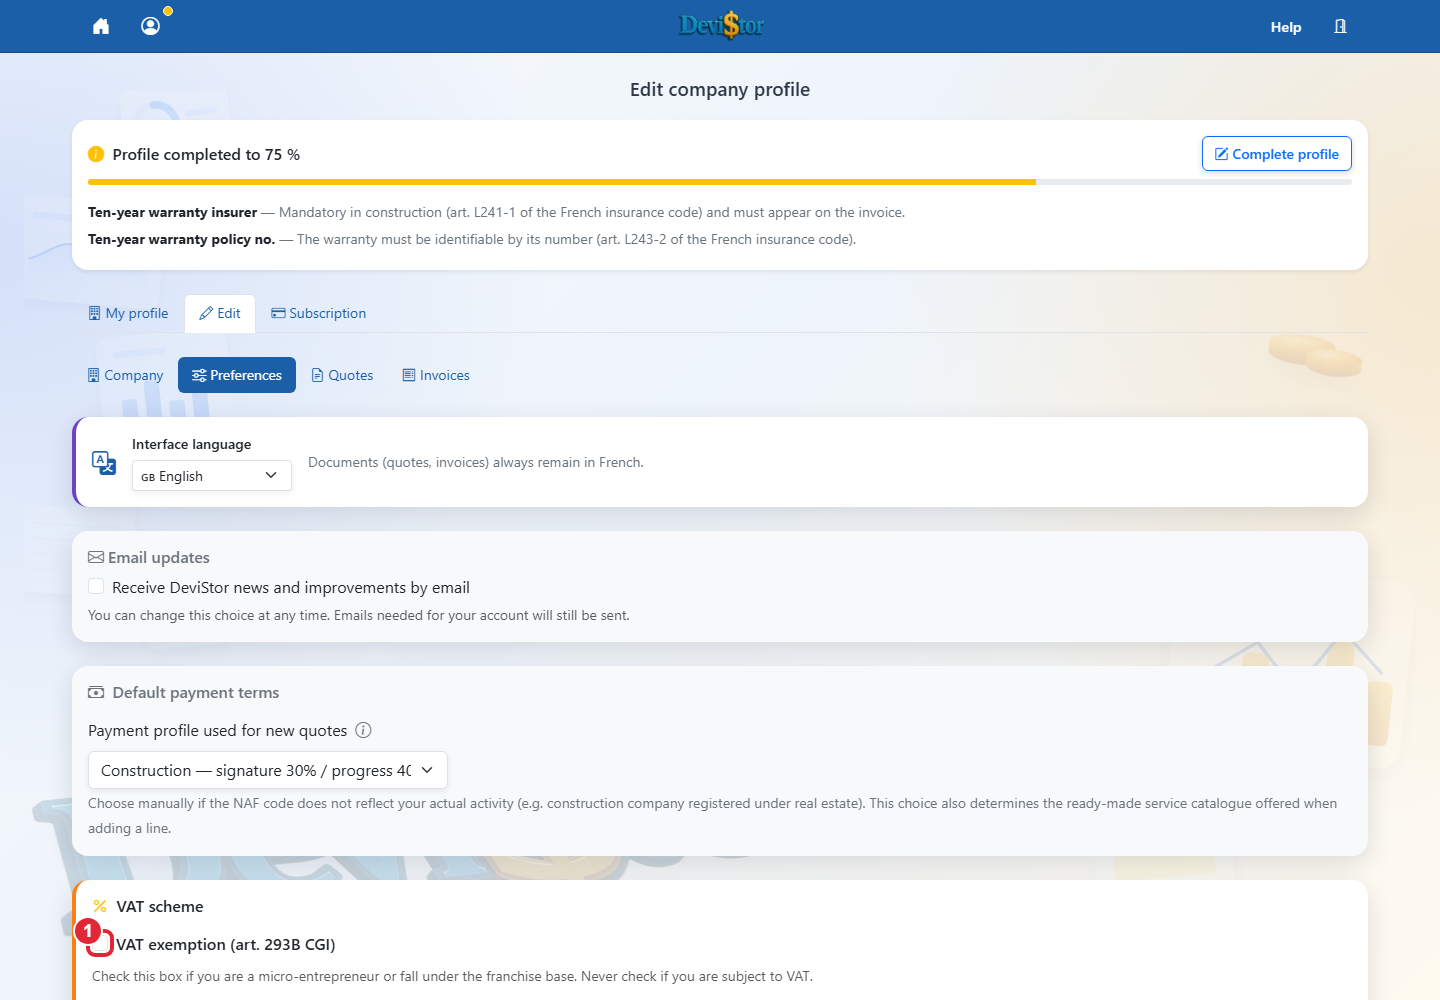
Check the VAT regime and default VAT rate, especially if you are a micro-entrepreneur.
Check invoice numbering before finalizing your first invoice.
Click Save profile to save preferences.
Interface language
The DeviStor interface is available in five languages: French, English, Polish, Ukrainian and Portuguese. French remains the compliant primary language of quotes and invoices. You can also generate a bilingual version using the language selected on the client's profile.
Activity profile
Choose the activity profile used for services and new quotes. Automatic mode selects a profile based on your NAF / APE code. This choice activates the matching predefined services catalog and default payment terms.
You can also choose manually: BTP, IT, Consulting / Engineering, Services or Full payment, 100% order, for example if your NAF code does not reflect your real activity.
VAT regime
If you are a micro-entrepreneur or under the VAT exemption regime, tick VAT exemption under art. 293B CGI. New invoices will be created without VAT with the mandatory legal note: TVA non applicable, art. 293B du CGI. Already created invoices are not modified.
When this regime is active, the default VAT rate is set to 0% for new quotes and invoices.
Warning: DeviStor does not know whether your company has exceeded micro-enterprise thresholds. If you exceed those thresholds or become subject to VAT, you must disable the exemption and manually change the default VAT rate, for example to 20% or the rate applicable to your activity.
The Default VAT rate field is preselected automatically when creating a quote or invoice. It must always match your real situation.
Invoice numbering
By default, DeviStor proposes a prefix such as F, a pattern such as -{annee}-{numero} and a preview such as F-2026-1. If you are starting your activity and have not issued any invoice during the year, you can usually keep this setting.
If you start using DeviStor during the year after already issuing invoices with another tool, adapt the prefix and next number to continue the chronology of your existing documents.
Warning: after issuing your first invoice in DeviStor, numbering must no longer be freely changed. Carefully check prefix, pattern and next number before finalizing your first invoice.
Tip: take two minutes to fill in the profile. Quotes and invoices will then automatically reuse your information.
2. Create your first customer
Application screenshot — demonstration data. 1 — Save Click to enlarge.
Goal: save a B2B or B2C customer and prepare their documents.
Customers3 minutes
From the dashboard, click Customers, then Add.
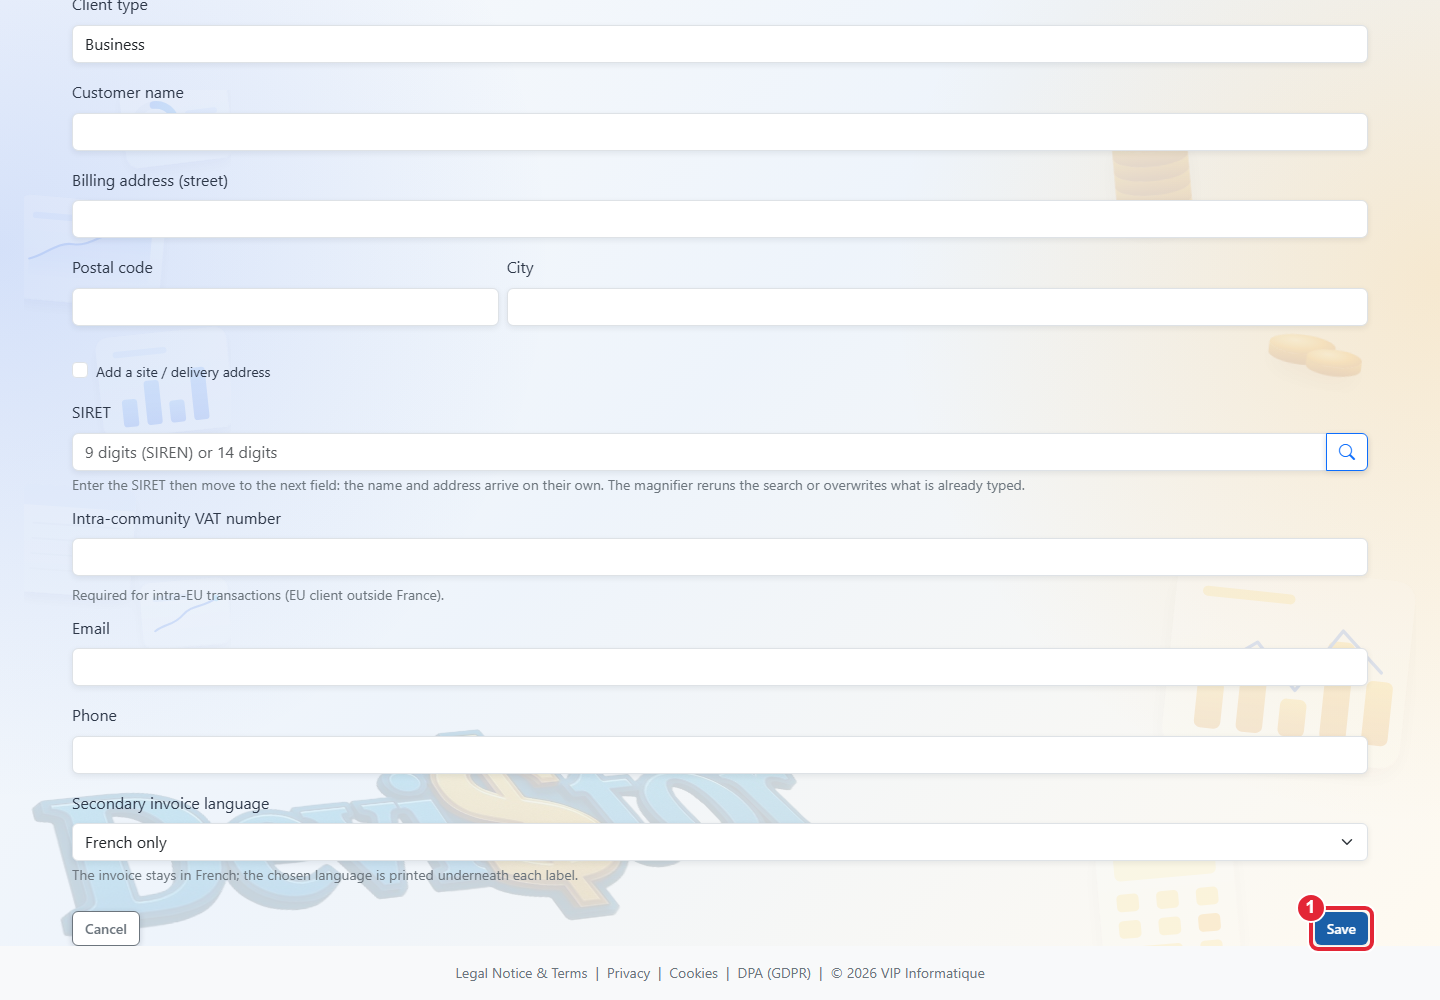
Choose the customer type: business (B2B) or individual (B2C).
Depending on the type: for a B2C customer, complete all data manually. For a B2B customer, enter a SIRET or SIREN in the SIRET field so DeviStor can automatically retrieve the SIRET and professional customer information.
Check consistency of imported or entered data: name, address, postal code, city, VAT number, email and phone.
Save the information by clicking Save.
Frequent issue: if SIRET lookup returns nothing, you can always enter the information manually.
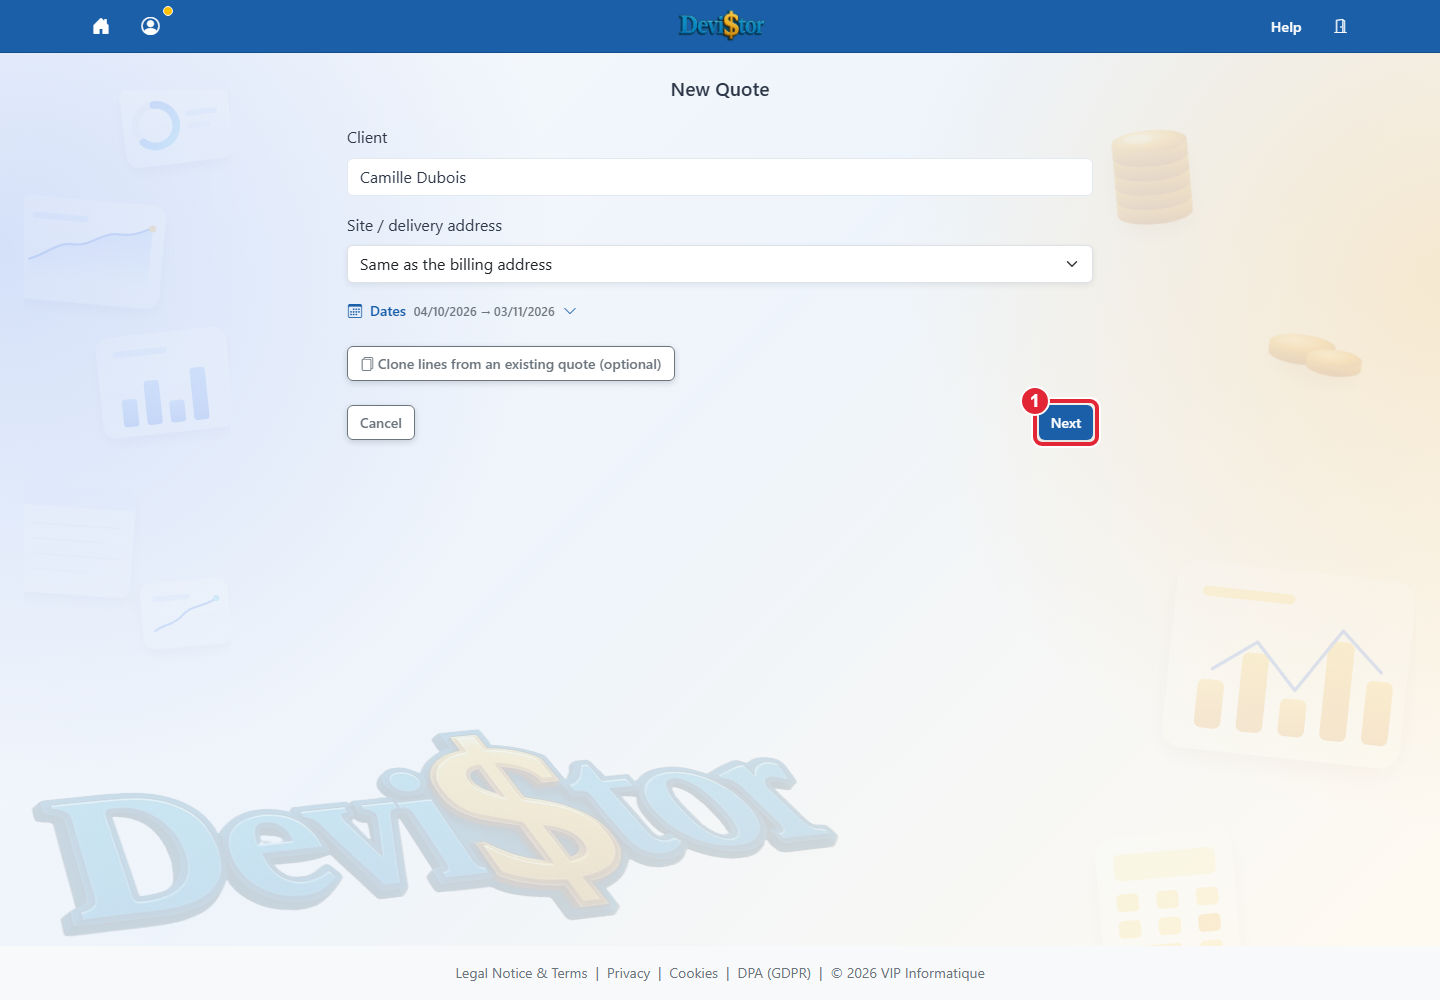
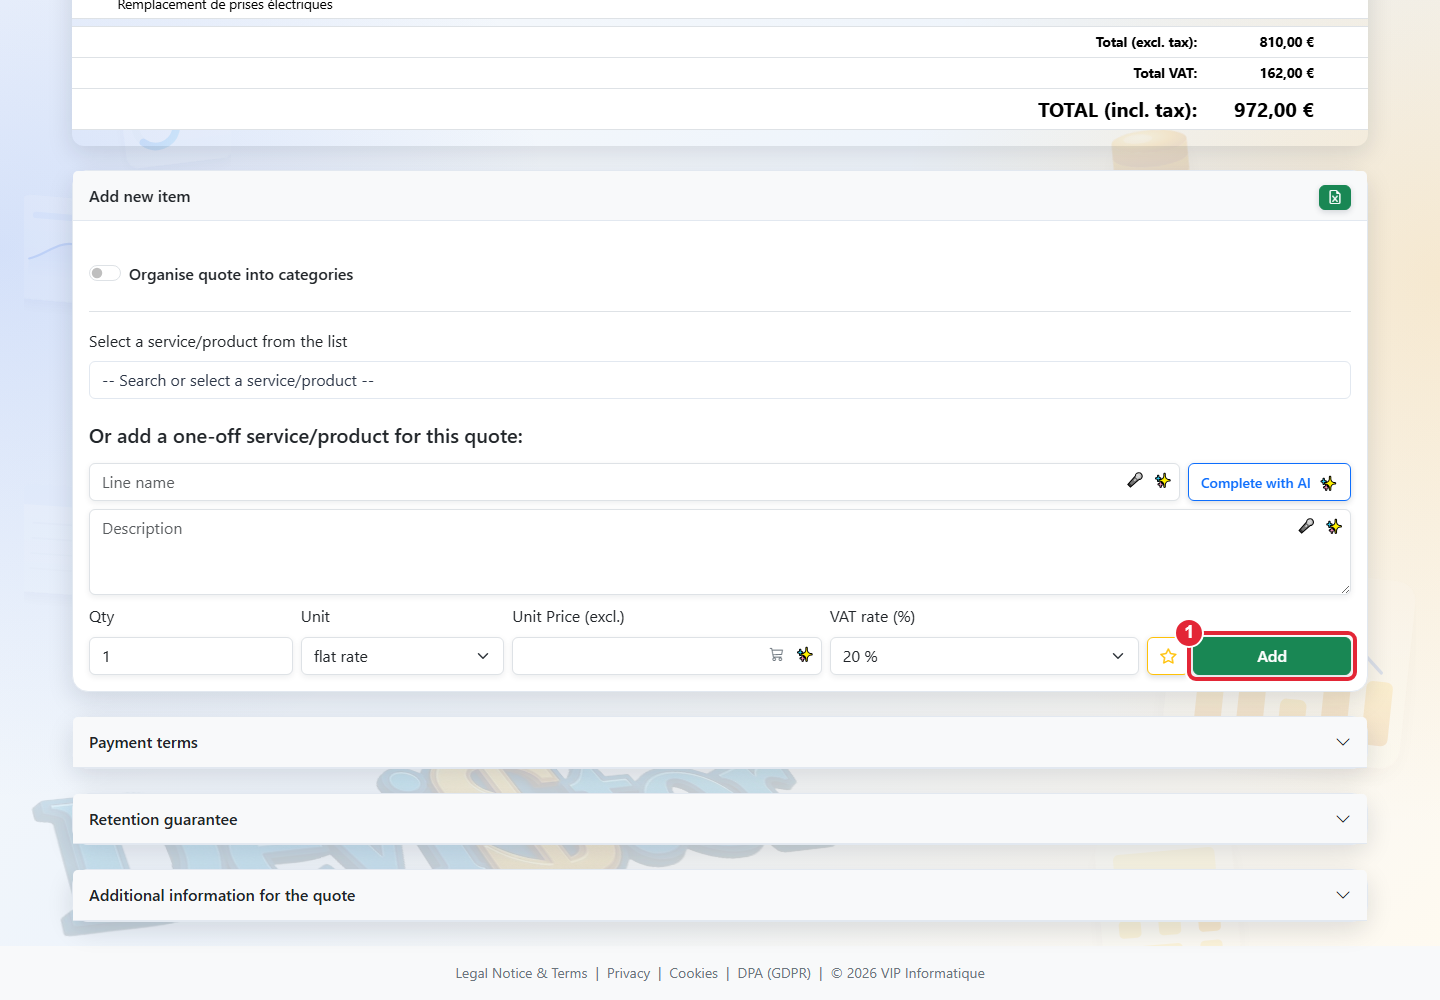
Application screenshot — demonstration data. 1 — Next Click to enlarge.Application screenshot — demonstration data. 1 — Add Click to enlarge.
Goal: create a clear quote, calculated automatically and ready to send.
Quote5 minutes
Click New quote from the dashboard or directly after adding a customer.
Select customer, issue date and quote validity date.
Add services using one of the two methods: choose a predefined service/product from your list, or create a one-off item for this quote.
To group lines into lots (structural work, plumbing, finishes…), switch on Organise quote into categories at the top of Add new item: each line can then be filed under a category, and the PDF shows them with a subtotal.
To reuse an existing item, open Add new item, then use Select a service/product from the list.
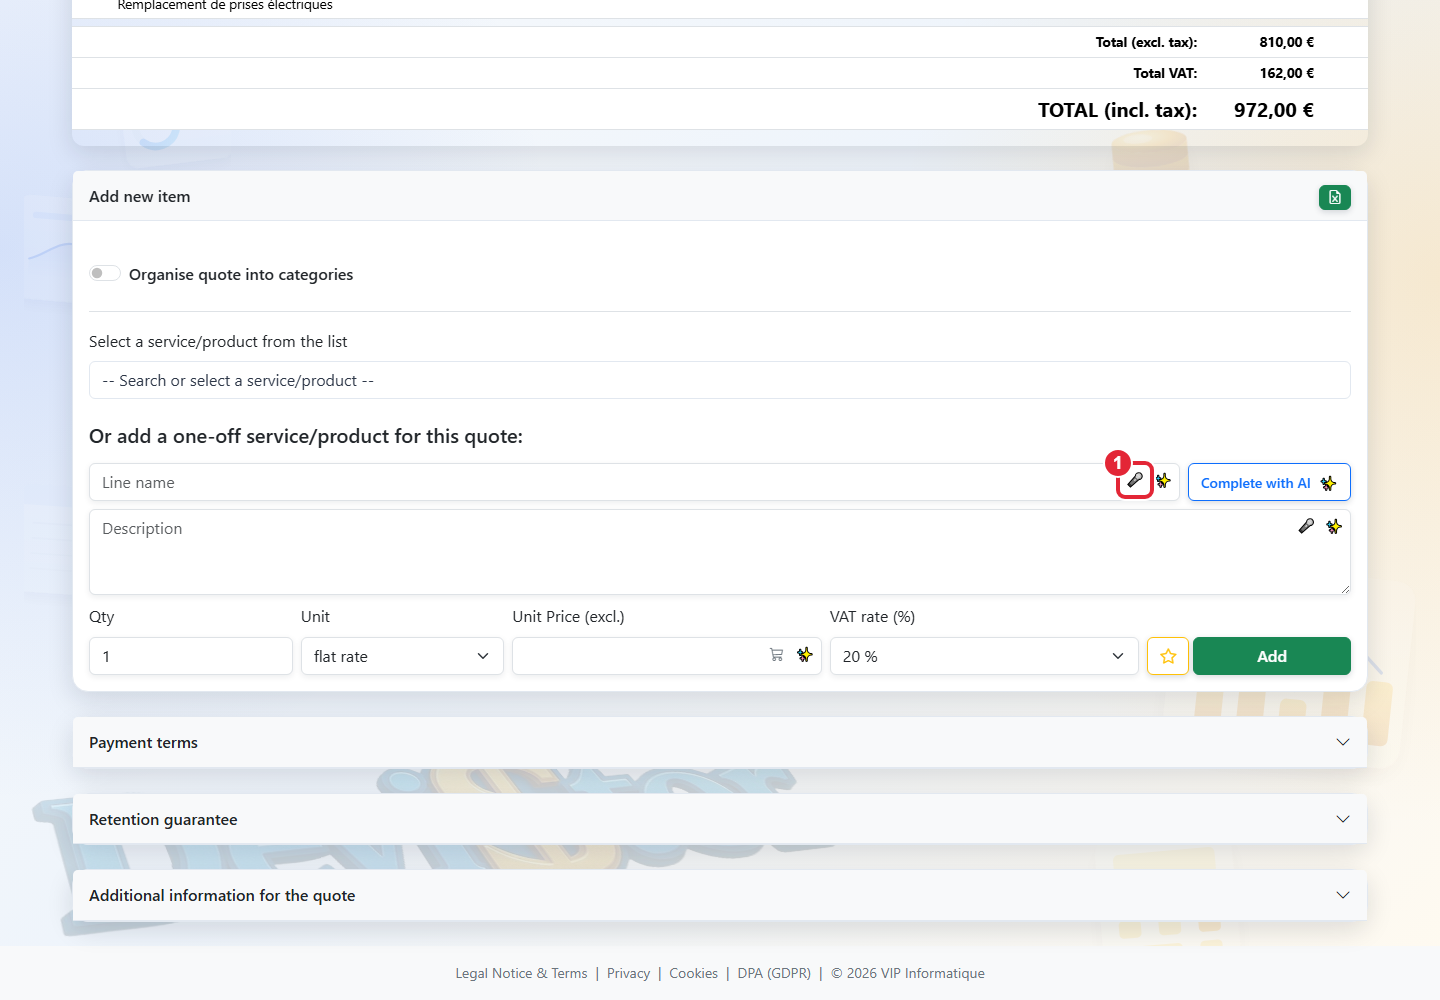
To enter a new service, use Or add a one-off service/product for this quote, then complete name, description, quantity, unit, net price and VAT rate.
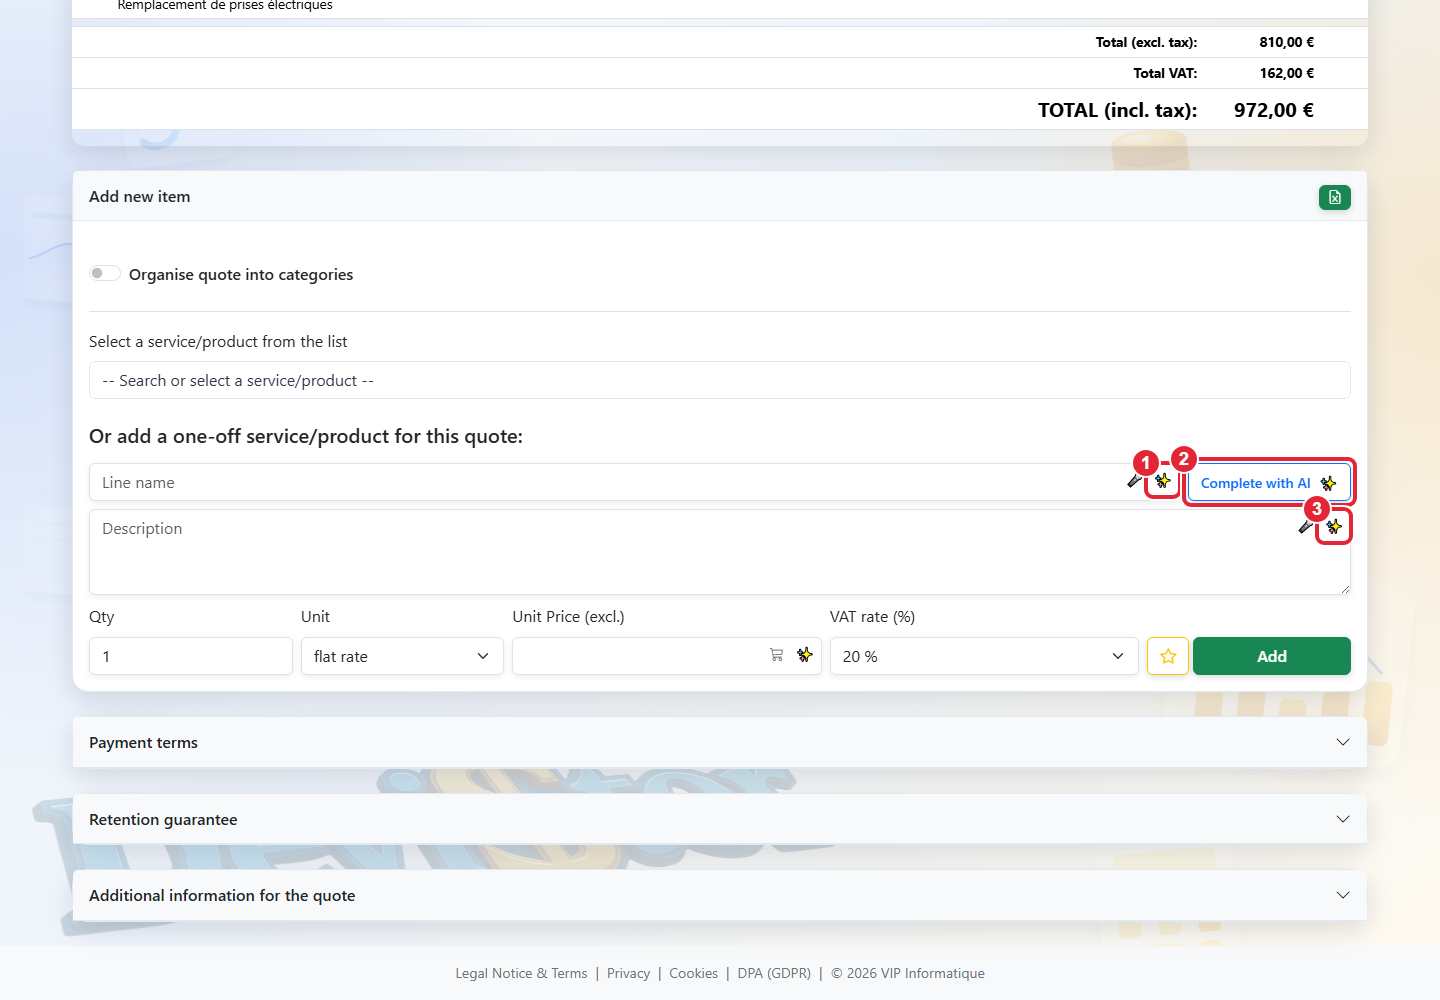
If you use the AI assistant, start with a clear title, then use AI icons to rewrite the title, generate a description or complete the line with a price suggestion.
To avoid typing, click the mic icon next to the Title or Description fields and dictate your text: voice recognition runs in the interface language (French, English, Polish, Portuguese or Ukrainian).
If this service should be reused later, tick Save this item to my global service/product list for future use.
Check net totals, VAT and total including VAT before previewing the PDF.
Check Payment terms. They are prefilled according to your activity profile or preferences, but remain adjustable for each quote.
If a BTP retention guarantee is required, open Retention guarantee (BTP), tick Apply retention guarantee, then choose 1 to 5% and a duration of 12 or 13 months.
Use Additional information for the quote if you need to add a specific note to this quote.
Click PDF preview to view the final quote. As long as it has not been sent to the customer, you can still freely modify it.
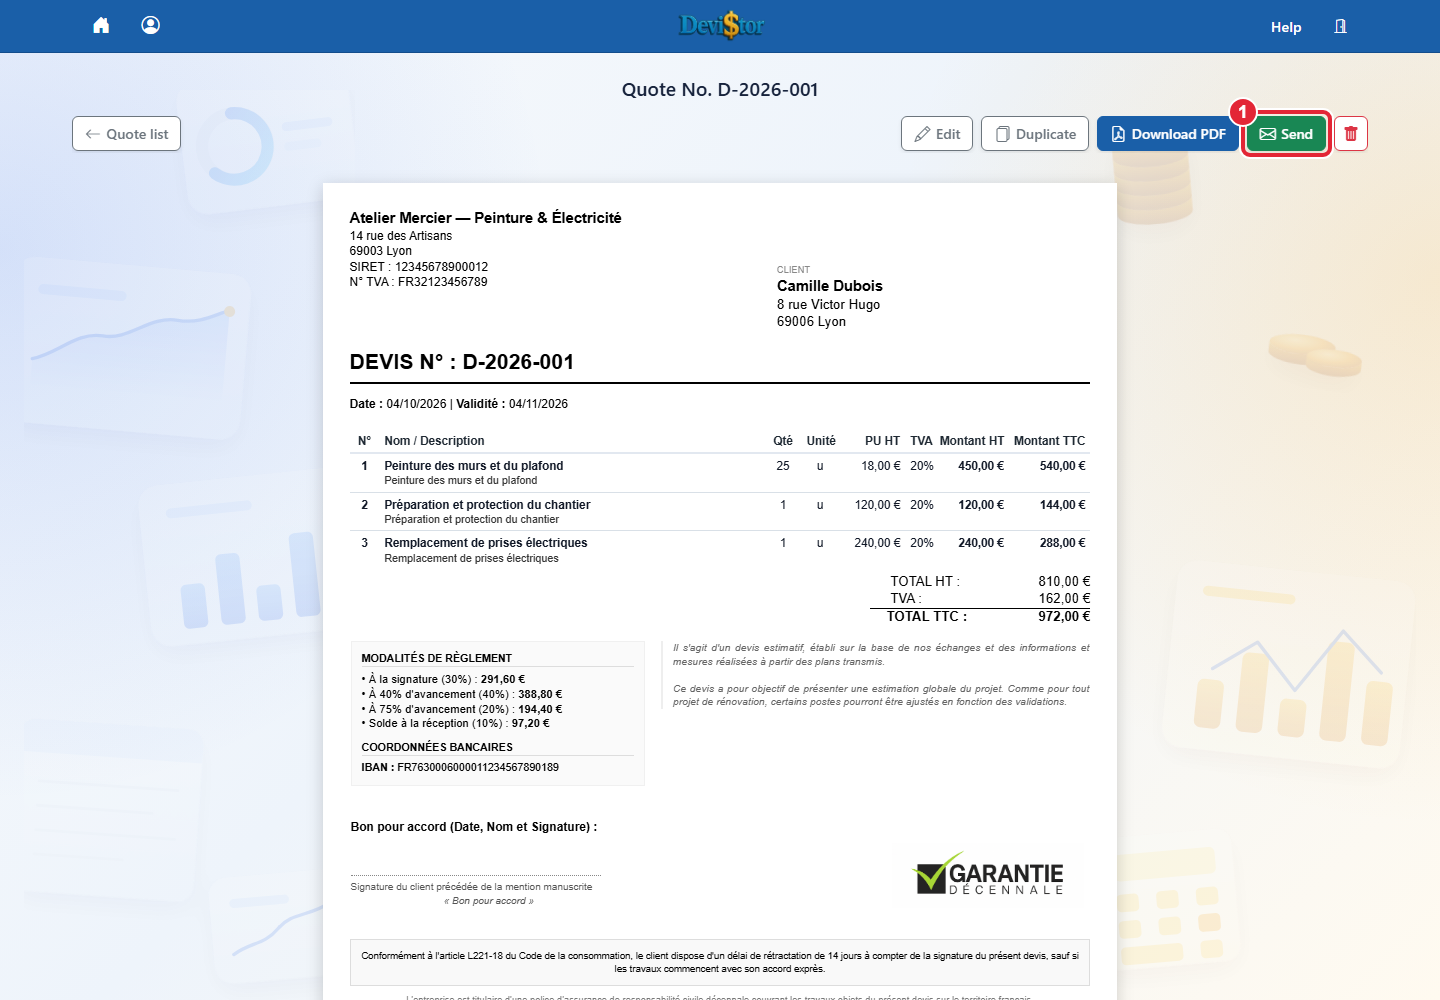
Send the quote by email with the Send button in the preview, or directly from the quote list.
Tip: save recurring services in Services / Products to reuse them in one click.
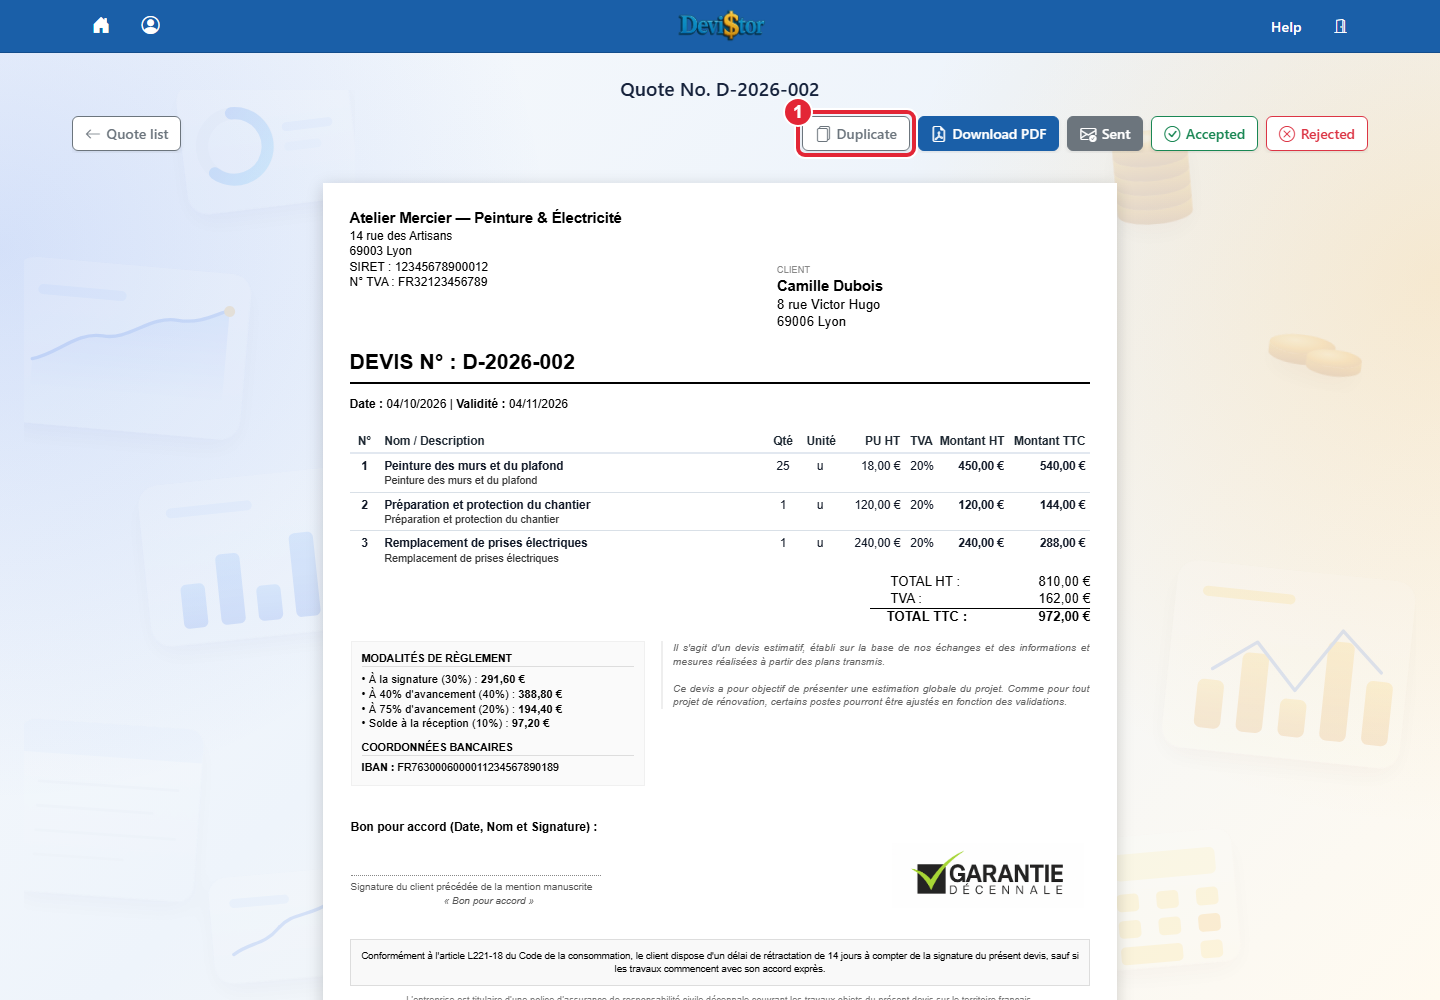
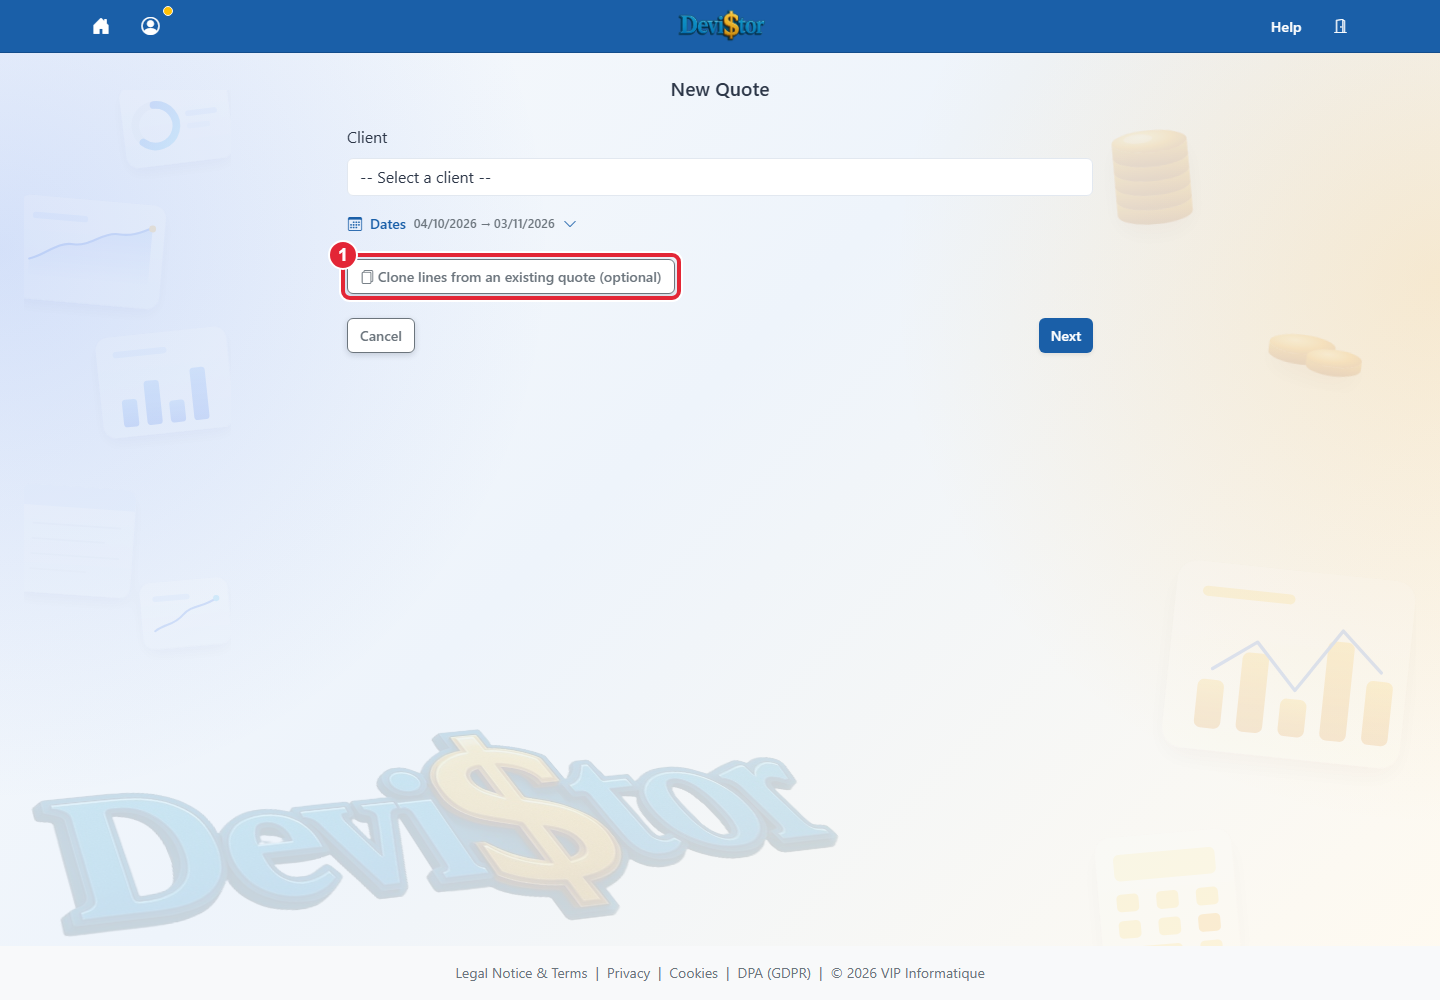
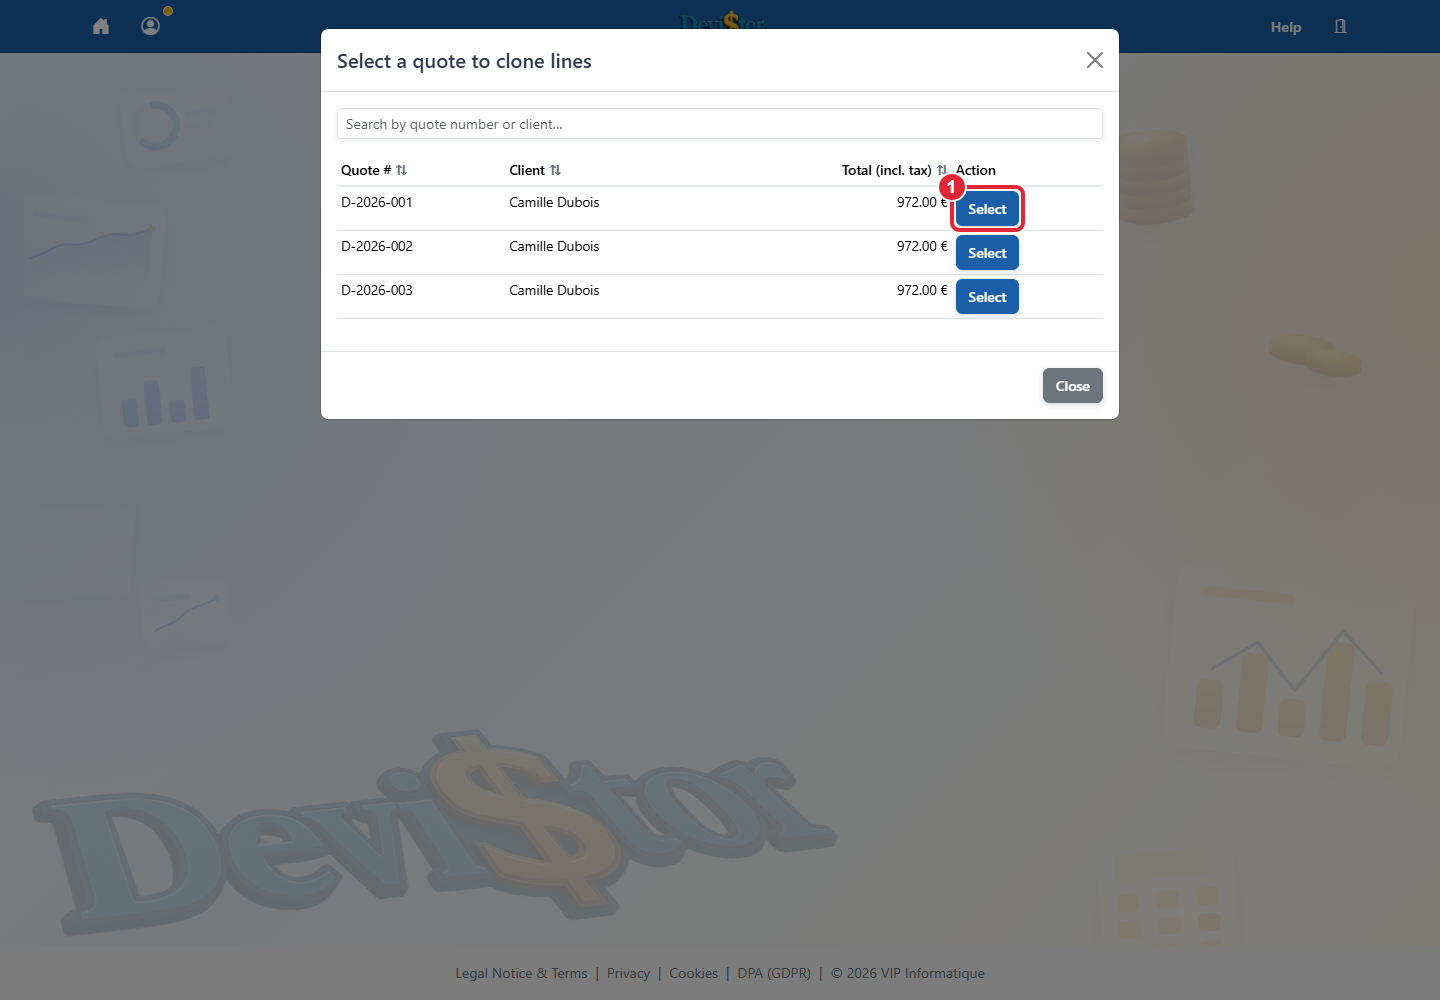
A sent quote is locked. Open its preview and use Duplicate to correct it; for another customer, create a new quote and copy the lines.
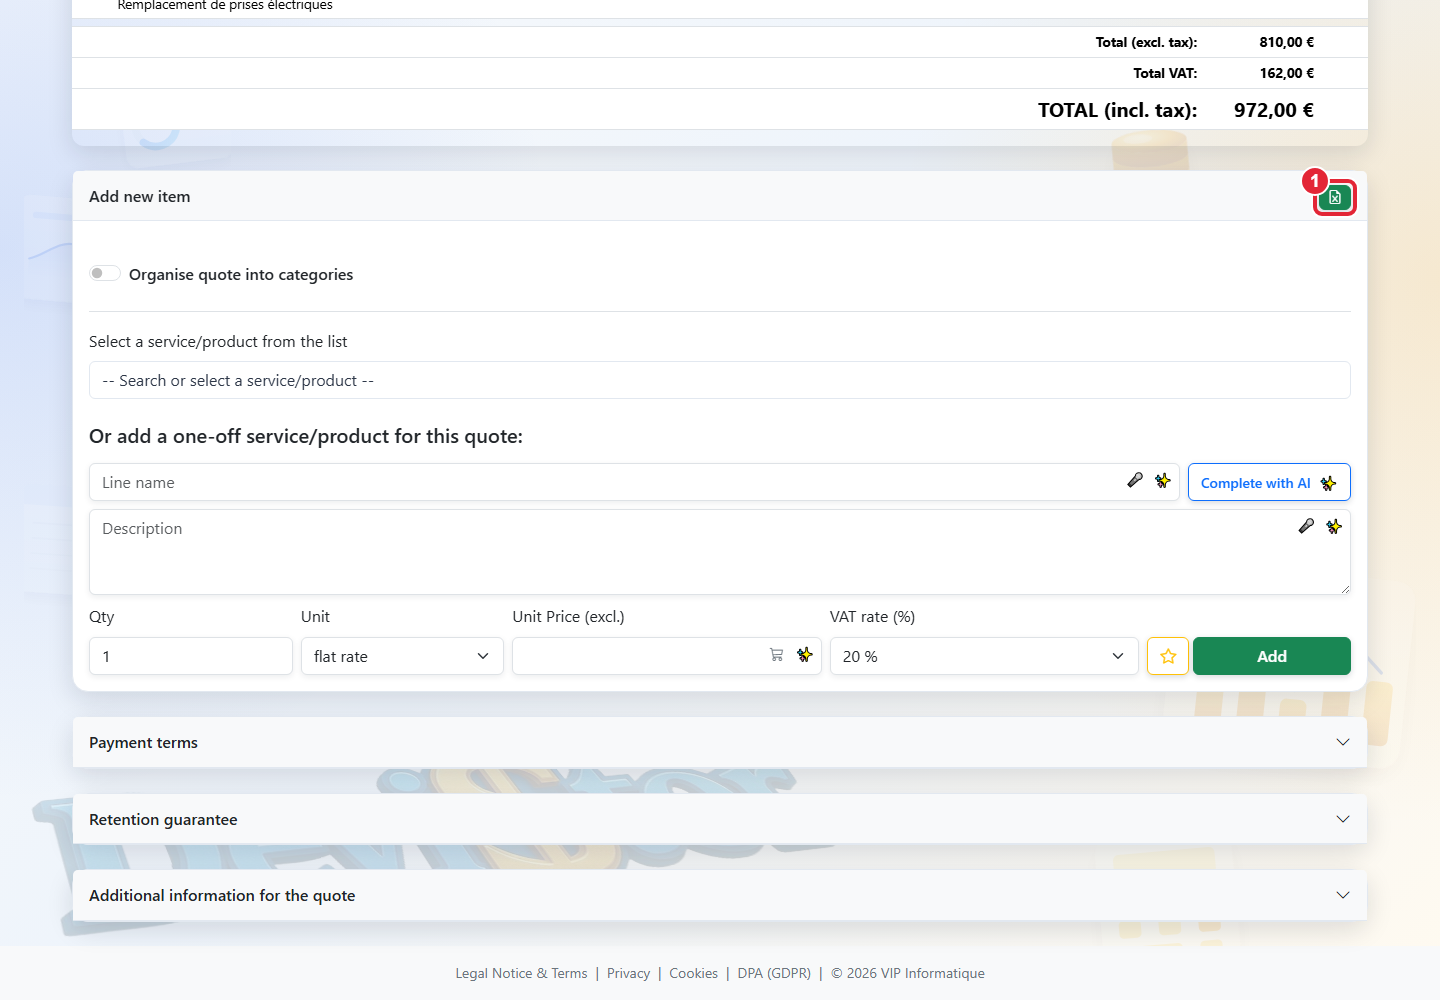
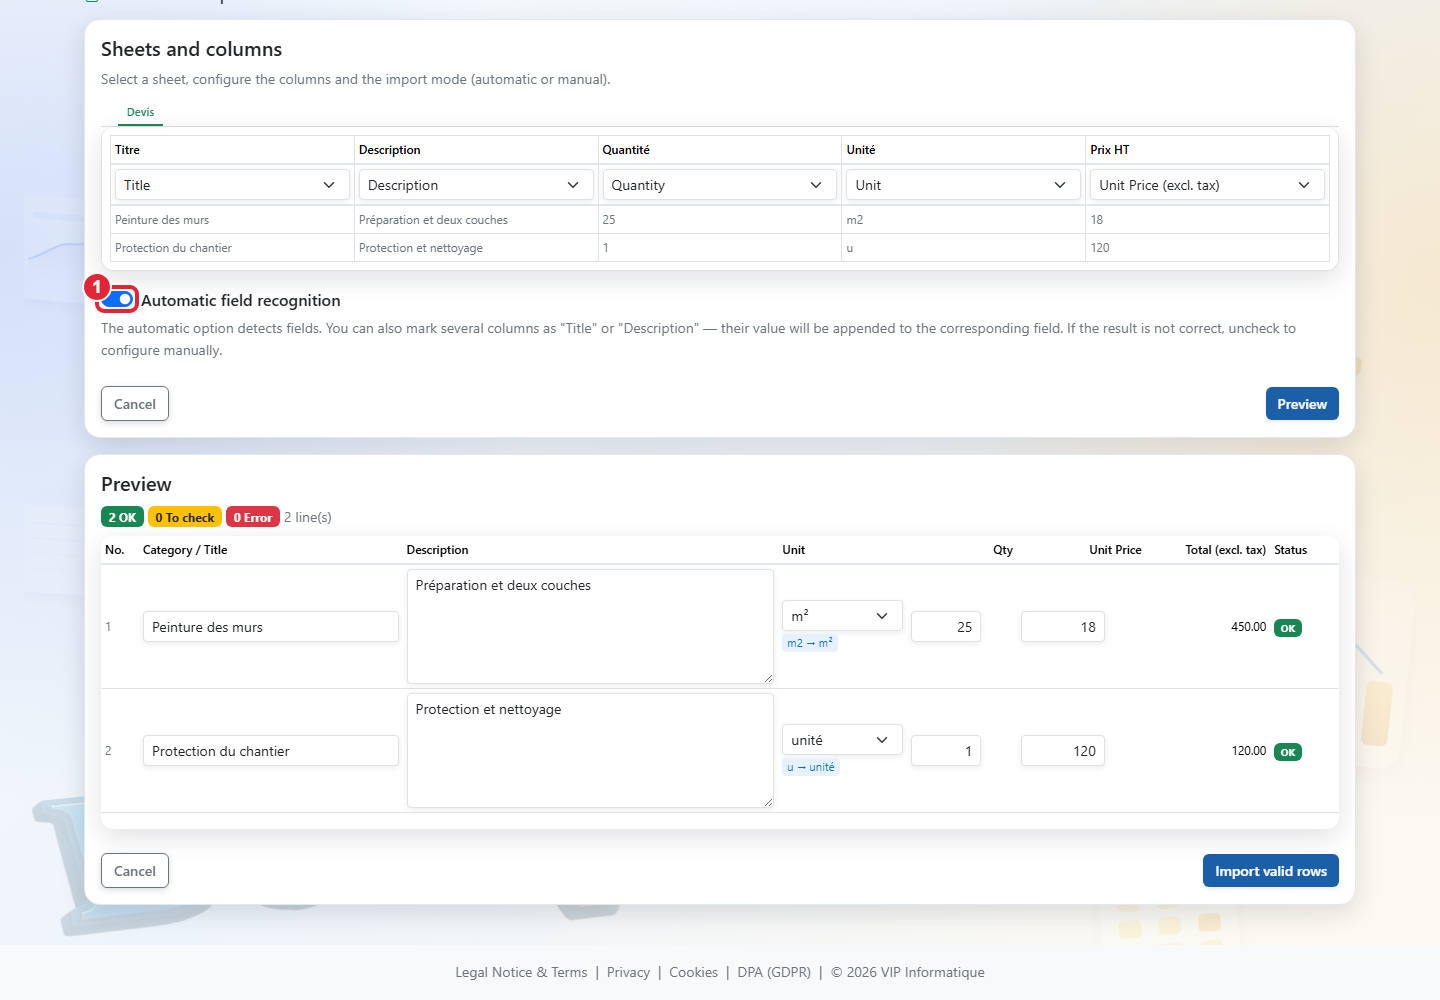
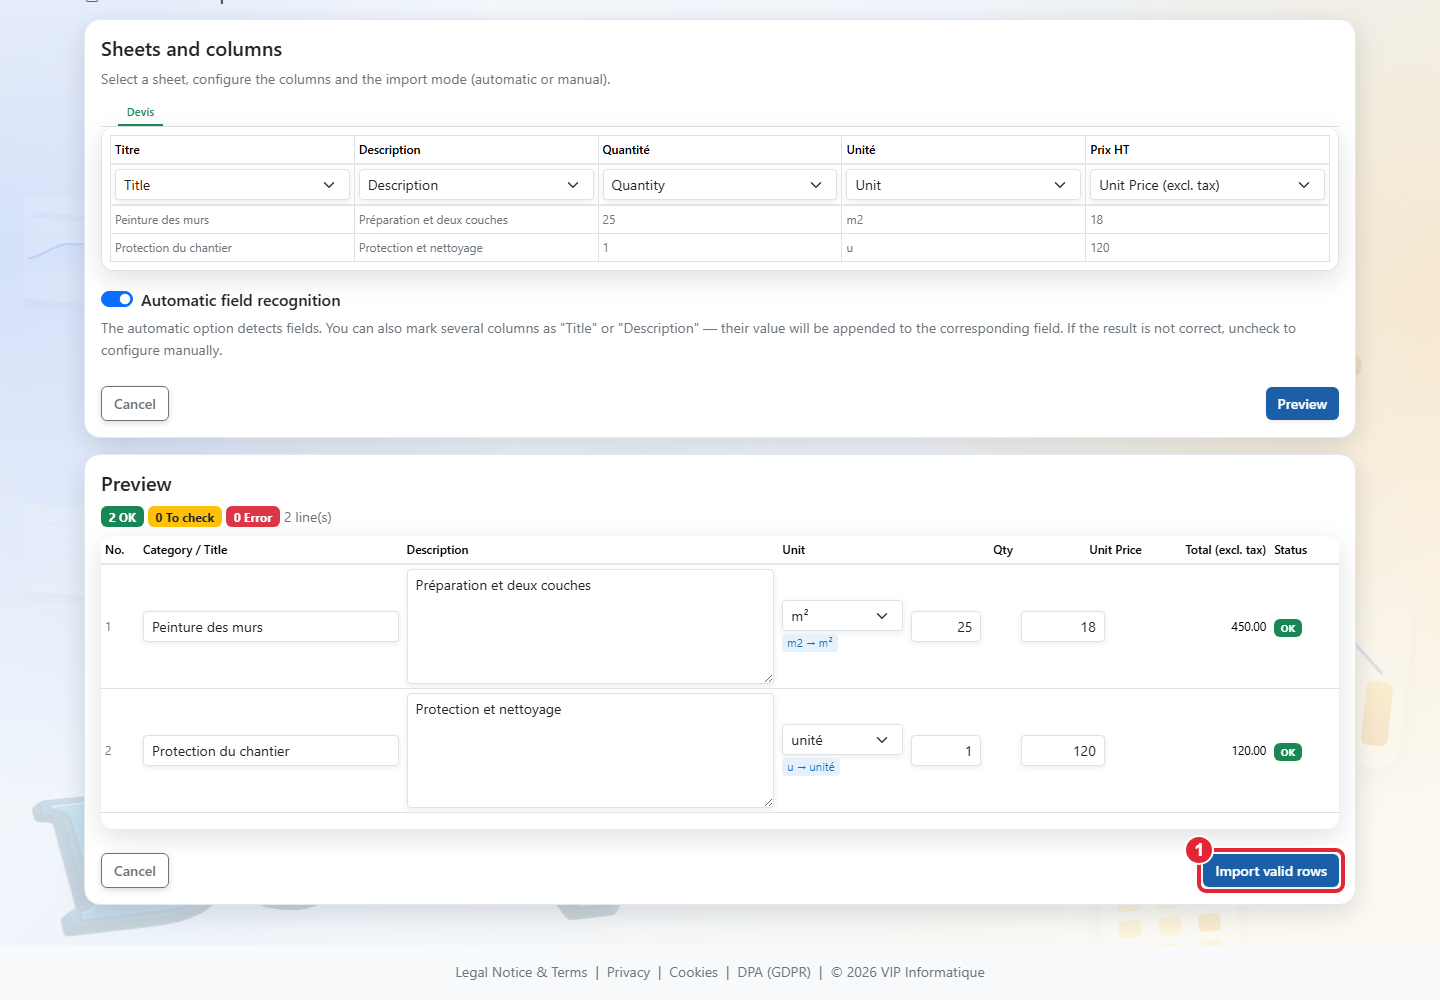
Application screenshot — demonstration data. 1 — Import from Excel Click to enlarge.Application screenshot — demonstration data. 1 — Automatic field recognition. Click to enlarge.Application screenshot — demonstration data. 1 — Import valid rows Click to enlarge.
Goal: reuse a quote already prepared in Excel without retyping everything by hand.
QuoteTime saver
On the quote creation or editing screen, find the small Excel icon (green) next to the Add new item title.
Click this icon, then select your Excel file (.xlsx).
Your file is never stored on our servers: it is only read for the duration of the import, then analyzed automatically. You are taken directly to the next step.
DeviStor tries to automatically recognize your columns (title, price, quantity…). If your file has several tabs, choose which one to import at the top of the screen.
If everything is correctly recognized, go straight to the preview: it updates itself, nothing else to click.
If a column is not recognized (e.g. the Price column), uncheck Automatic field recognition and indicate yourself, for each column, what it contains (Title, Description, Unit, Quantity, Price, etc.).
Also choose how to organize your categories: let DeviStor detect them, use the tab name, put everything in one category, or use no categories.
Even in automatic mode, you can keep an extra column from your file (e.g. Location): simply choose Title or Description above that column, its content will be appended to the matching field.
Before the final import, check the preview of each line, you can still correct everything directly in the table (title, description, unit, quantity, price).
Each line gets a status: OK (green, ready to import), To check (yellow, a remark to read but the line can still be imported) or Error (red, a required field is missing, the line will not be imported until it is fixed).
When a suggestion is available, a magic wand icon appears on the right of the line , click it to apply it, or use Apply suggestions at the top of the table to fix everything at once.
Once happy with the preview, click Import valid lines. Only lines without errors are added to the quote.
What DeviStor detects for you: missing title, missing or invalid quantity, a unit that is written but not recognized (you need to fix it yourself), a missing unit (automatically deduced from the title or description), a price of 0 € flagged as "to be priced", and a "ens" or "forfait" unit that doesn't match the line's text.
Good to know: only lines with an OK or To check status are imported. A line with an Error status must be fixed in the preview before importing, otherwise it is skipped.
5. Use the AI assistant in a quote
Application screenshot — demonstration data. 1 — Correct / translate the title · 2 — Complete with AI · 3 — Generate / correct the description Click to enlarge.
DeviStor
Type or dictate a precise title in a quote line.
Correction and translation of entered text into French are available from Essentiel. Always review the result.
With Pro, generate a description from the title and use Complete with AI for missing fields.
Suggested prices use comparable lines from your history, not a public price list. Without relevant history, no price is imposed.
Before sending, check meaning, unit, quantity, net price and VAT. The assistant does not legally validate your service.
Goal: send a quote with a secure link so the customer can view, accept, refuse or comment.
Customer portalConversion
Open the quote you want to send, then click Send from the preview screen.
You can also send the quote directly from the quote list.
The customer receives an email with the PDF attached and a secure link to the online acceptance page.
From this page, the customer can view the quote, accept it, refuse it or add a comment.
Sending: in the quote list, the green envelope icon indicates a first send. The grey envelope icon lets you resend an already sent quote.
Status: once sent, the quote moves to Sent and is no longer directly editable. Only Draft quotes can be freely modified.
A sent quote is locked. Open its preview and use Duplicate to correct it; for another customer, create a new quote and copy the lines.
Acceptance: when a customer accepts or refuses the quote from the secure link, its status is automatically updated in DeviStor. An accepted quote can then be used to create an invoice.
Tracking: click the small icon next to a sent quote number to view its history: send date and time, customer view, comments, automatic reminders already sent and the possibility to disable reminders for this document.
9. Turn a quote into an invoice
Application screenshot — demonstration data. 1 — Invoice Click to enlarge.Application screenshot — demonstration data. 1 — Create an invoice Click to enlarge.
Goal: create a compliant invoice from an accepted quote.
InvoiceFactur-X
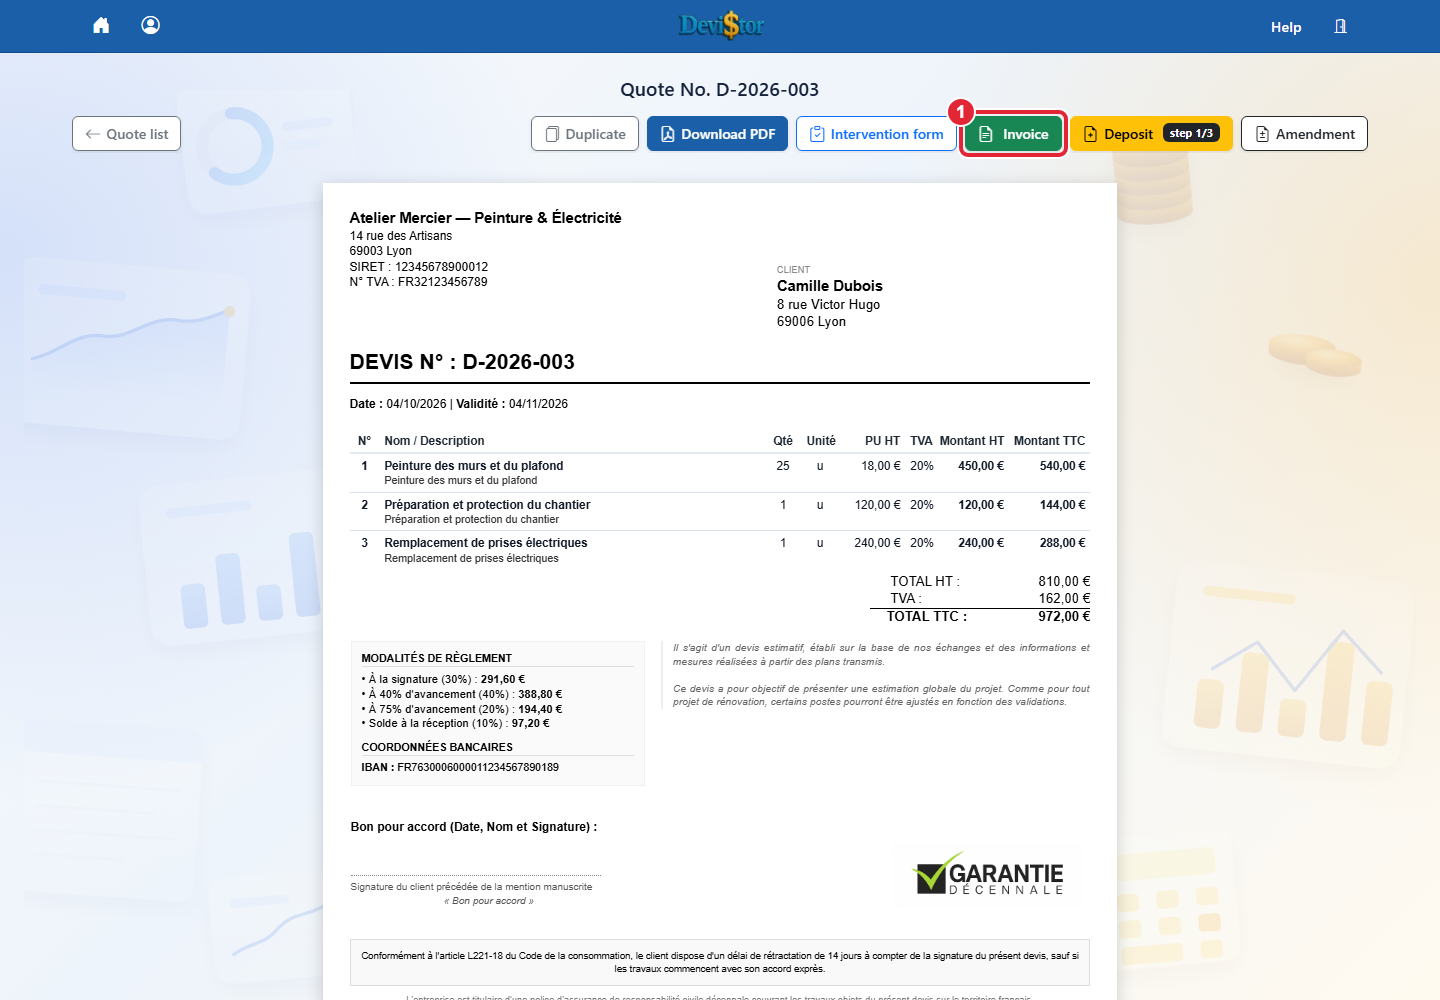
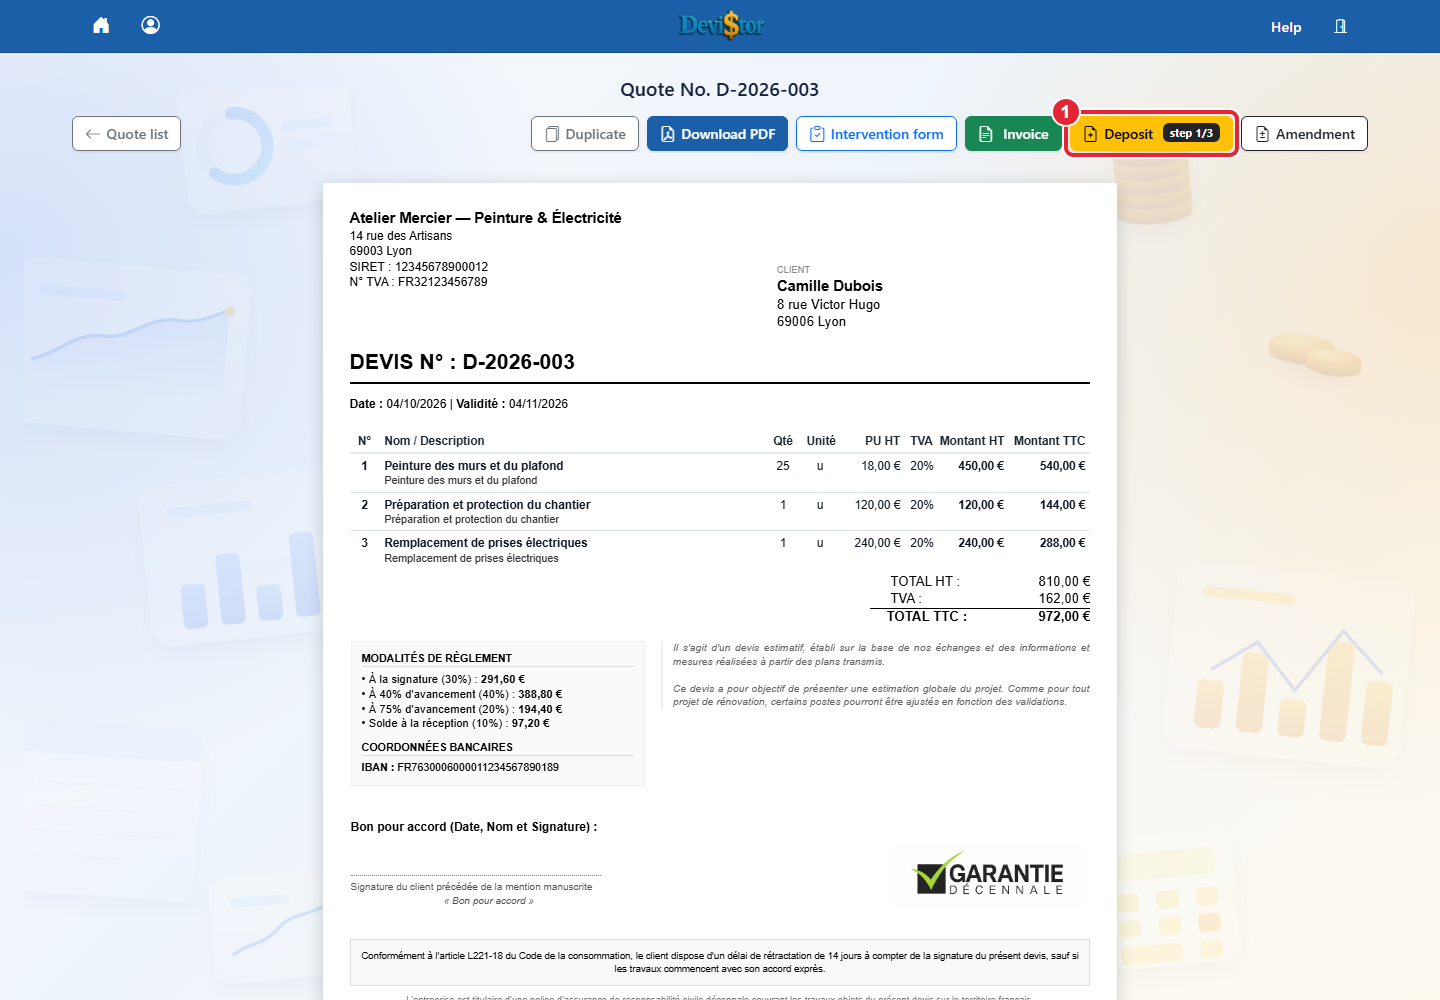
From the accepted quote, click Invoice to invoice 100% of the quote directly, or Deposit if payment terms include several stages.
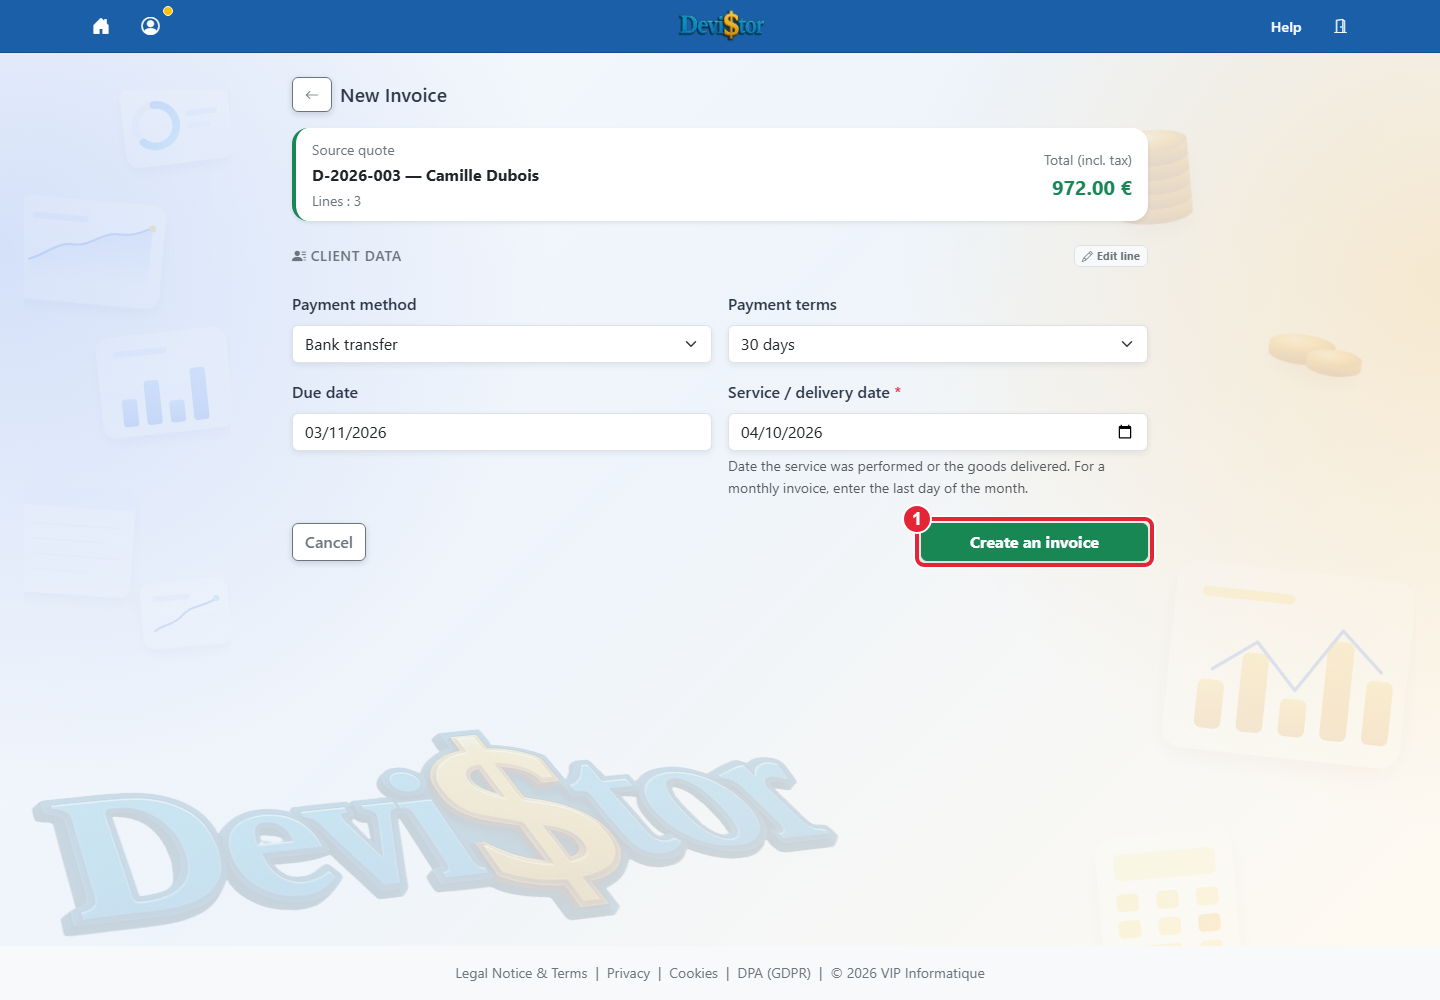
Select the payment terms and payment method that must appear on the invoice.
Check customer data reused from the accepted quote and correct it only if necessary.
Go to the next step to check invoice lines, correct or add a position if needed, then complete additional information.
Confirm the operation category and service date in the draft before finalising. For Pennylane tracking, see the synchronisation and sending guide.
Download or send the Factur-X PDF to the customer.
Warning: modifying customer data at this step is only for correcting a small error found after quote acceptance. For a major change, create a new version of the quote instead.
Important: finalize an invoice only when its number, date and amounts are correct.
E-invoicing compliance, Factur-X: each PDF generated by DeviStor is PDF/A-3b with an embedded structured XML file compliant with European standard EN 16931. This embedded XML contains all invoice data (number, dates, net/VAT amounts, SIRET, IBAN…) in a format readable by accounting software and e-invoicing platforms. This anticipates the French e-invoicing obligation progressively applicable from 2026.
Finalise an invoice and use the offered Pennylane synchronisation. For a French business customer, the integration then starts electronic sending; check receipt in the list. Icons indicate pending, received or refused; hover for the reason. Foreign customers and individuals use the standard PDF import. Renew authorisation if access is missing. Connection alone does not confirm document receipt.
10. Manage BTP deposits, situation invoices and balances
Application screenshot — demonstration data. 1 — Deposit
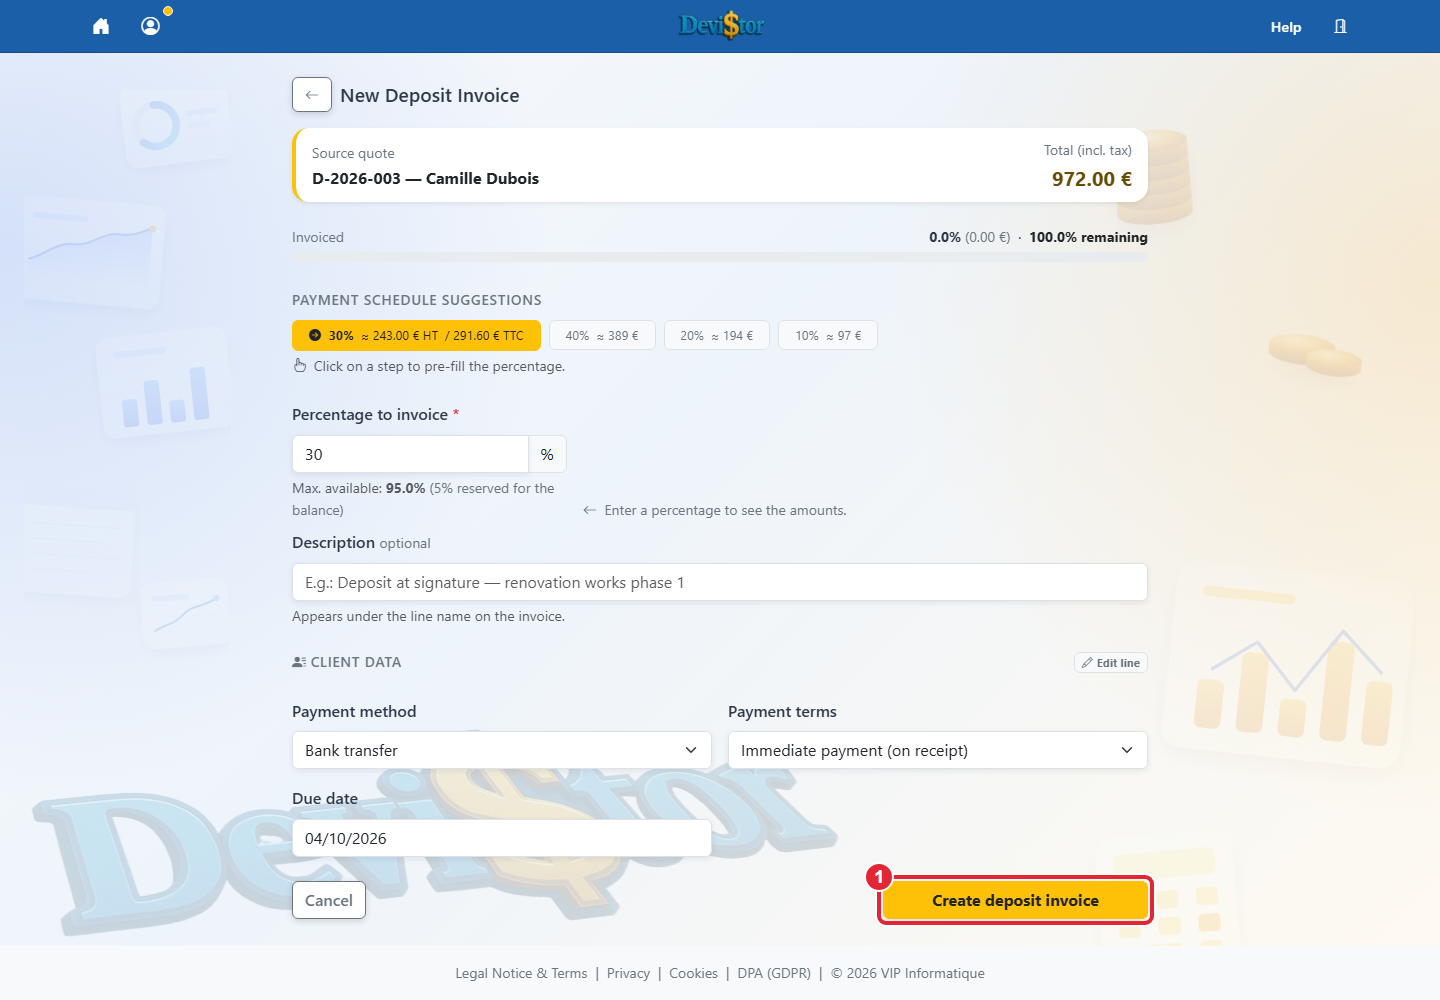
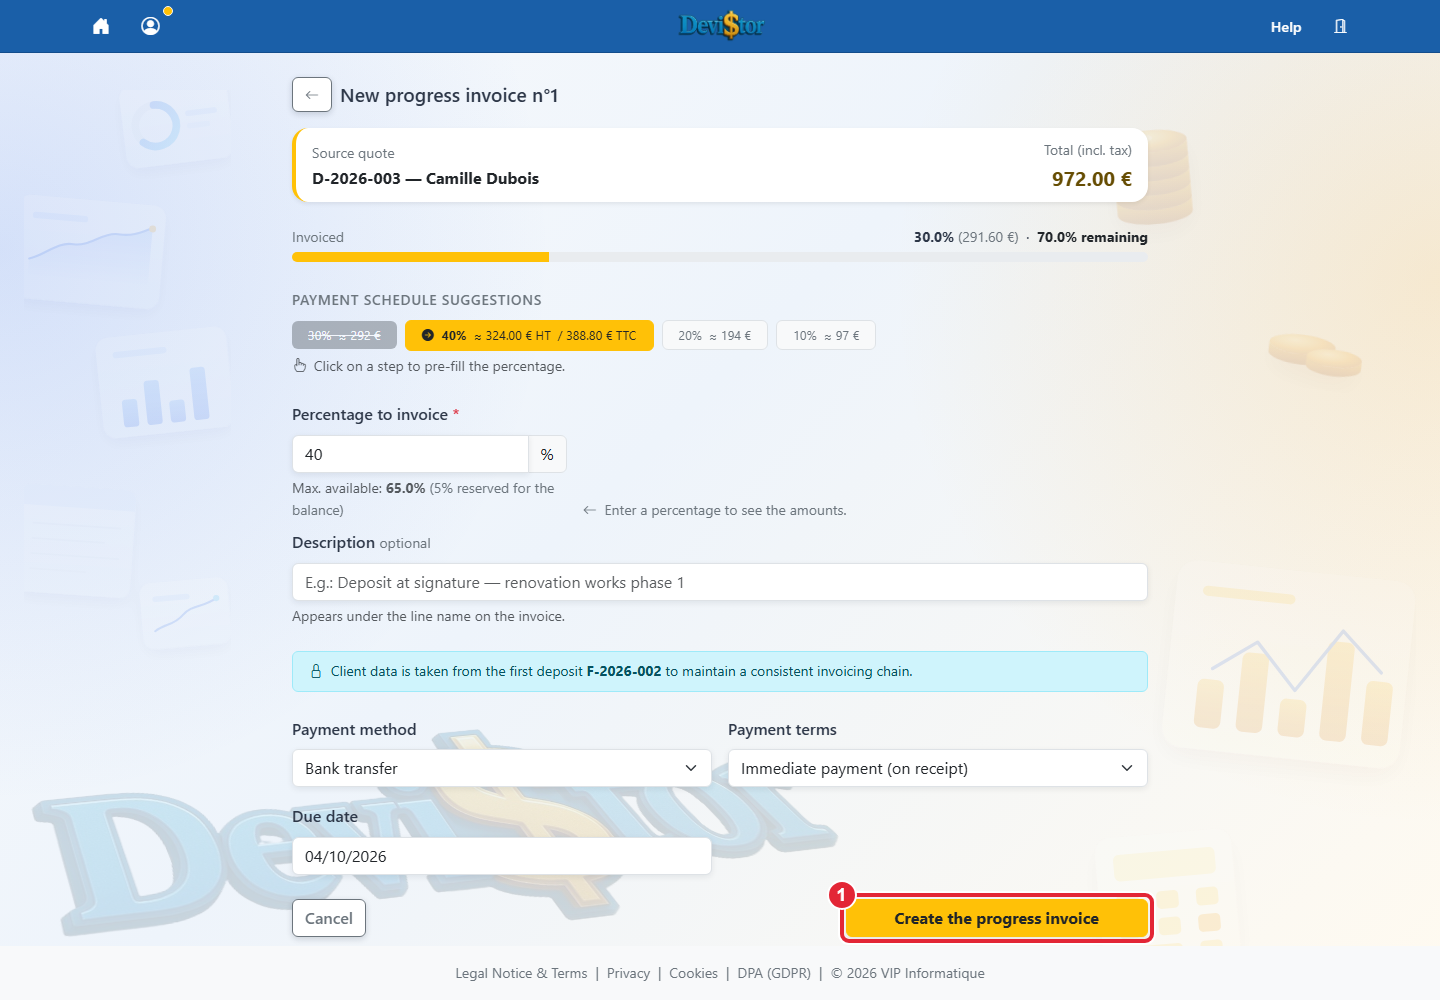
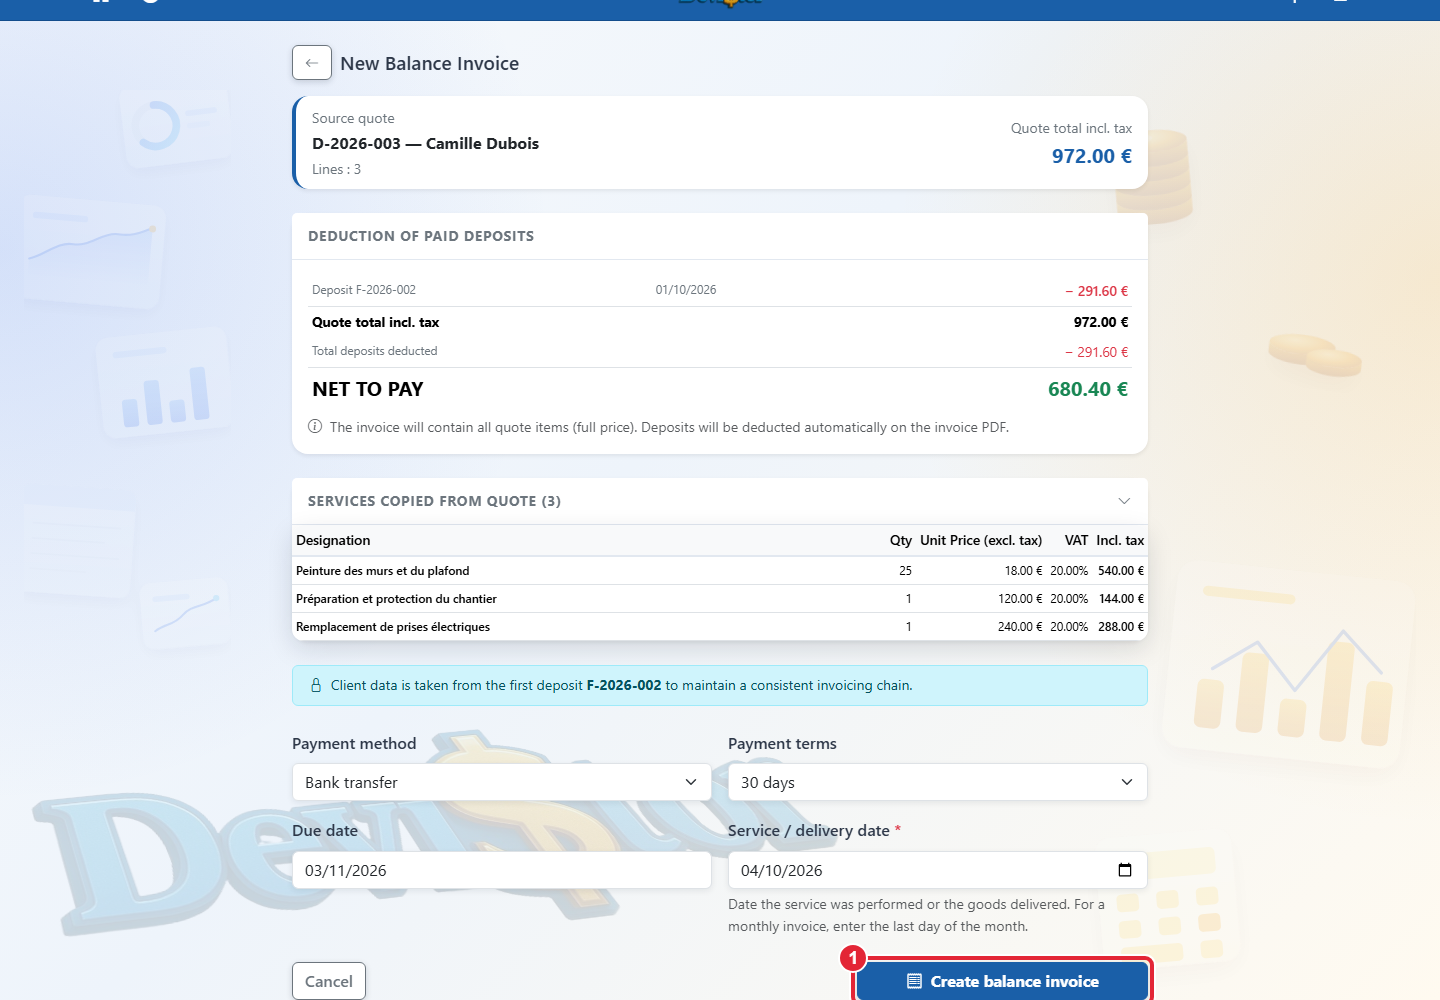
step 1/3 Click to enlarge.Application screenshot — demonstration data. 1 — Create deposit invoice Click to enlarge.Application screenshot — demonstration data. 1 — Create the progress invoice. Click to enlarge.Application screenshot — demonstration data. 1 — Create balance invoice. Click to enlarge.
Goal: invoice a project by stages without exceeding the quote total.
BTPProject
Create your quote with a suitable activity profile or payment model: 30/40/20/10, 50/50 or 100% on order.
For the first invoice, choose deposit and enter the planned percentage.
As the project progresses, create the next stages: for BTP profiles, they are automatically issued as situation invoices no. 1, 2…, the standard French practice for construction contracts. The Situation button replaces the Deposit button as soon as a first deposit is finalized.
At the end, create the balance invoice: it takes the project total and deducts all deposits and situations already invoiced.
Activate retention guarantee if your BTP project requires it.
Tip: DeviStor tracks the percentage already committed to avoid invoicing more than the quote.
Note: the balance invoice can only be issued if at least one deposit invoice has already been created for this quote.
After finalising the first deposit, reopen the quote and use Progress invoice for the next stage. Check the percentage already invoiced and the current stage. To finish, open Balance and check deductions for deposits and progress invoices, accepted amendments and any retention before creating and finalising the draft. These workflows require Pro.
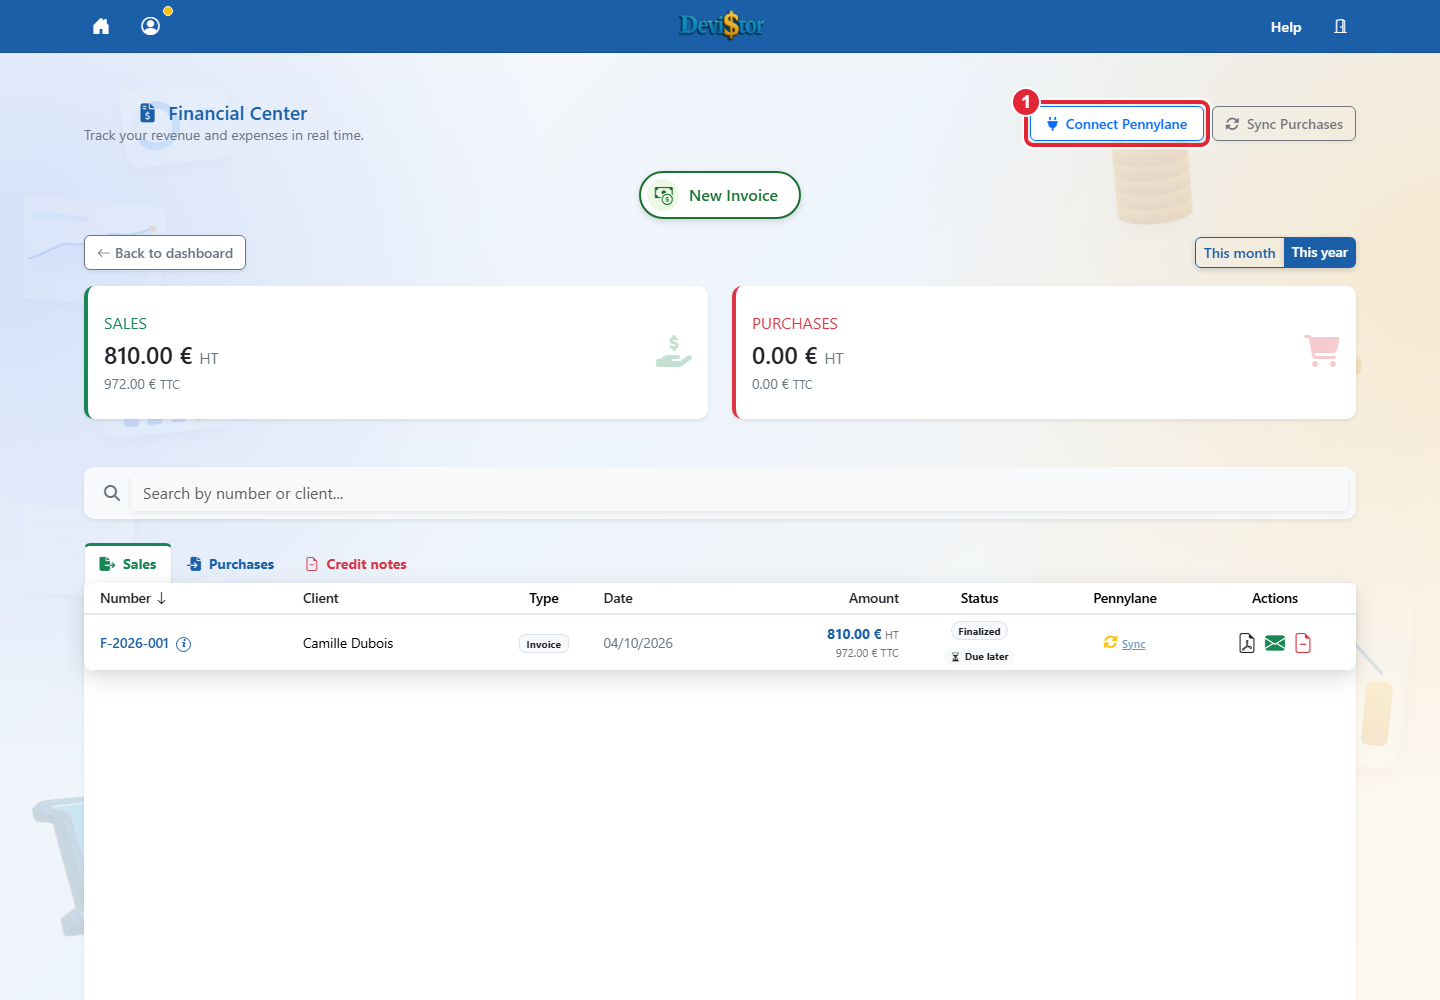
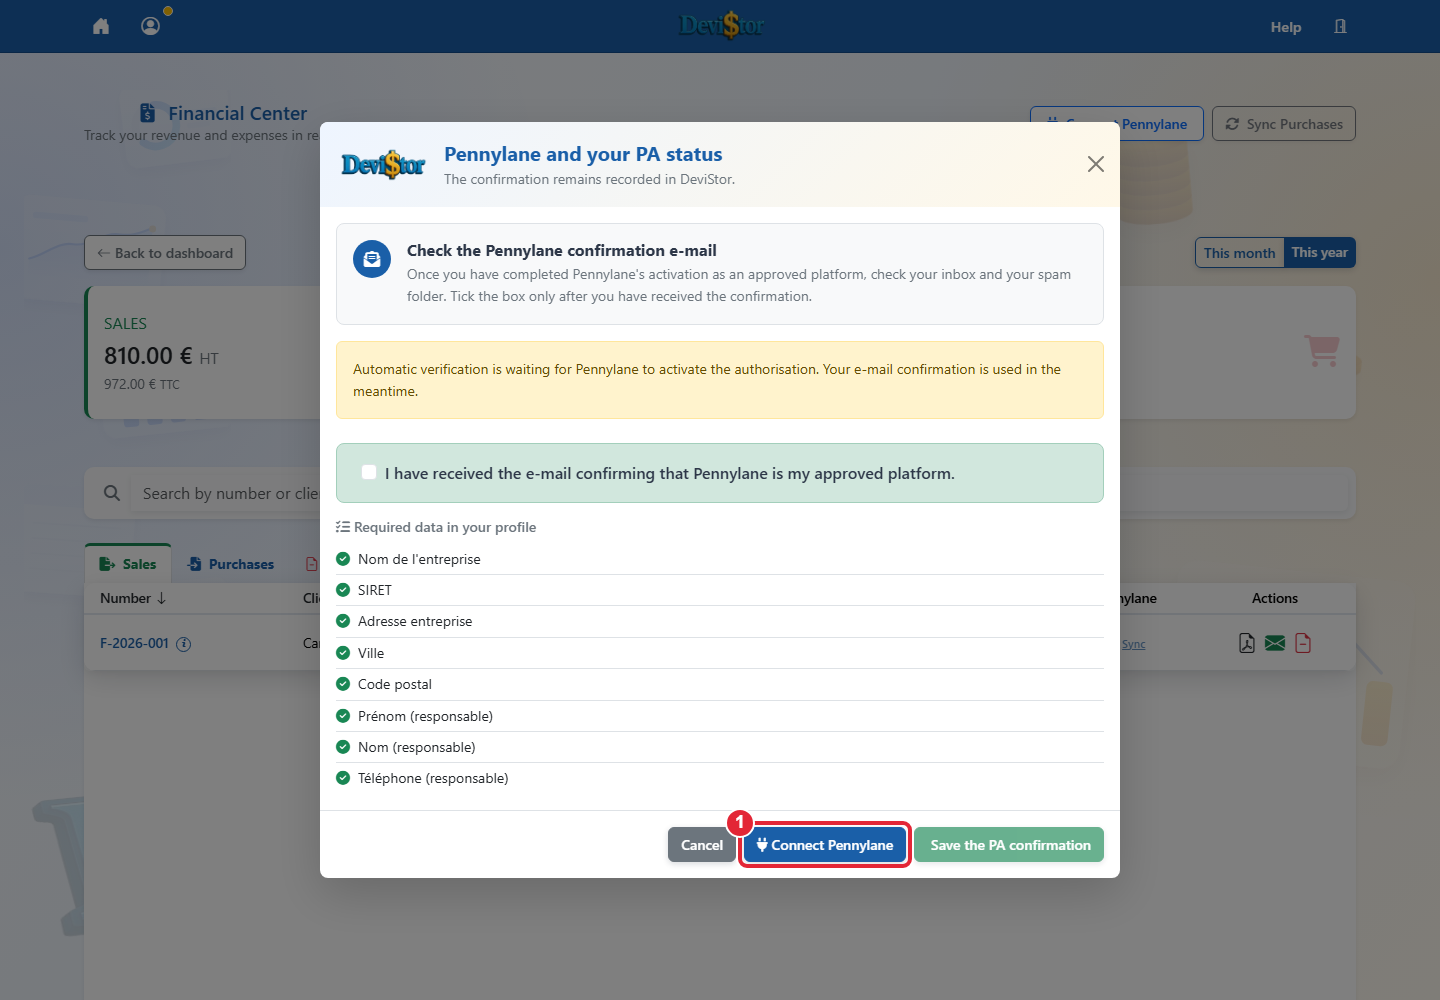
Complete your company profile, then open the Pennylane connection from DeviStor.
Use your existing account if you have one. Otherwise follow the account creation flow offered. Keep the information DeviStor displays for this flow.
Authorise DeviStor in Pennylane, then return to DeviStor and check the connection status.
Finalise an invoice and check its synchronisation status. If a send or retry action is available, use it and check the result.
An active connection alone does not prove regulatory receipt of an invoice. Review available statuses and confirmations; if an error occurs, check the profile, customer and displayed message before retrying.
Goal: correct or cancel an invoice while keeping a compliant trace.
Credit noteCorrection
Open the related invoice.
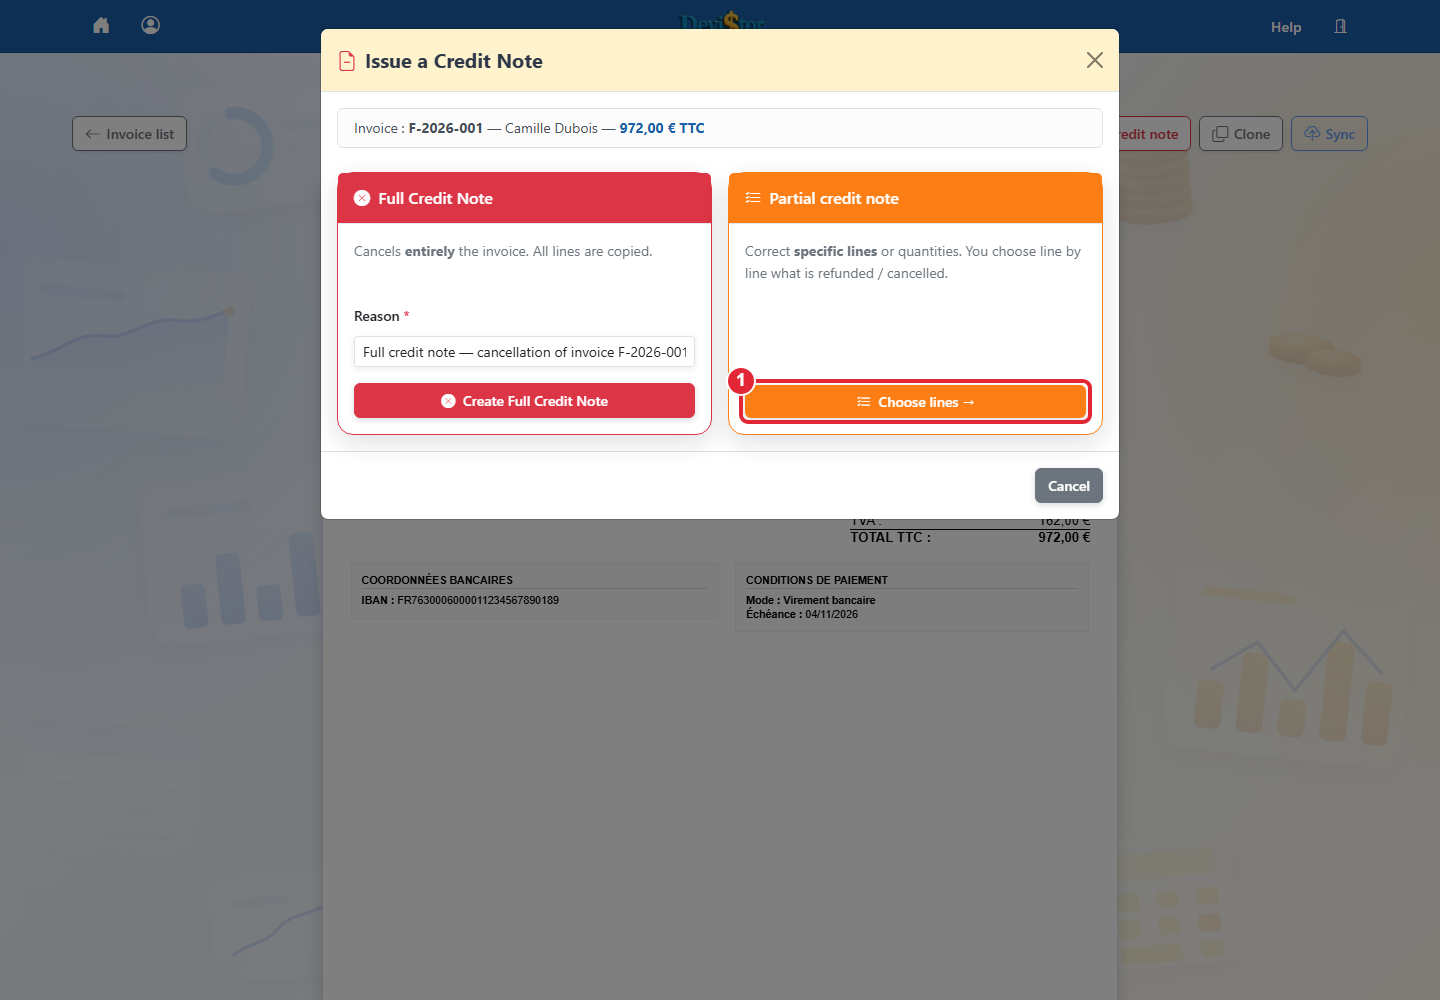
Choose Create a credit note.
Select a full or partial credit note depending on the situation.
Enter the correction reason.
Check the available amount before finalizing the credit note.
Good reflex: do not delete a finalized invoice. Use a credit note to keep a clean chronology.
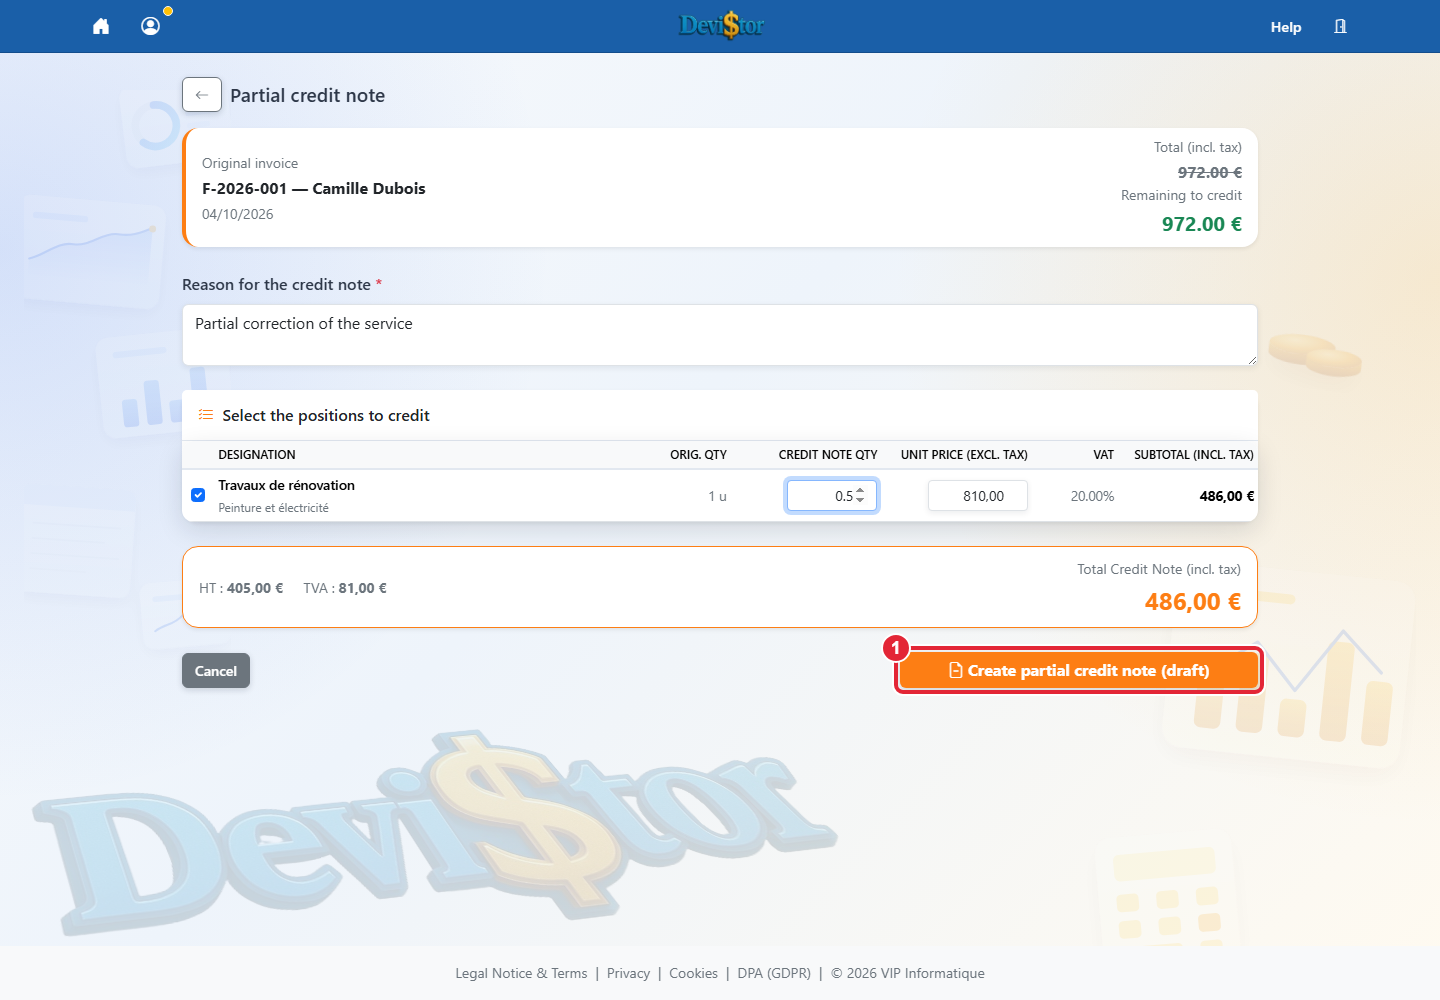
With Pro, select the lines to credit and adjust their quantity or price. Enter the reason and check the remaining creditable amount and total before creating the credit note draft. Review its PDF before finalising. A project-closing credit note concerns the whole project: check the proposed scope before confirming.
13. Configure your company profile
Application screenshot — demonstration data. 1 — Save profile Click to enlarge.
Goal: understand profile tabs and prepare information reused in quotes and invoices.
ProfileConfiguration
Open Profile, then the Edit tab to modify company information.
In the Company tab, use SIREN search with your SIRET if you want to prefill legal data.
In the Preferences tab, choose the interface language. Generated documents remain in French.
Set the activity profile: automatic according to NAF code, BTP, IT, consulting, services or full payment. This prepares both suggested services and the payment model for new quotes.
Check VAT regime, default VAT rate and invoice numbering before saving.
Remember: the Company tab describes who you are legally. The Preferences tab defines how DeviStor prepares new quotes and invoices.
Important: after finalized invoices, numbering must remain stable to preserve chronology.
Application screenshot — demonstration data. 1 — 1 year — 180,00 € HT Click to enlarge.
DeviStor
Open Profile / Subscription. Your trial includes 2 months of Pro without a bank card.
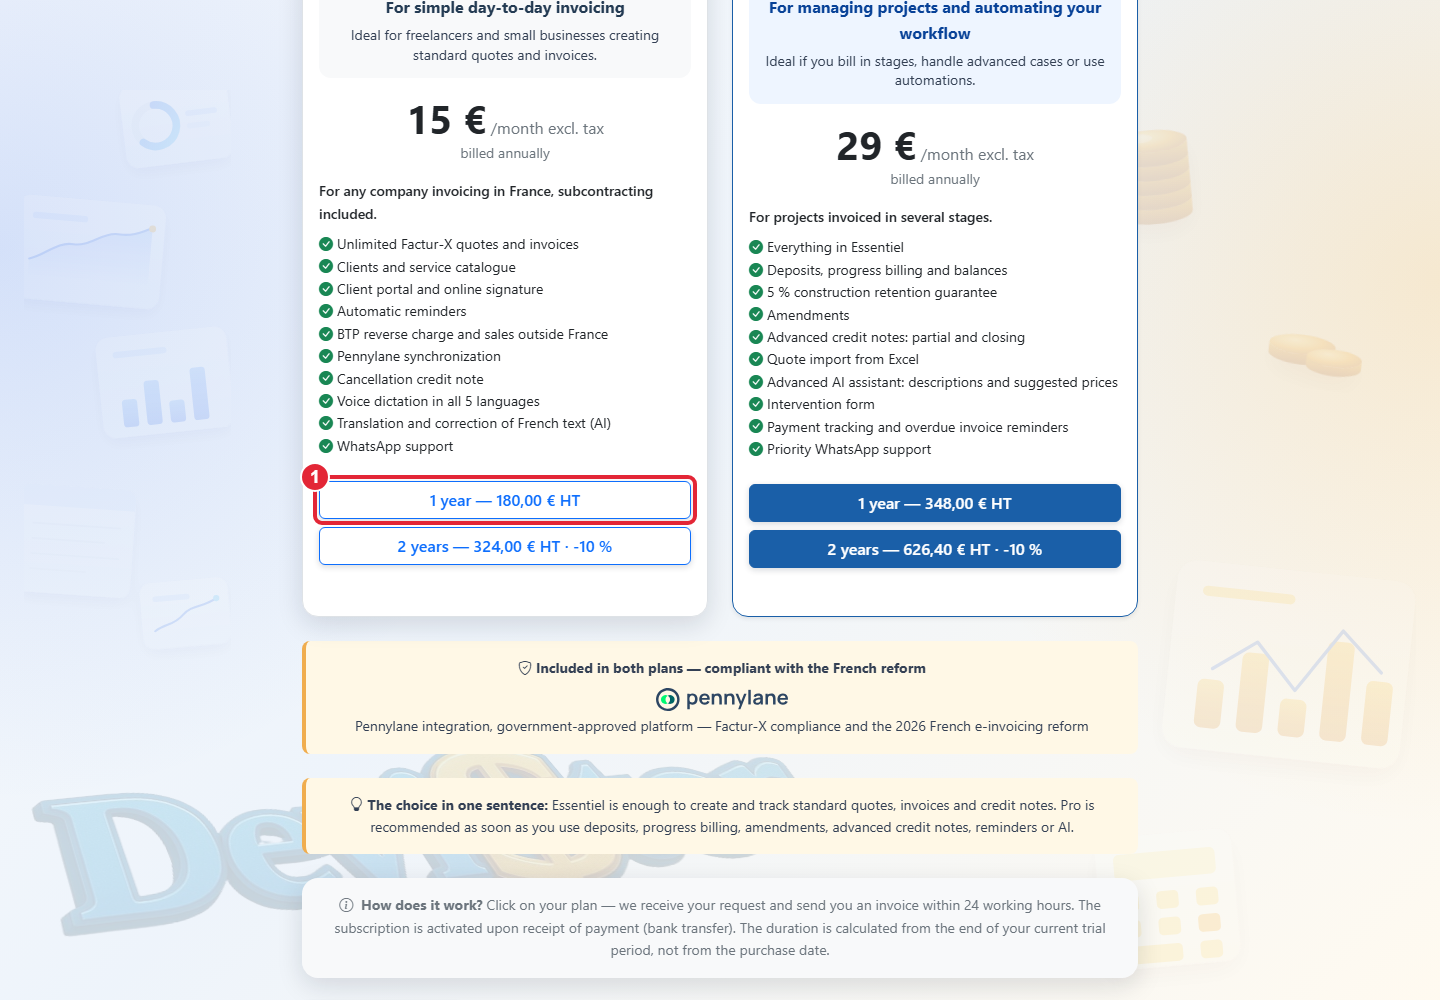
Essentiel includes quotes and invoices, Pennylane, cancellation credit notes, dictation and AI correction/translation into French. Pro adds staged billing, amendments, advanced credit notes, Excel import, advanced AI, work orders and payment tracking.
Select the plan and term offered in your account. Check the total amount and terms before confirming a paid licence request.
Follow the invoice and payment instructions you receive. Once payment is processed, check the new subscription end date.
The prices and options displayed in your account are the reference. You can also consult the site’s pricing. DeviStor X is being built with customers; it is not an available plan to select in this guide.
Goal: give all your quotes a consistent professional image, without retyping anything on each document.
QuoteProfessional image
a) Badges and certifications
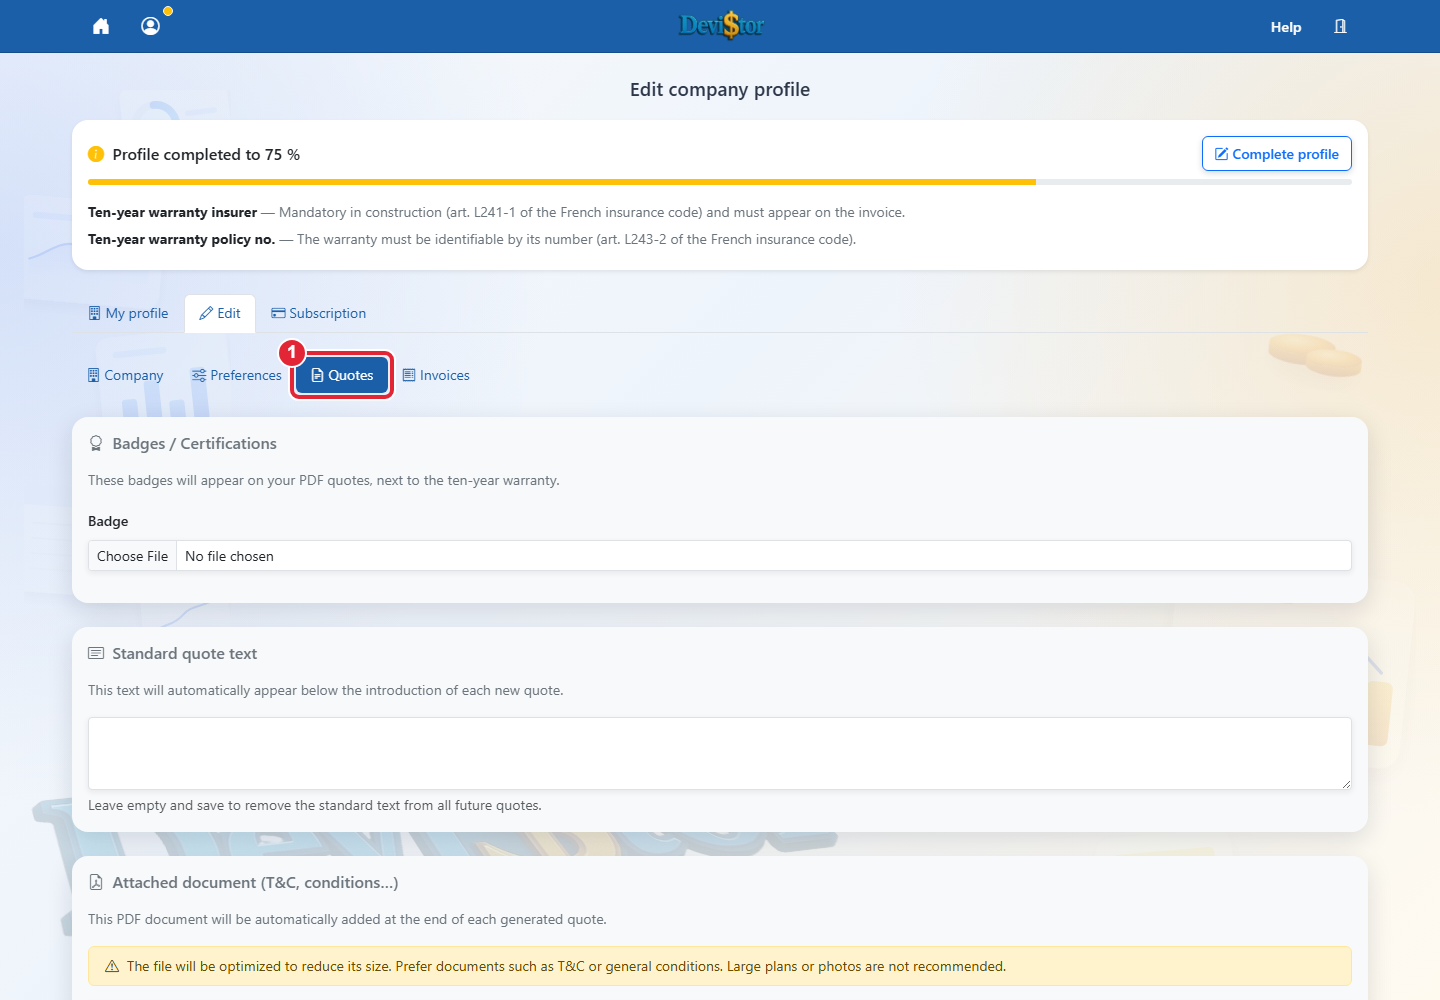
Open Profile, then the Quotes tab.
Upload up to 2 images: quality labels, certifications (RGE, Qualibat…), partner logos.
They automatically appear on the PDF of every quote, next to the ten-year guarantee: a single badge is displayed near the signature area, two badges are centered below it.
To replace a badge, delete it with one click (red Delete link) then upload the new one. If you delete badge no. 1, no. 2 takes its place automatically.
b) Standard quote text
Still in the Quotes tab of the profile, enter your standard text: intervention conditions, recurring notices, typical lead times…
It is automatically suggested on every new quote and appears in the italic section of the PDF, below the introduction.
On a given quote, you can remove it or reapply it with one click, without touching the template saved in the profile.
c) Appended PDF document (T&C, conditions…)
Upload a PDF file (max 2 MB) in the Quotes tab of the profile: it will automatically be added at the end of every generated quote.
The document name is remembered on each sent quote: even if you change the appendix later, older quotes keep the version that accompanied them.
Note: the appended document is optimized and compressed at upload time to keep quotes lightweight. Do not put detailed plans or high-resolution graphics in it, image quality would be reduced. This appendix is intended for terms and conditions (T&C), intervention conditions, notices and other mostly text-based documents.
16. Create an amendment to an accepted quote
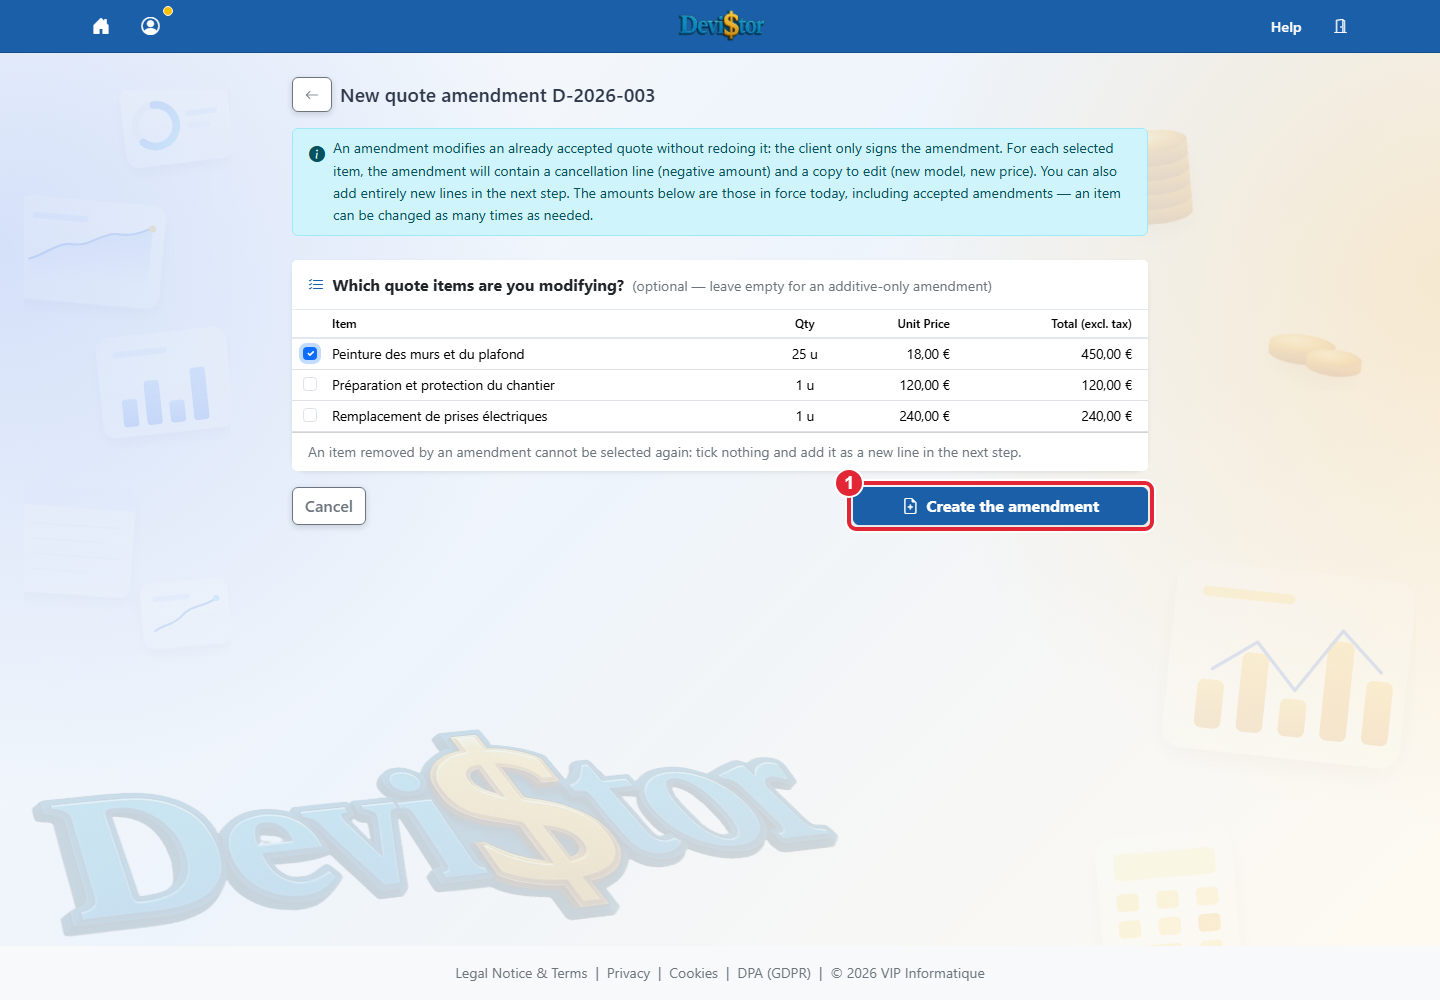
Application screenshot — demonstration data. 1 — Amendment Click to enlarge.Application screenshot — demonstration data. 1 — Create the amendment Click to enlarge.
Goal: modify a quote already signed by the customer, material change, final price of a provision, additional work, without having the whole quote signed again.
QuoteAfter signature
Typical case: the customer signed the quote with a provision (e.g. “bathtub of the customer's choice, provision €800”) and has just chosen the final model.
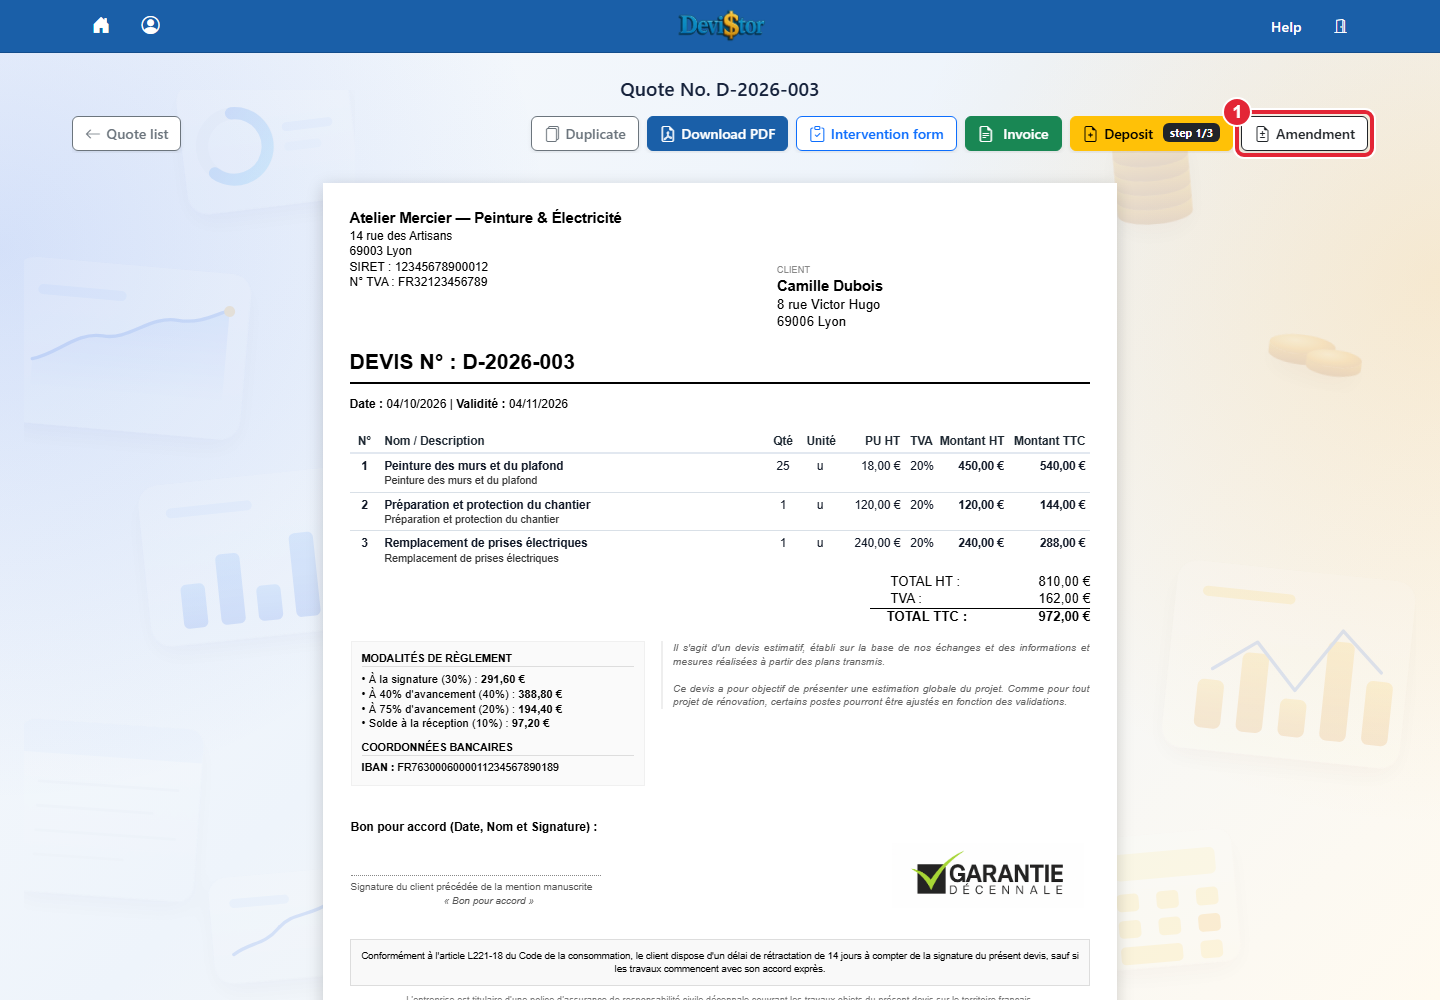
Open the preview of the accepted quote, then click Amendment.
Tick the quote items you are modifying. For each one, DeviStor creates two lines: a Cancellation line (negative amount, locked) and an editable copy with the new model and the new price. You can also add entirely new lines.
The amendment carries the quote number followed by -AV1 (then -AV2…). Its PDF states that it modifies the original quote, that all other conditions remain unchanged, and shows the new total of the project.
Send the amendment to the customer like a quote: they accept it online via the same secure link, they only sign the change, not a whole new quote.
Once the amendment is accepted, invoicing (deposits, situations, balance) is automatically calculated on the quote + amendments total, and the final invoice shows the lines of each amendment in a dedicated section.
Tip: for a price still unknown at quote time, enter a realistic provision with “final price by amendment” in the description, then settle it by amendment as soon as the customer has chosen.
Note: an amendment is only possible on an accepted quote and as long as the final invoice (balance or 100% invoice) has not been issued. A pending amendment must be accepted, refused or deleted before the final invoice can be issued.
17. Dictate and correct text
Application screenshot — demonstration data. 1 — Title microphone Click to enlarge.
Essentiel · Pro
Open a quote line and select your interface language in preferences.
Click the microphone beside the title or description. Allow microphone access in your browser, then dictate the service.
Review the recognised text. Use AI correction to translate it into French and improve the wording before sending it.
French is the primary document language; the second language chosen on the customer record can be included.
18. Reuse your services and products catalogue
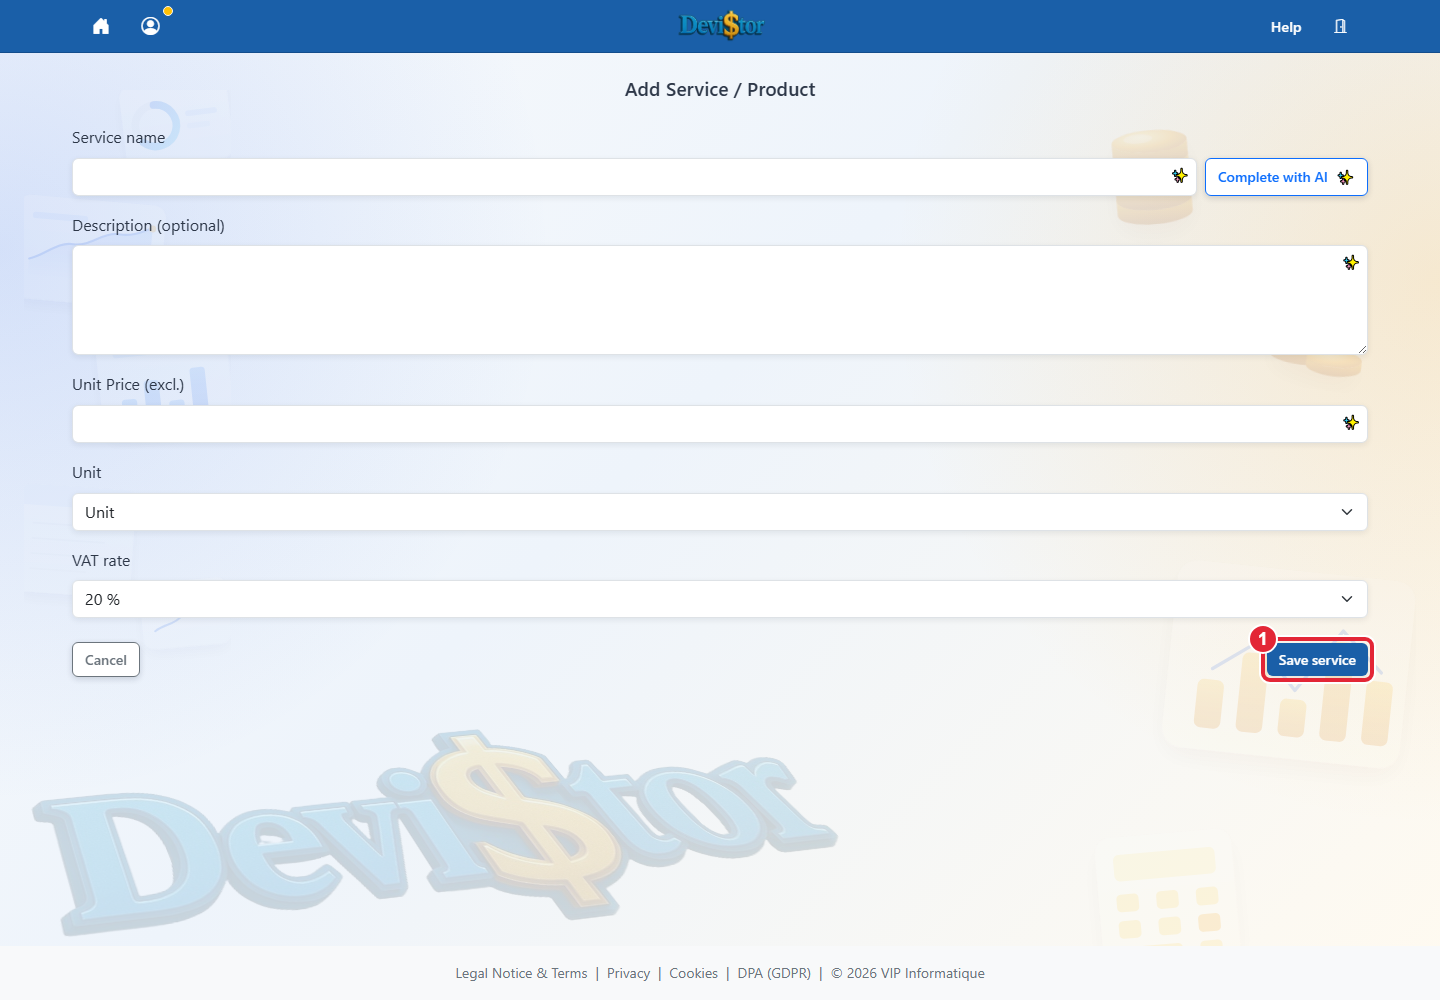
Application screenshot — demonstration data. 1 — Save service Click to enlarge.Application screenshot — demonstration data. 1 — Select a service/product. Click to enlarge.
Essentiel · Pro
Open Services / Products to view saved services or create a new entry.
Fill in the name, description, unit, net price and VAT rate. Save the entry.
In a quote, select a service/product from the list. Adjust the quantity and check the price and VAT for this customer.
Your industry catalogues are available on quotes and invoices: construction, IT, consulting, landscaping, cleaning or garages depending on the profile and NAF code. Adjust prices; garage packages exclude parts.
The VAT rate field is hidden under VAT exemption. Changing the industry replaces untouched predefined copies; your own services and edited lines remain.
You can also save a new quote line to your global list. Editing a catalogue entry does not rewrite existing documents.
19. Record payments and track the balance
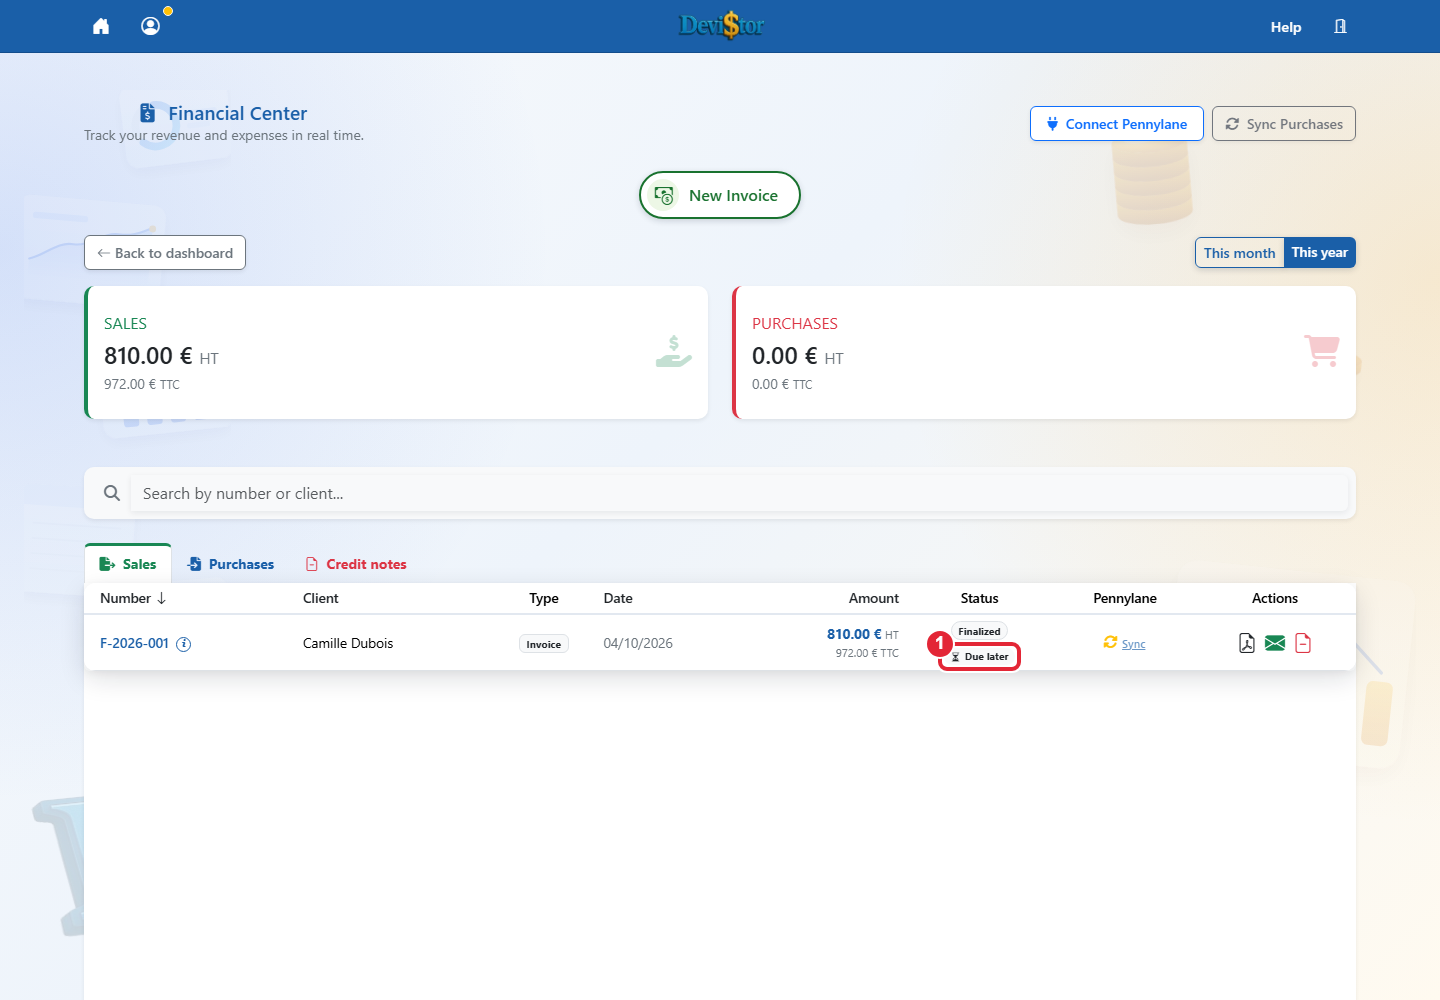
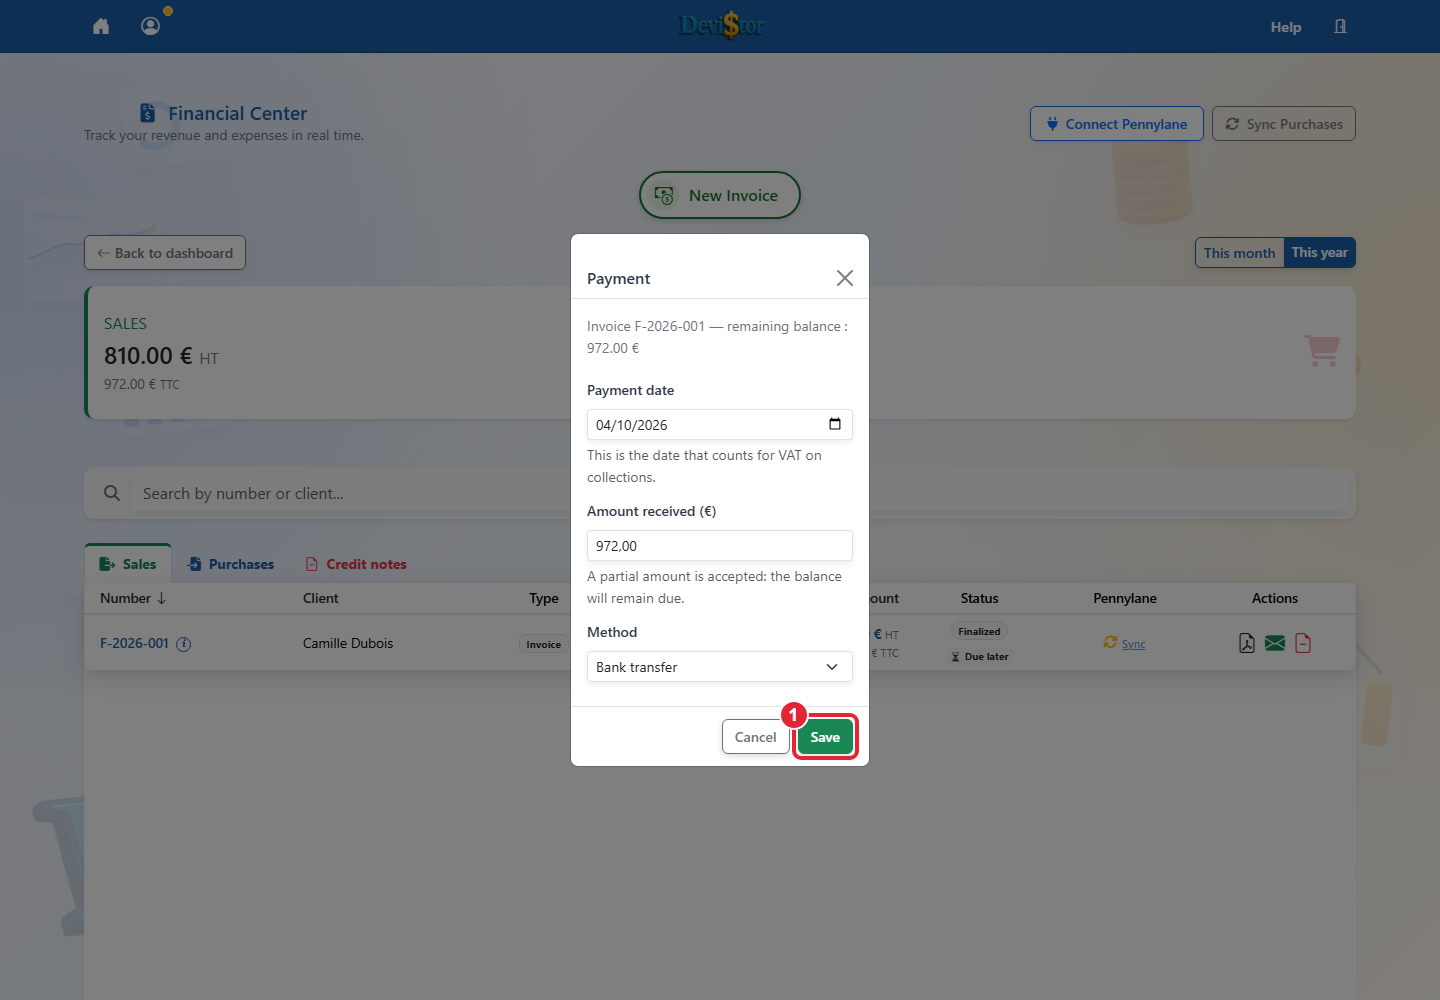
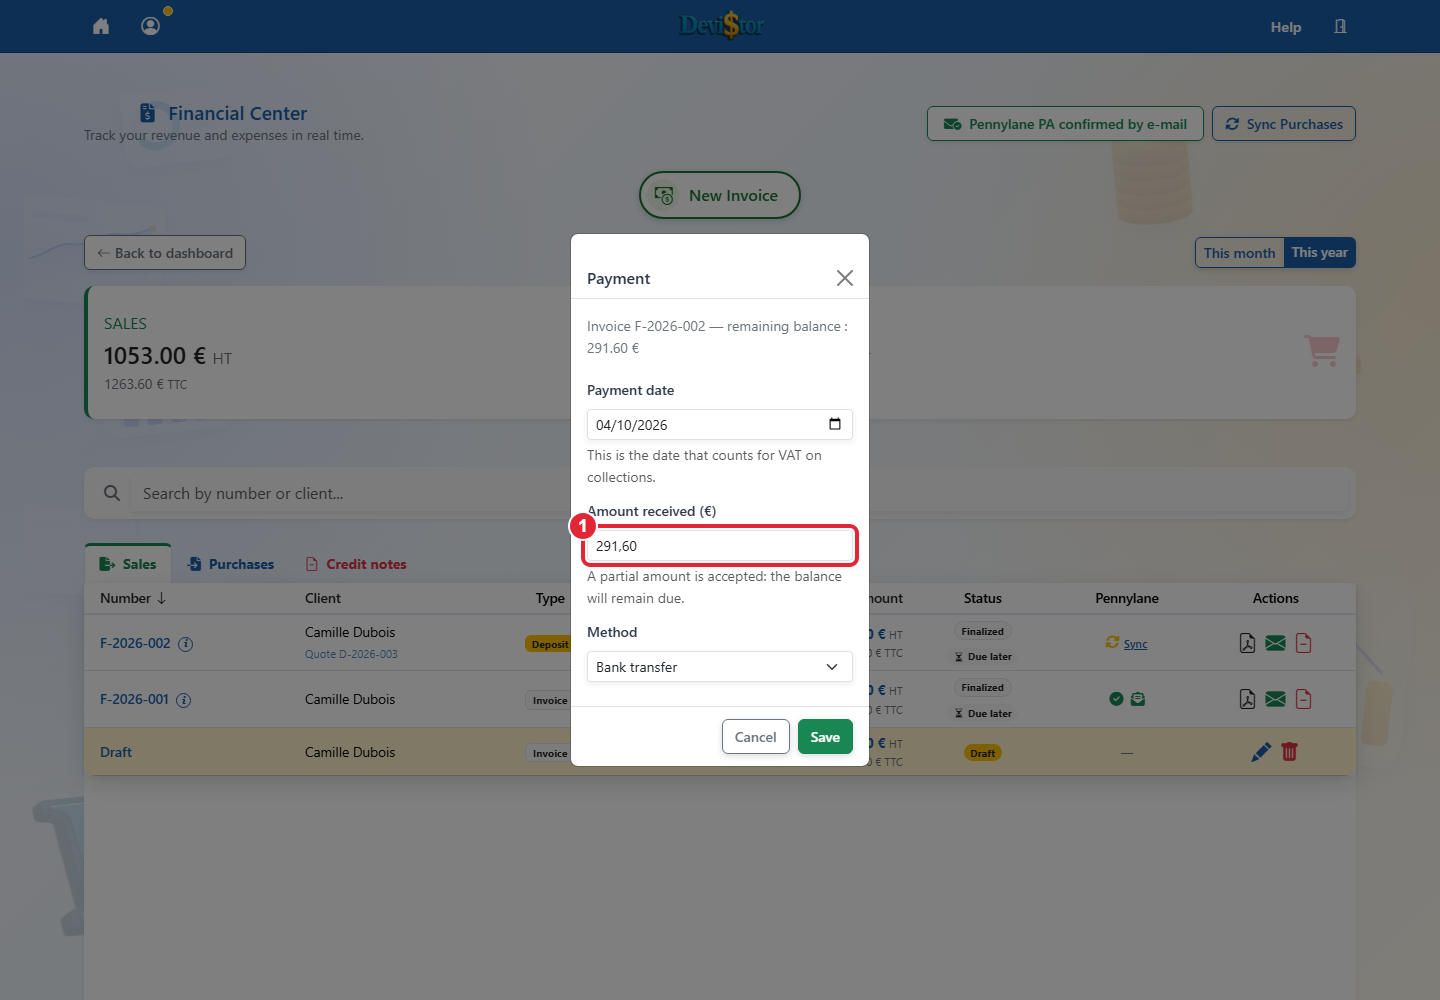
Application screenshot — demonstration data. 1 — Due later Click to enlarge.Application screenshot — demonstration data. 1 — Save Click to enlarge.Application screenshot — demonstration data. 1 — Amount received (€). Click to enlarge.
Invoice tracking
Open the invoice list and find the relevant finalised invoice.
Click the invoice payment badge (Due, Overdue or Paid). The suggested amount is the outstanding balance; check the actual amount, date and method. If a payment is wrong and no correction action is offered, contact help.
Save, then check the recorded amount and outstanding balance. For partial payments, record each subsequent payment separately.
Click the invoice payment badge (Due, Overdue or Paid). The suggested amount is the outstanding balance; check the actual amount, date and method. If a payment is wrong and no correction action is offered, contact help.
Check your VAT regime and defaults in Profile / Preferences.
The VAT selector appears only when the customer situation offers a choice. An EU services or goods regime may be suggested automatically; check it before finalising.
Complete the customer details and check rates, amounts and wording in the PDF preview before finalising.
The document regime must match the actual transaction. Profile defaults apply to new documents and do not change finalised invoices.
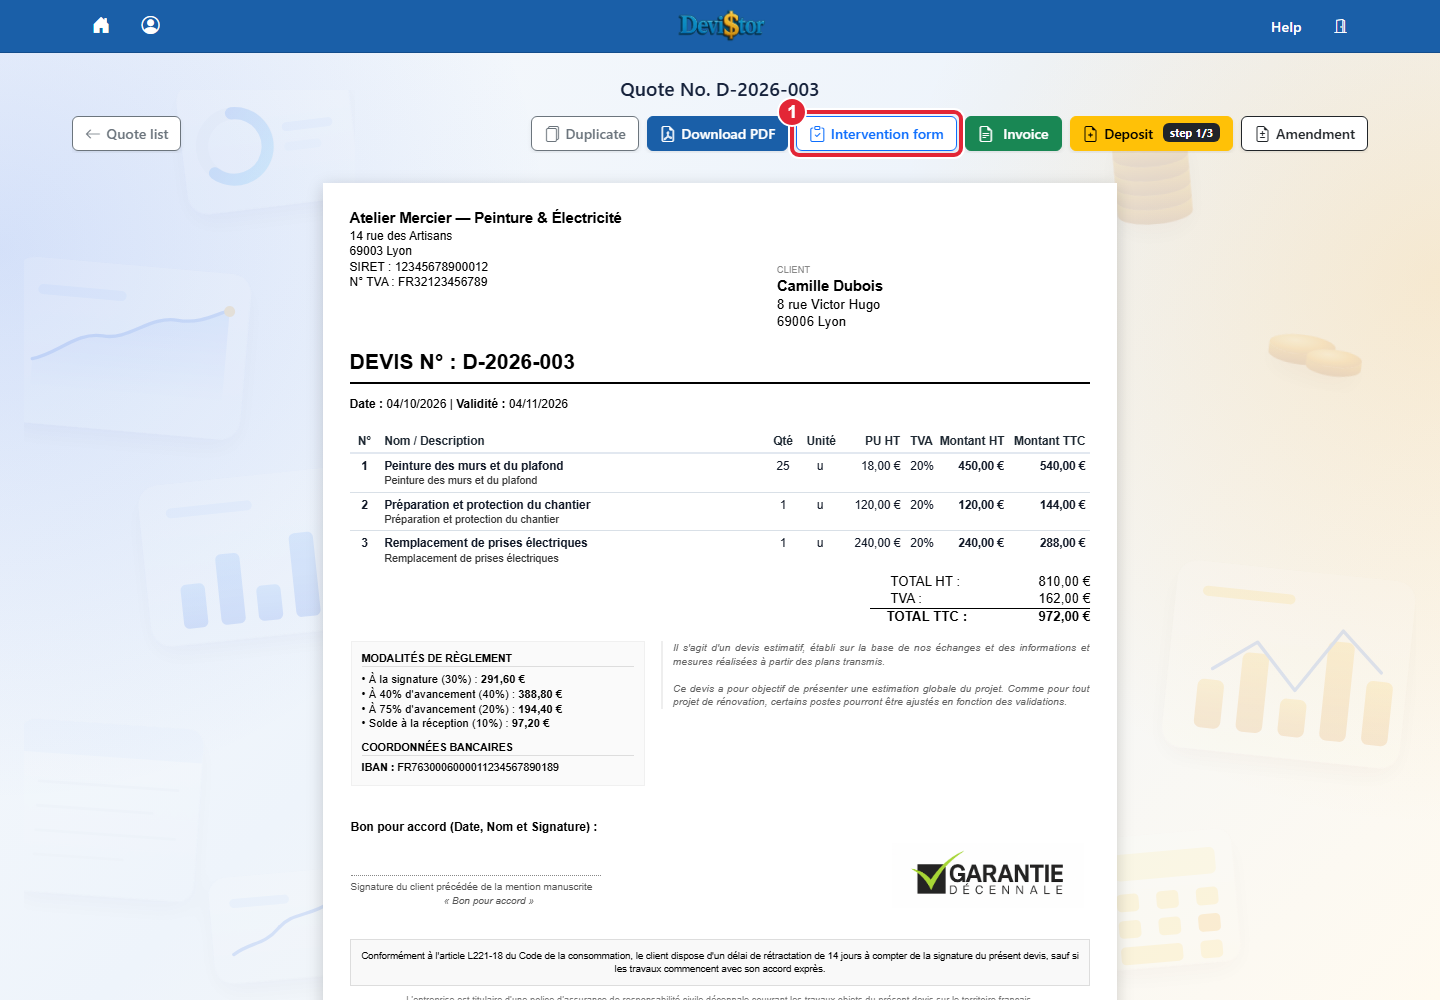
Application screenshot — demonstration data. 1 — Intervention form Click to enlarge.
Pro
Open the preview of the quote for the work you are carrying out.
Click Work order to download the PDF document.
Check the job details and use the document to prepare or accompany your work on site.
The work order is a working document. It does not replace the accepted quote or an invoice and does not trigger invoicing.
22. Install DeviStor on phone and computer
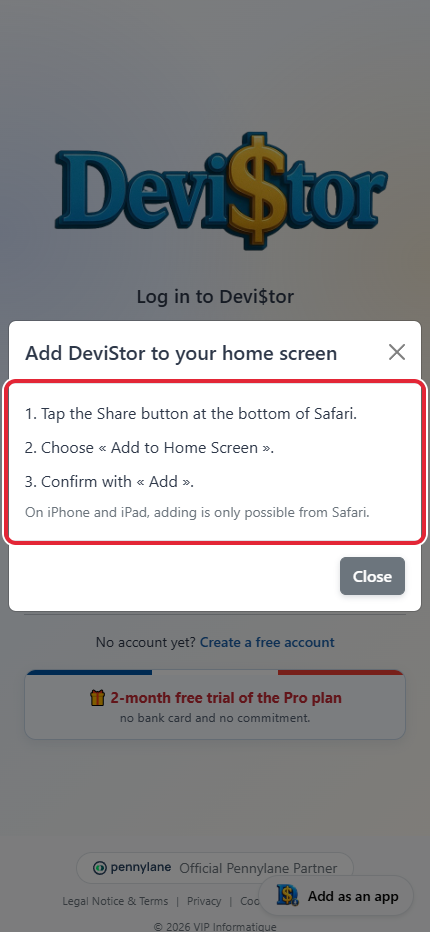
Application screenshot — demonstration data. Add as an app Click to enlarge.Application screenshot — demonstration data. Add as an app Click to enlarge.Application screenshot — demonstration data. Tap the Share button at the bottom of Safari.
Choose « Add to Home Screen ».
Confirm with « Add »… Click to enlarge.
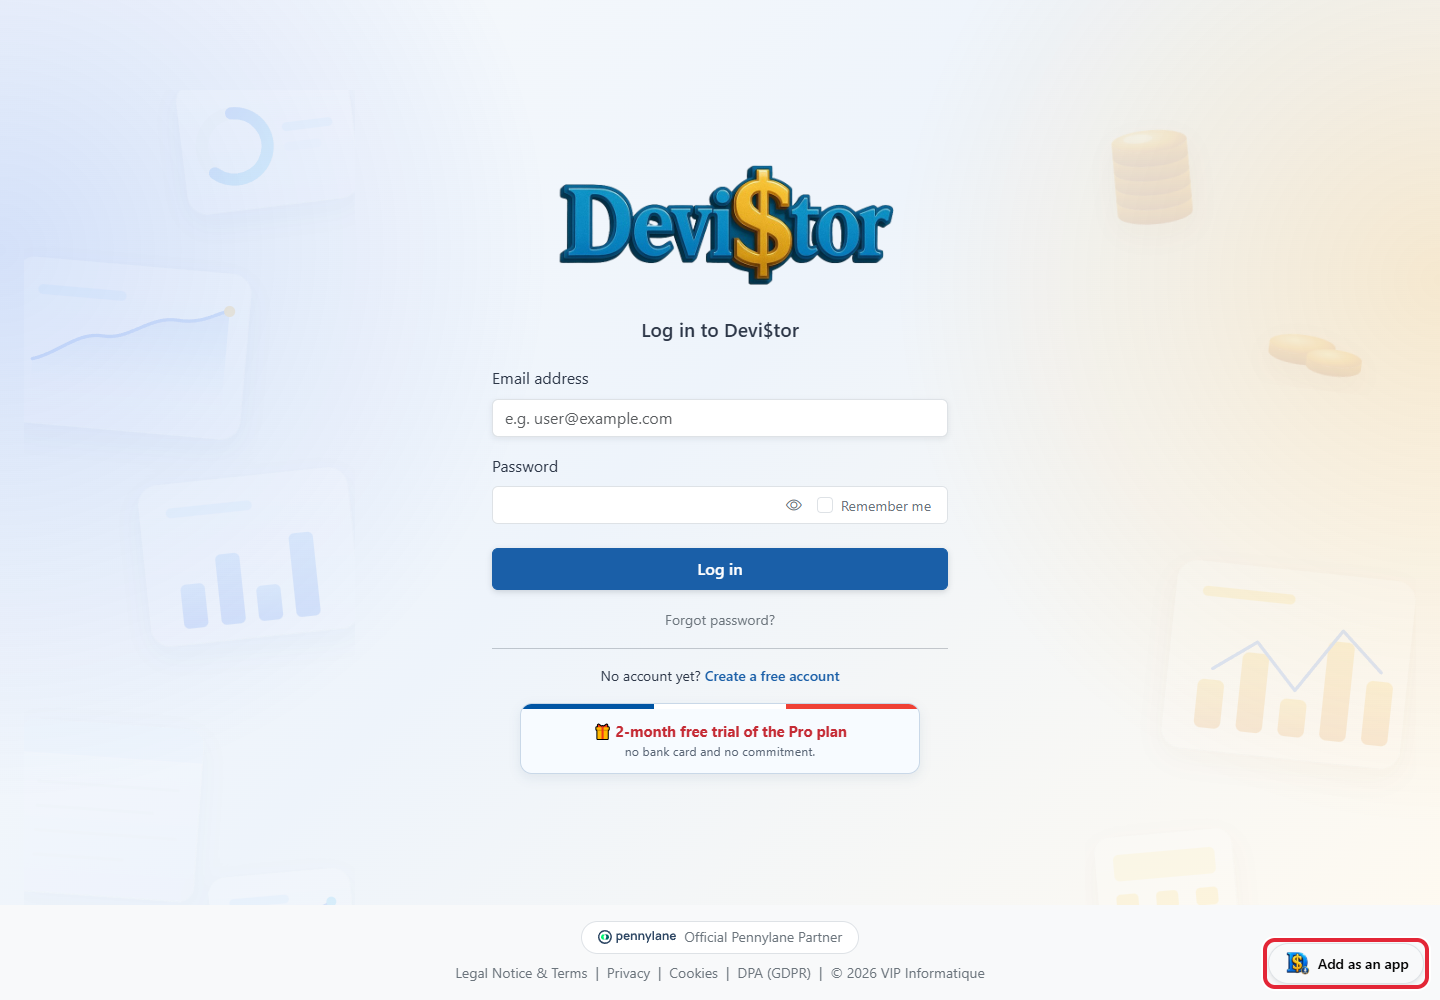
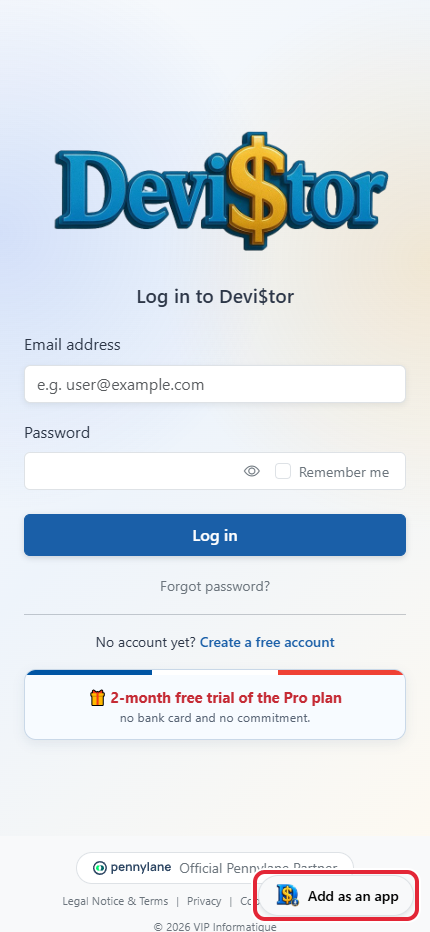
Open app.devistor.fr in your browser. On the login screen, find the DeviStor “Add as app” icon at the bottom right.
Click this icon. On a computer or Android, confirm installation in the window offered by your browser.
On iPhone or iPad, the same icon opens instructions: in Safari, use Share, Add to Home Screen and Add.
Then launch DeviStor from its icon and sign in normally.
The button appears when your browser offers installation or the iOS instructions are available. It may disappear once installed. An Internet connection is still required.
Want to try with your own documents?
Create a DeviStor account and follow these tutorials in parallel.
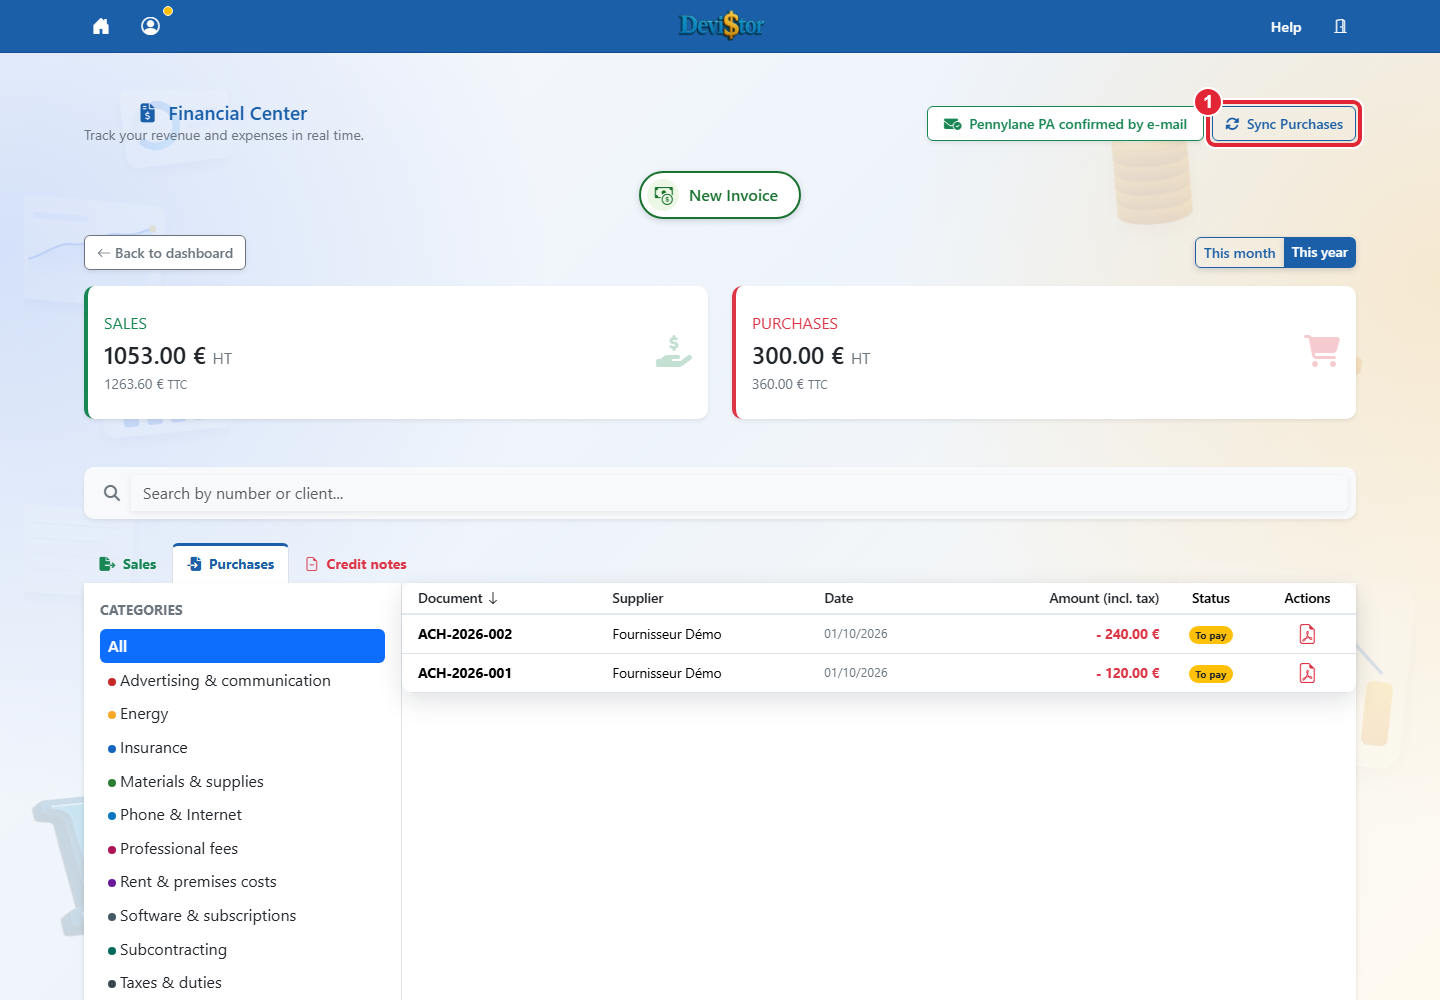
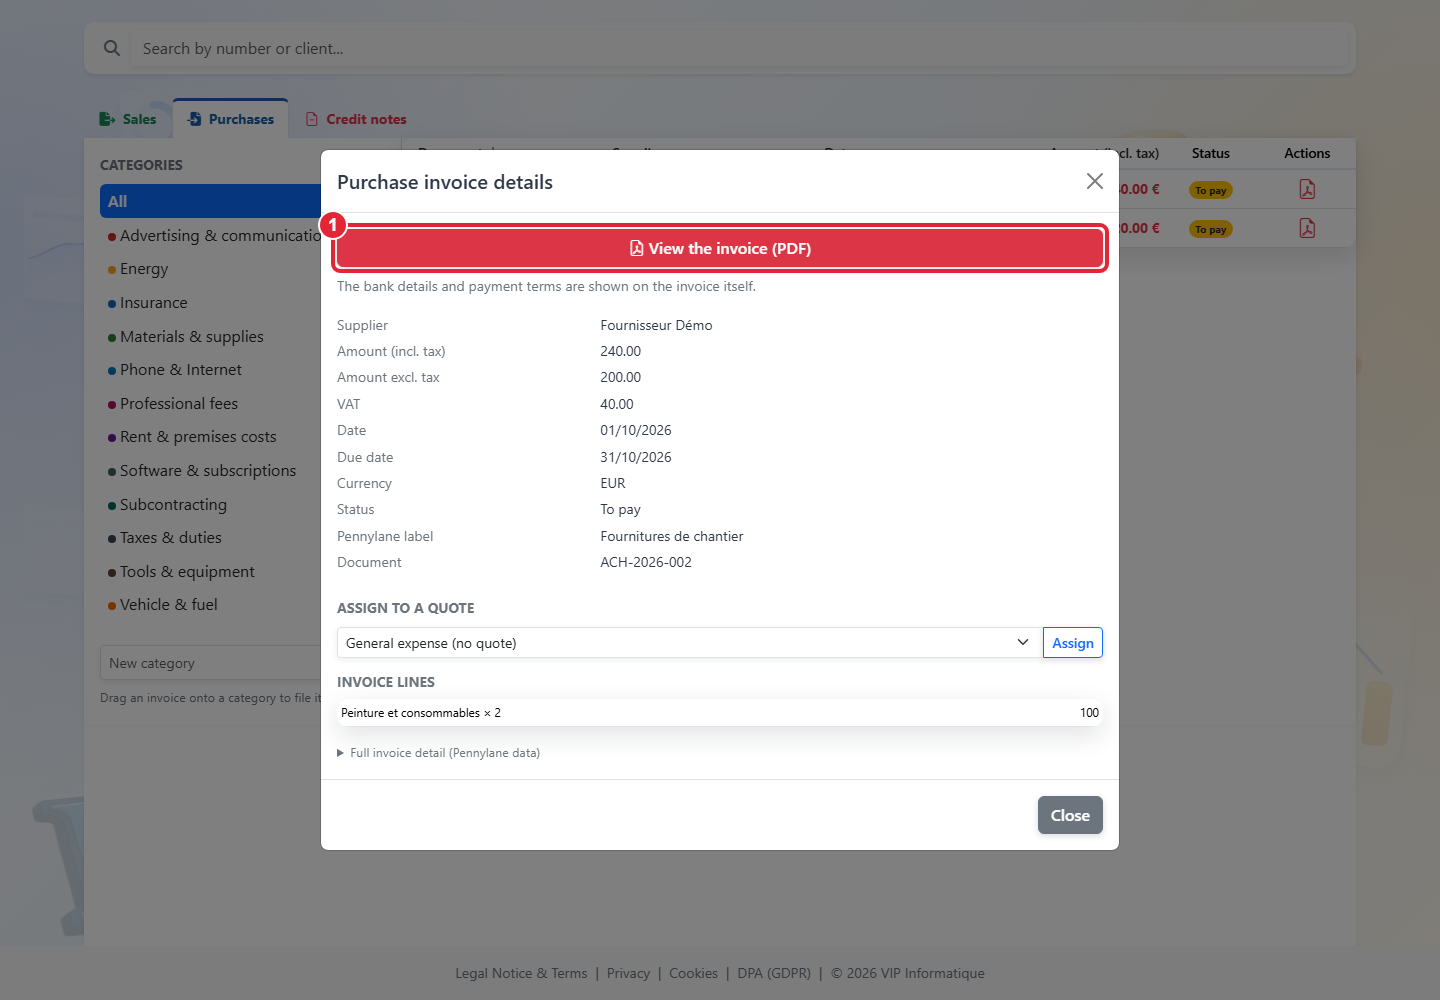
Application screenshot — demonstration data. 1 — Sync Purchases. Click to enlarge.Application screenshot — demonstration data. 1 — View the invoice (PDF). Click to enlarge.
Open the Financial Centre and select Purchases. Connect Pennylane to retrieve your purchases.
Click Synchronise Purchases to refresh documents, suppliers, amounts and due dates. Retrieval may take a few moments.
Click a row to open its details: amount, due date, status and lines supplied by Pennylane.
Use View invoice (PDF) for the original document and bank details. If the PDF is missing, synchronise again. Viewing purchases does not pay your supplier.
24. Categorise purchases and assign them to a project
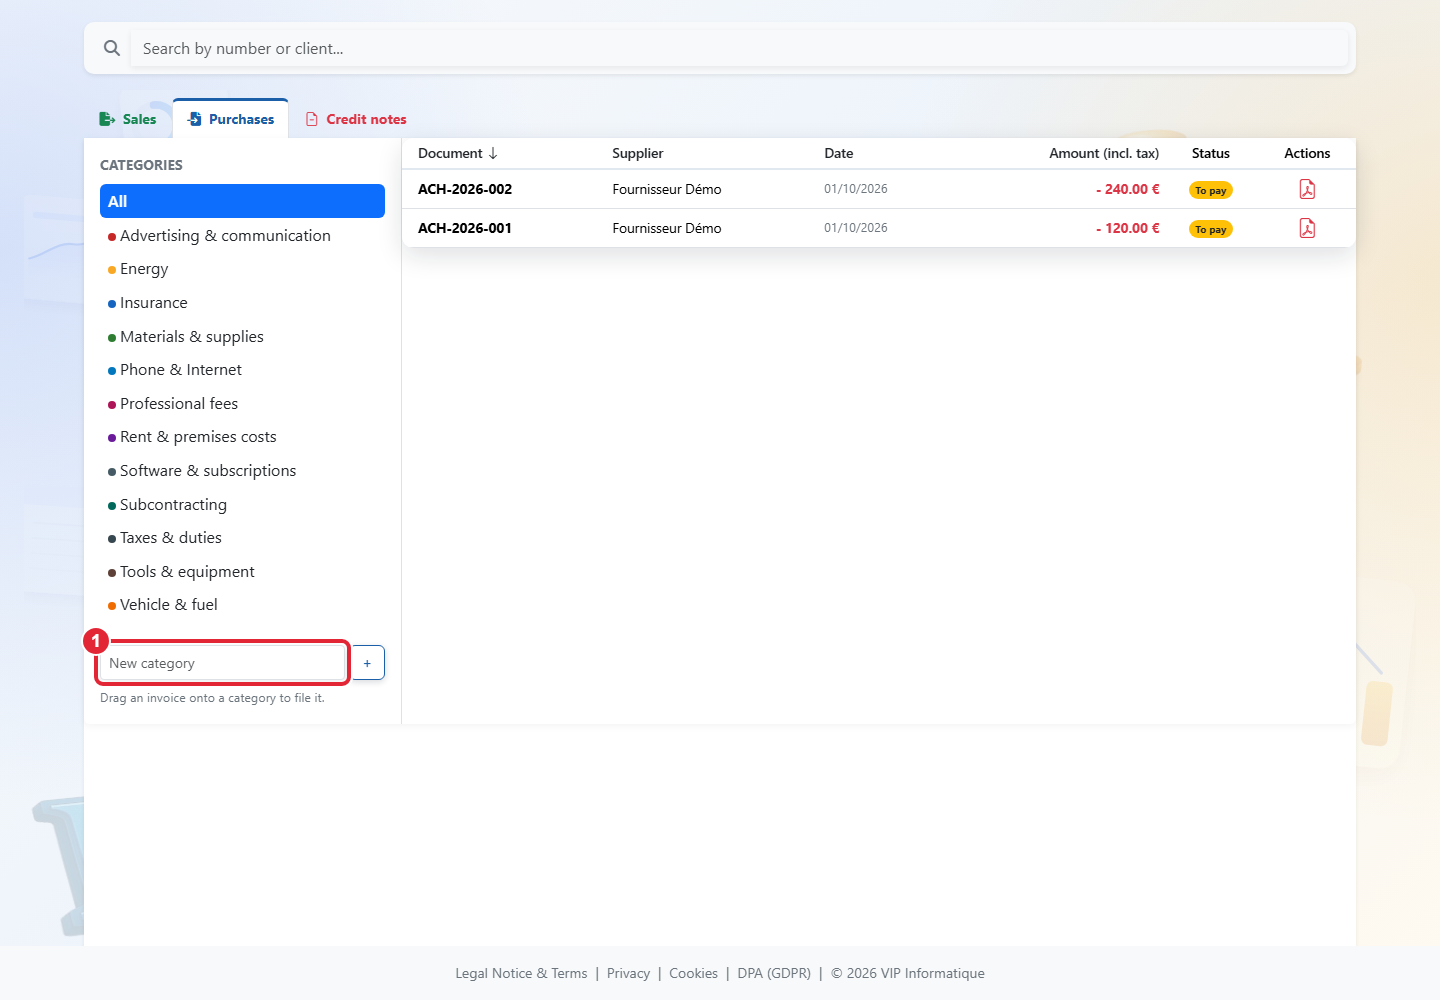
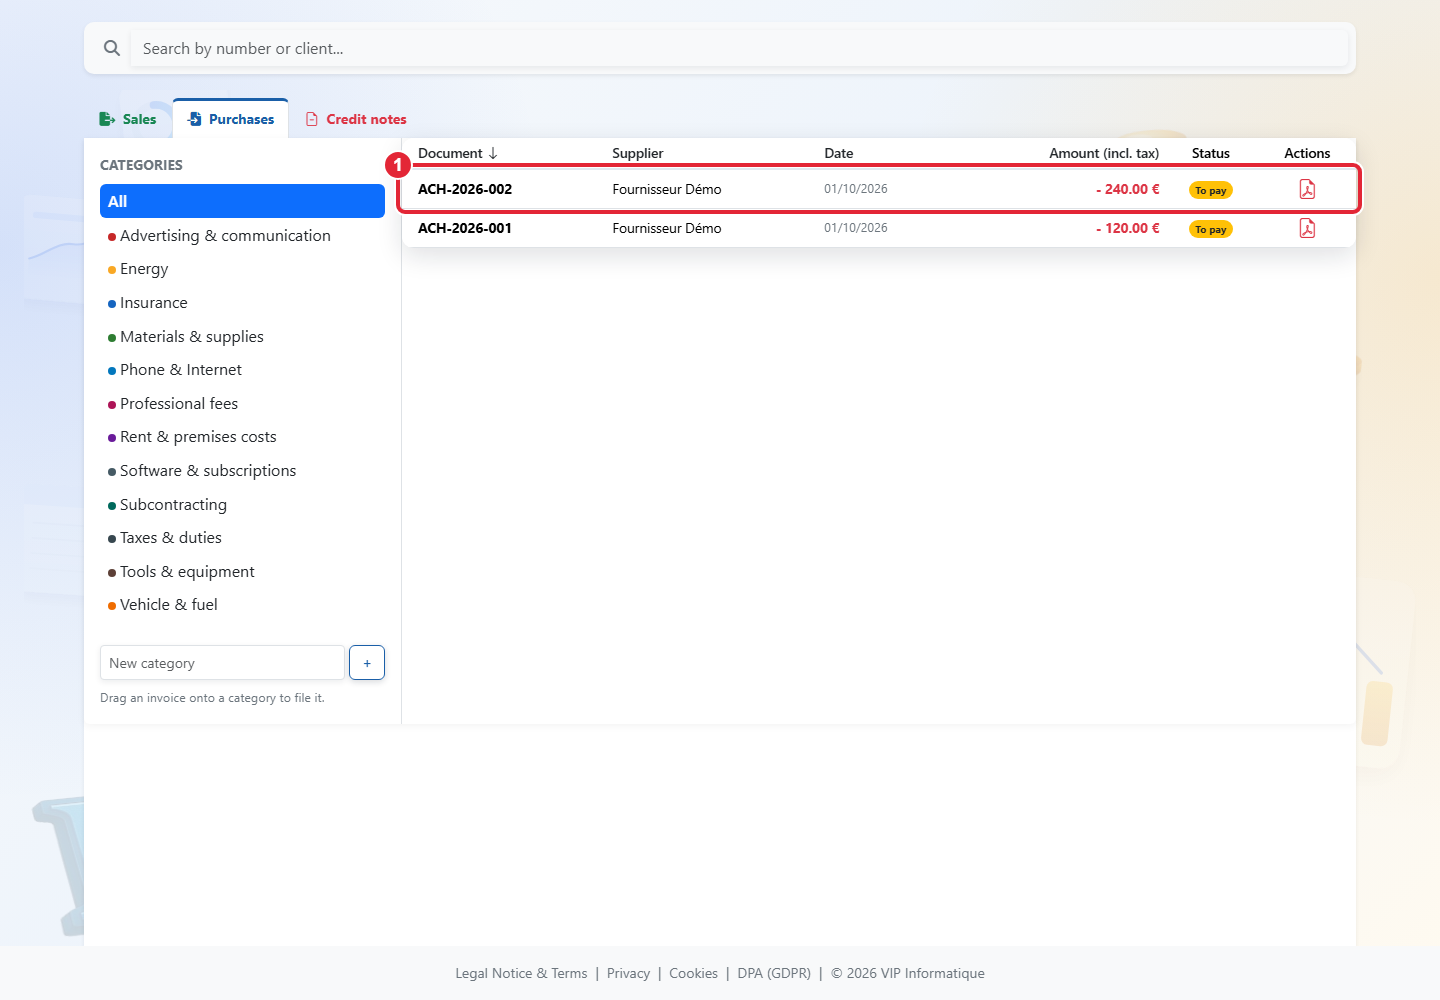
Application screenshot — demonstration data. 1 — New category. Click to enlarge.Application screenshot — demonstration data. 1 — Invoice to drag onto a category. Click to enlarge.Application screenshot — demonstration data. 1 — Assign. Click to enlarge.
In Purchases, enter a new category name in the left panel and click +.
Drag an invoice onto a category. Click a category to filter; All displays every purchase, and dropping an invoice there removes its category.
Use the pencil to rename a category. Deleting a category detaches invoices without deleting them.
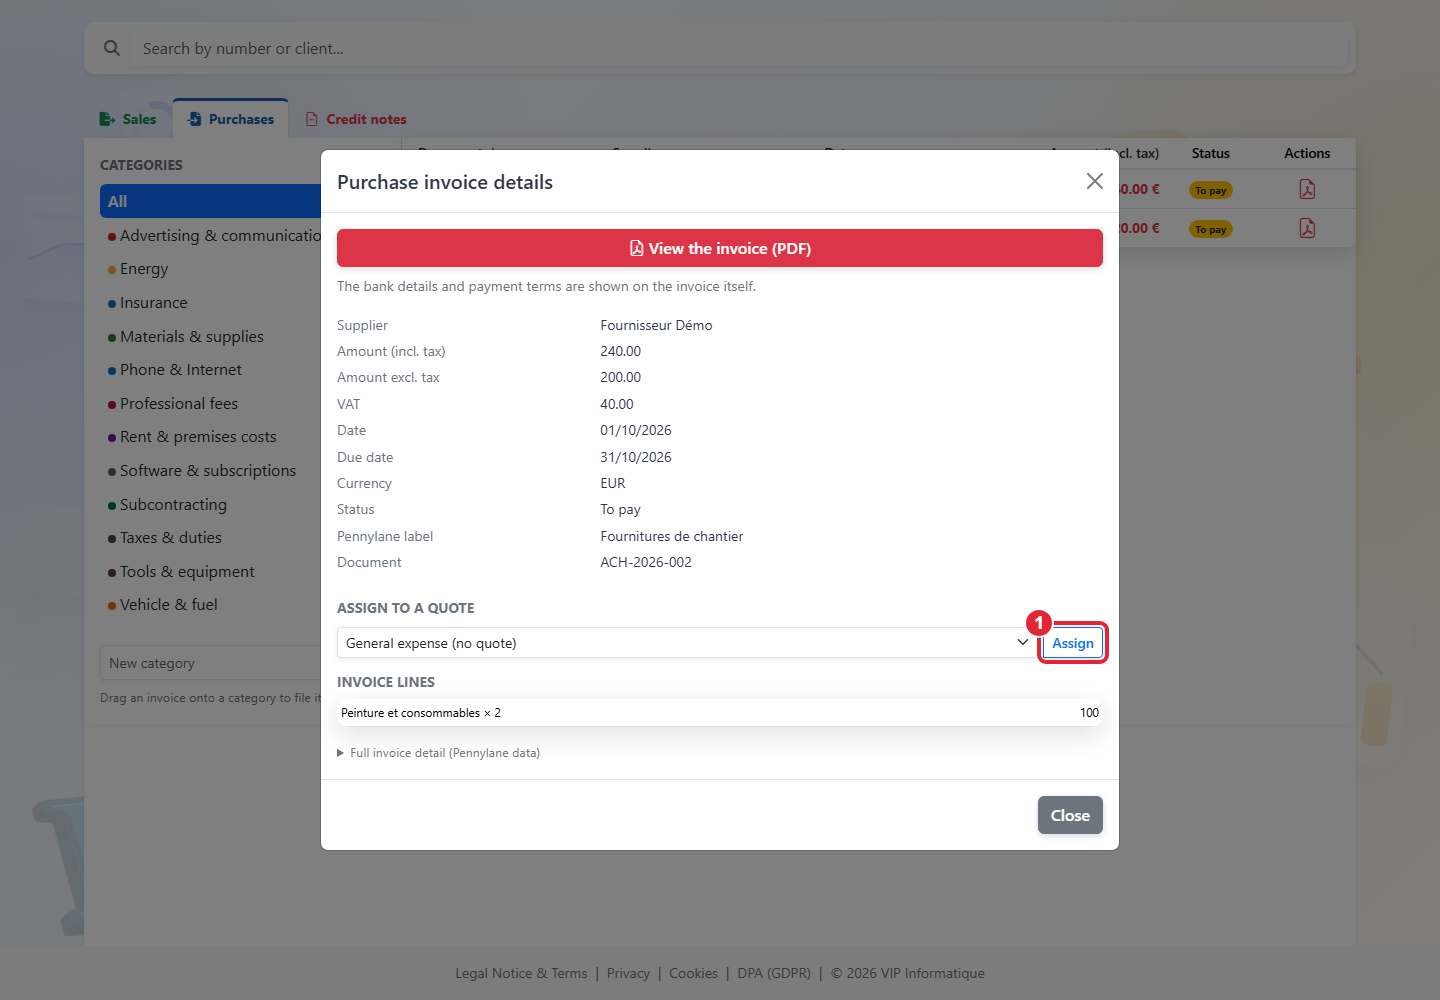
Open a purchase, select the quote under Assign to a quote and click Assign. General expense removes the link. Categories stay in DeviStor, do not change Pennylane accounting categories and do not calculate a margin.
25. Manage several project addresses
Application screenshot — demonstration data. 1 — Add a site / delivery address. Click to enlarge.Application screenshot — demonstration data. 1 — Site / delivery address. Click to enlarge.
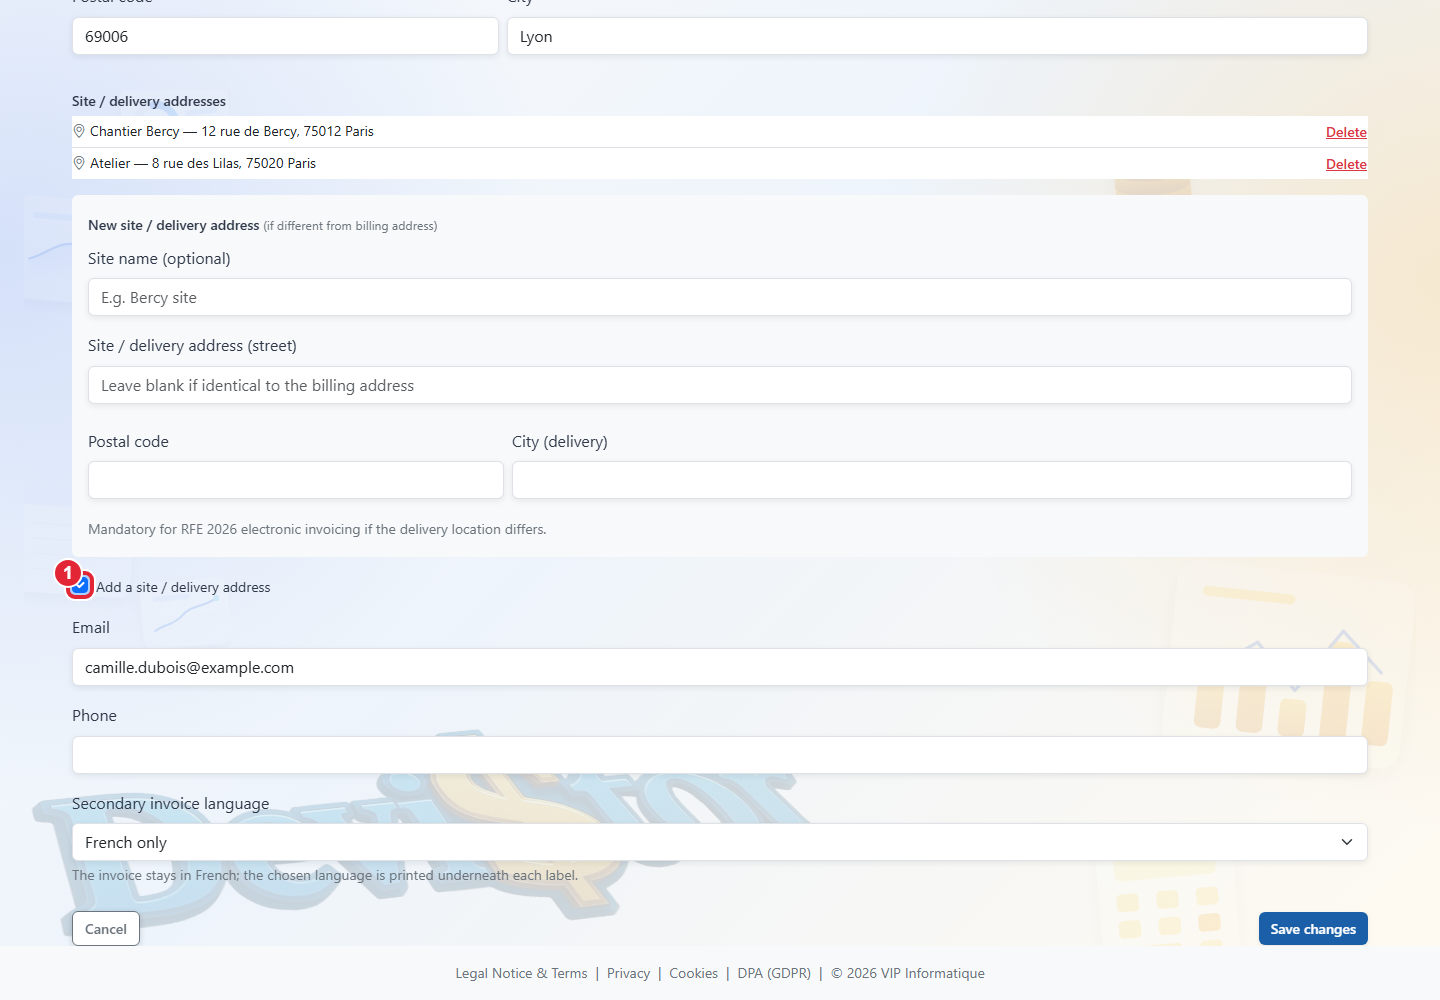
Edit the customer and select Add a project / delivery address.
Enter an optional name, street, postcode and city, then save. Repeat for other projects for the same customer.
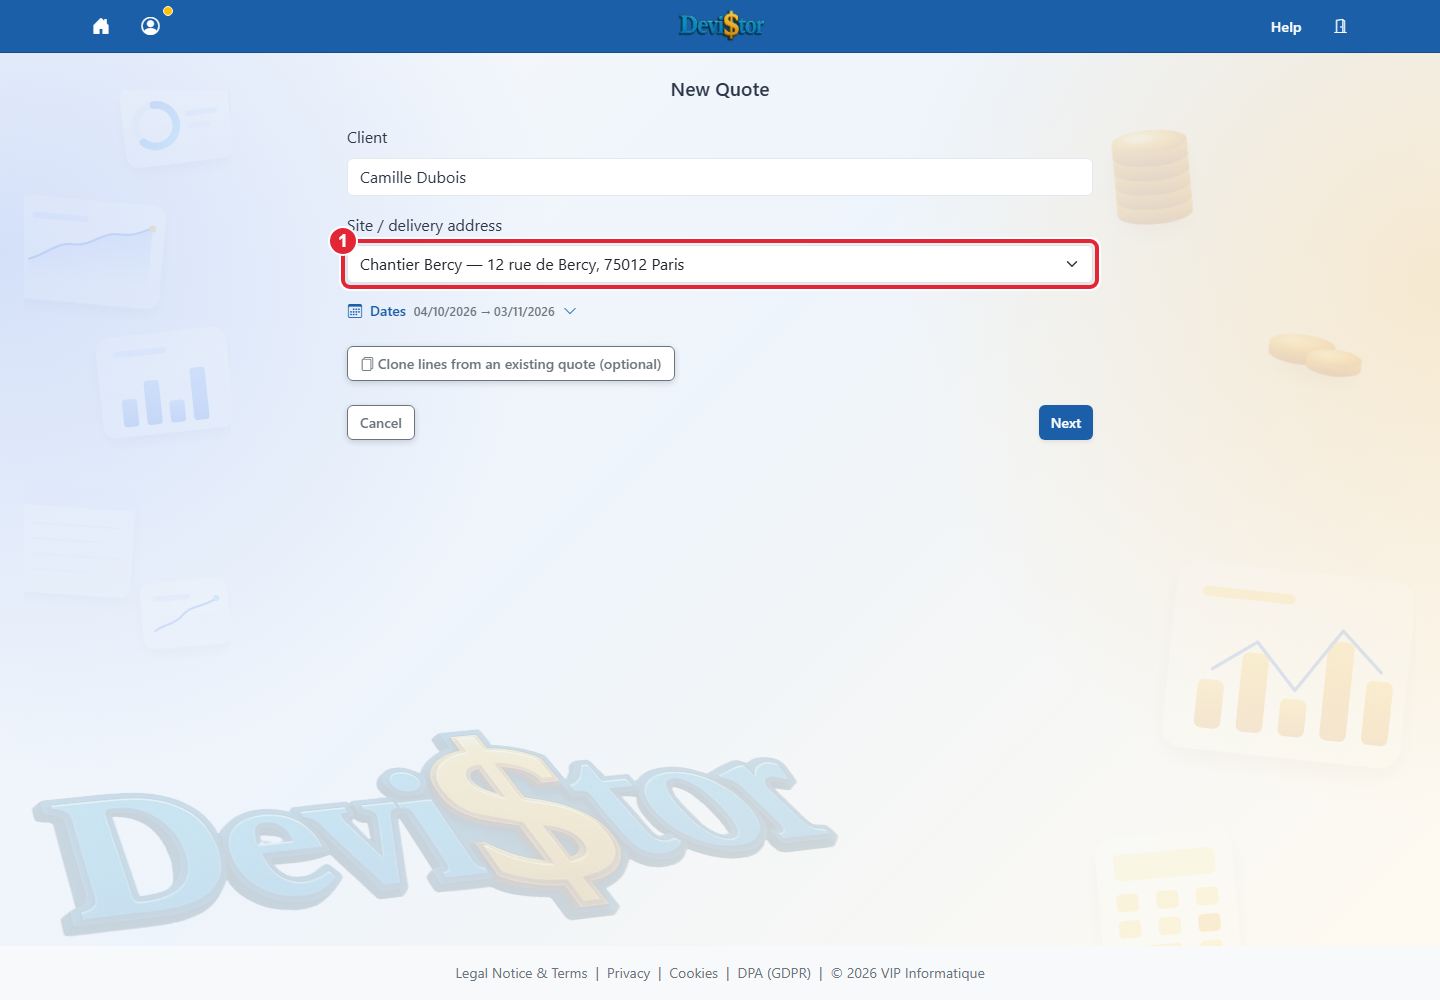
For a new quote or invoice, select the customer and choose the project address. You can keep the billing address or add a new address.
On a draft quote, use the address pencil to change the project. An invoice created from a quote inherits its address. Changing the customer record does not alter addresses already stored on documents.
26. Create an invoice without a quote and reuse an invoice
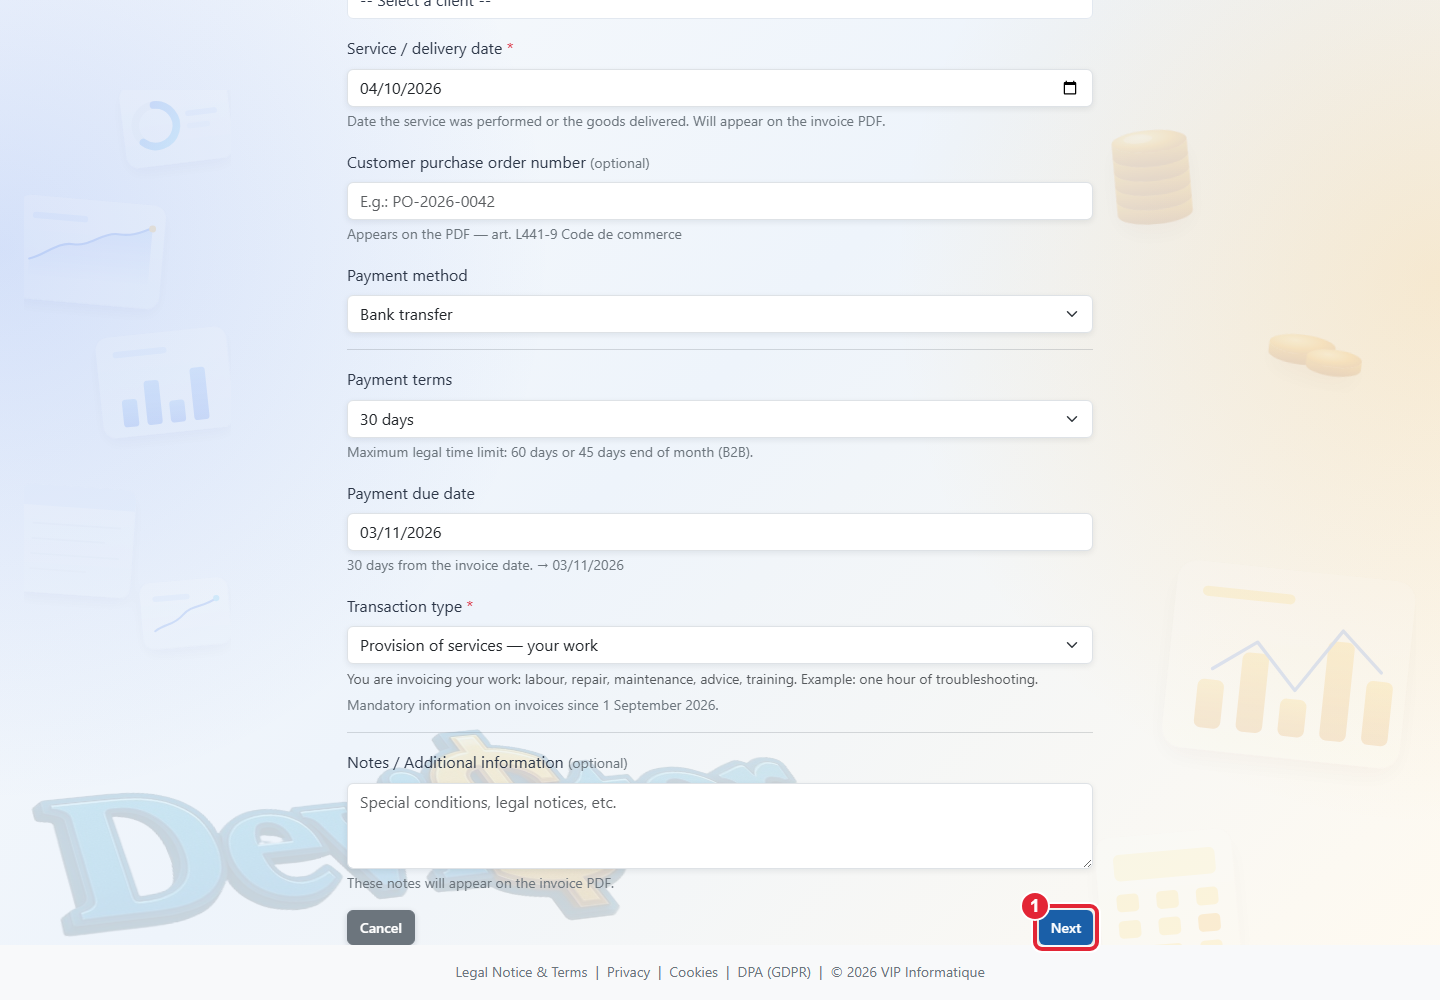
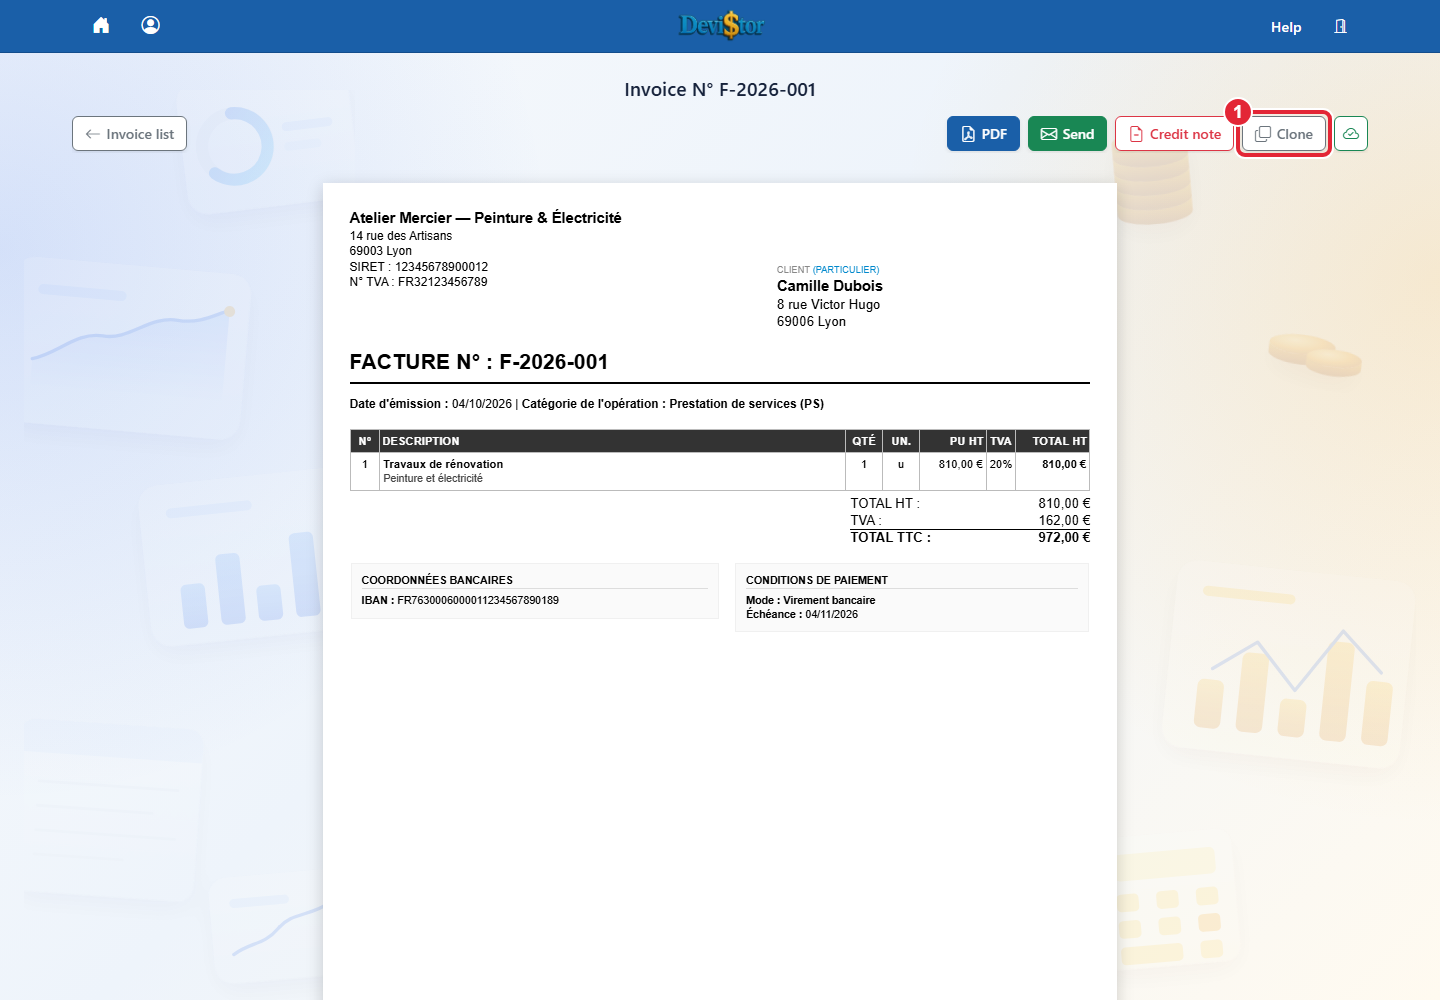
Application screenshot — demonstration data. 1 — Transaction type *. Click to enlarge.Application screenshot — demonstration data. 1 — submit. Click to enlarge.Application screenshot — demonstration data. 1 — Clone. Click to enlarge.
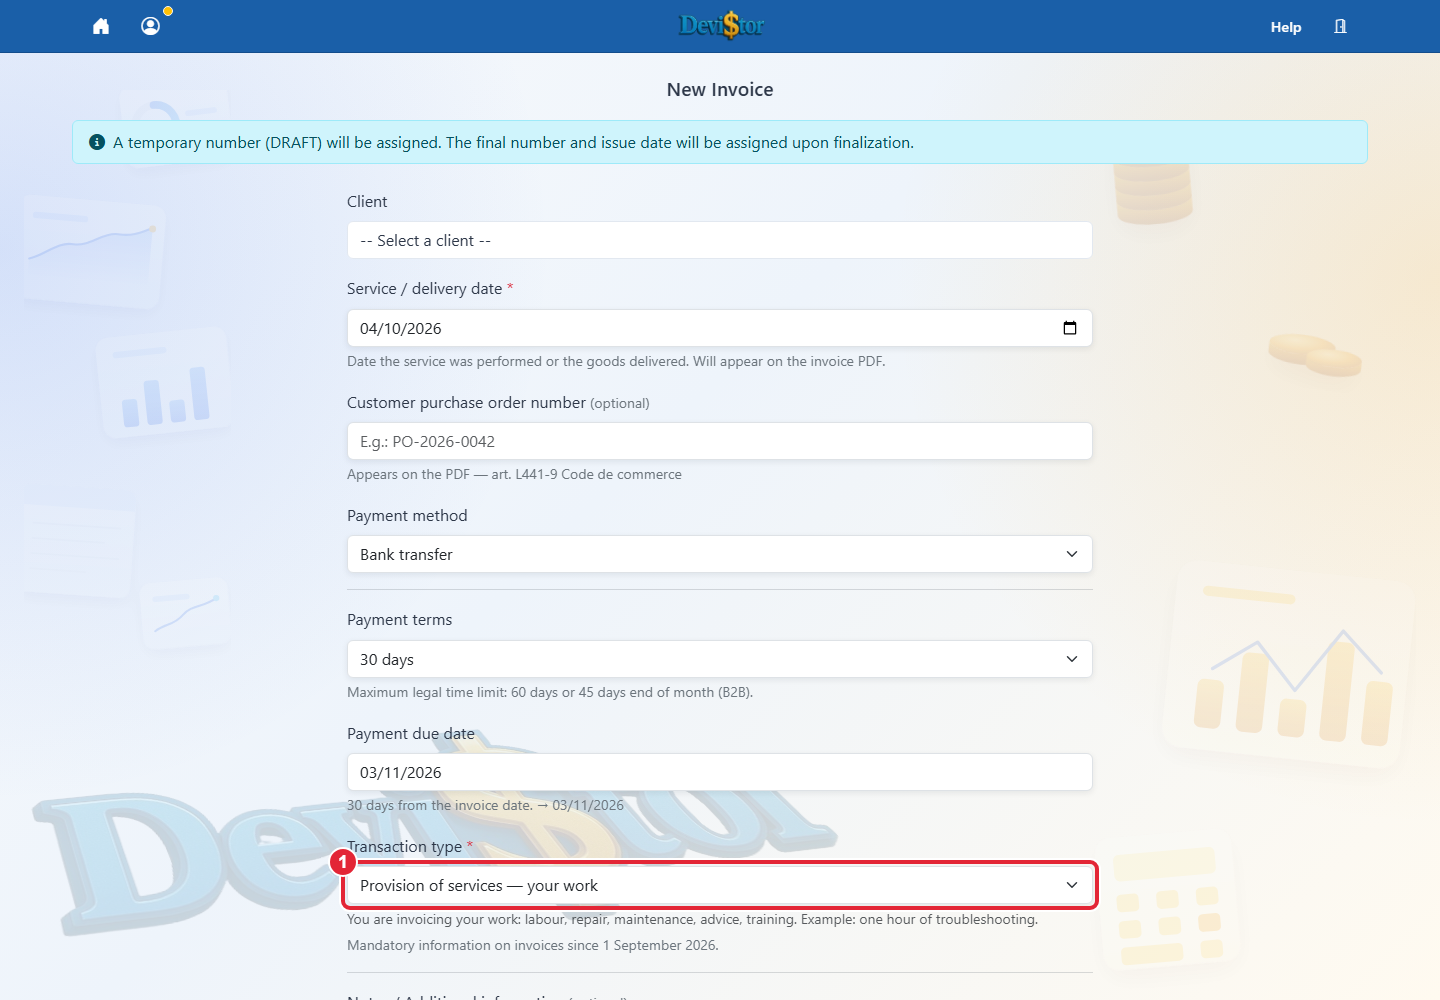
Open New Invoice and choose creation without a quote. Select the customer and project address if needed.
Check payment terms, method, due date and service date. Select the operation category: products, services or both.
Create the draft, add lines and review the PDF. Finalise only when everything is correct; the final number is assigned at this step.
To reuse an invoice, open its preview and click Clone. Check the copy’s customer, dates, VAT and lines before finalising. Correct a finalised invoice with a credit note.
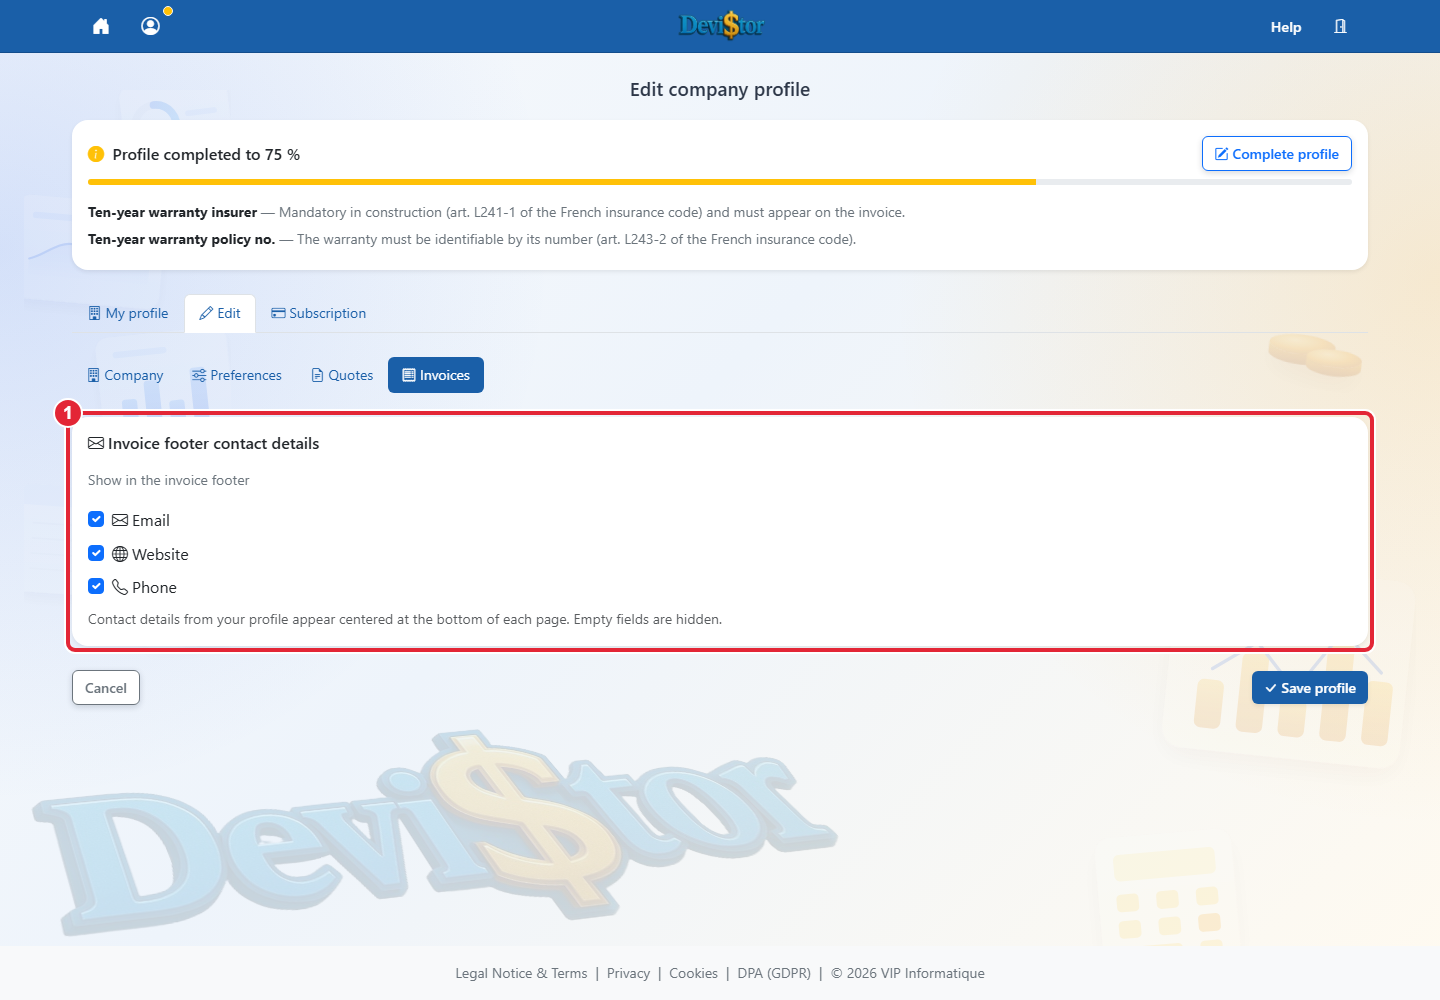
In Profile / Company, enter your HTTPS website and contact details, then save.
Open the Invoices tab. Select which details appear in the footer: email, website and telephone.
Save the profile and check an invoice preview. Empty details are hidden; the website link is clickable in the PDF.
28. Edit, reorder and shorten document lines
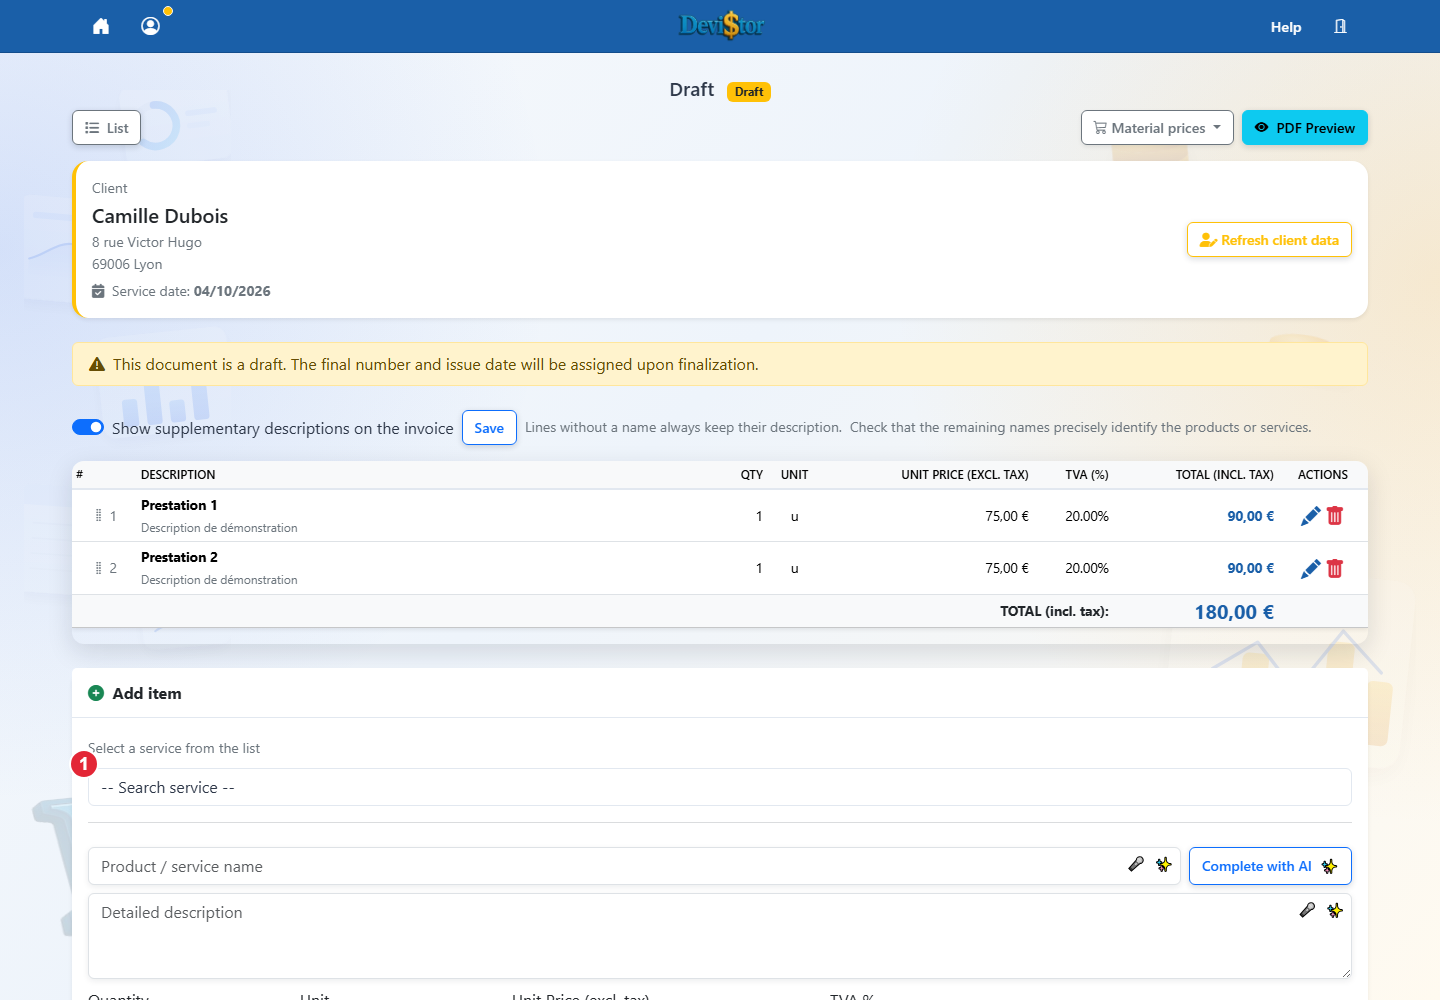
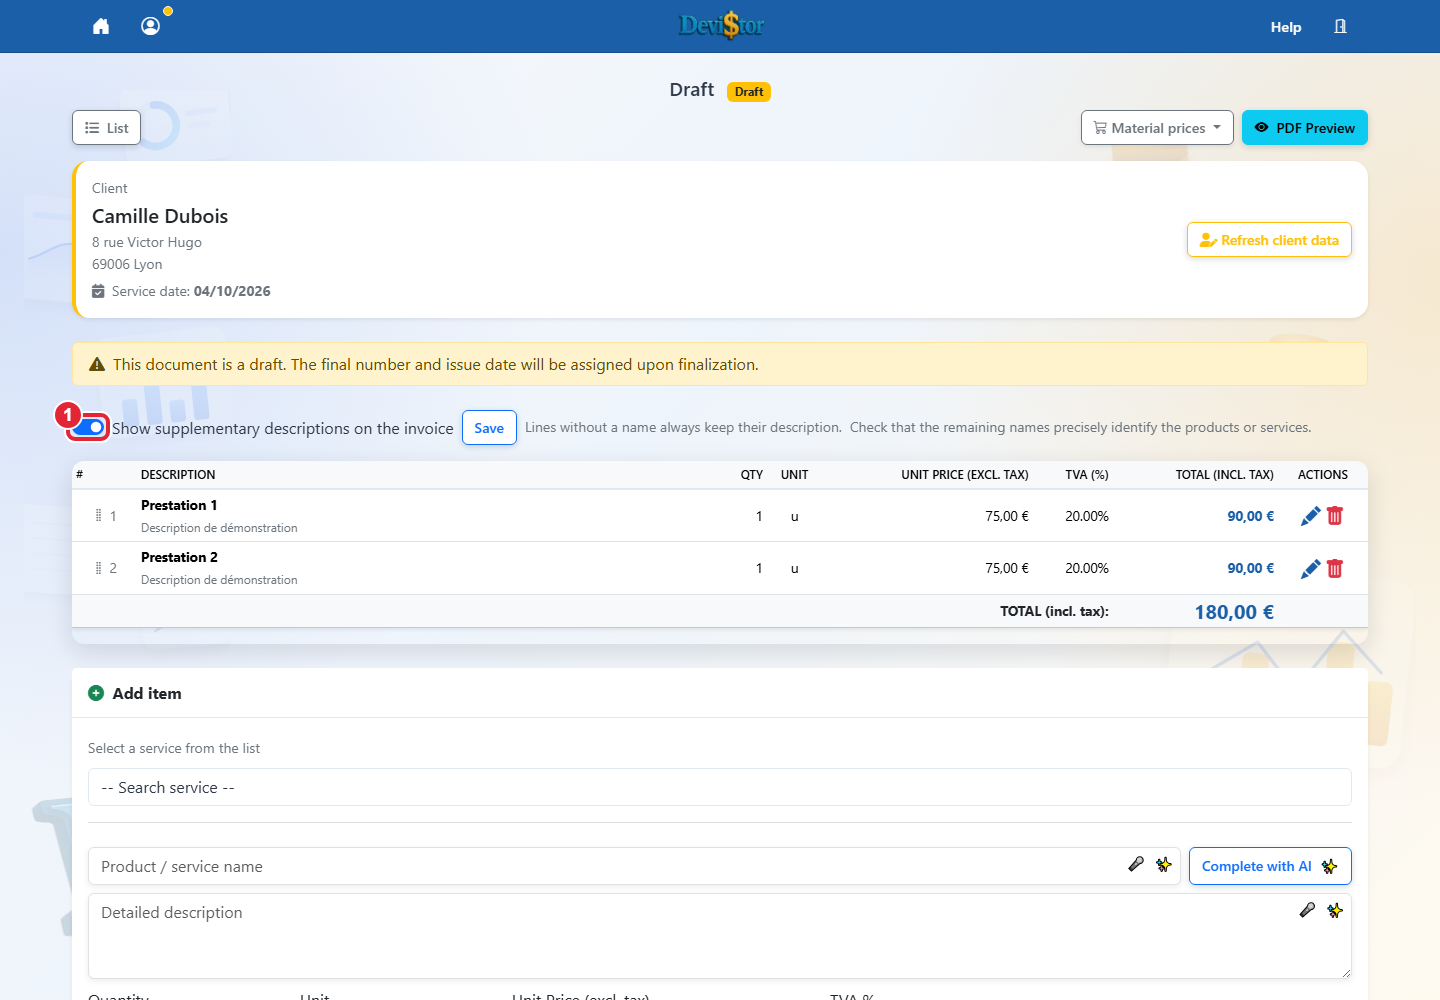
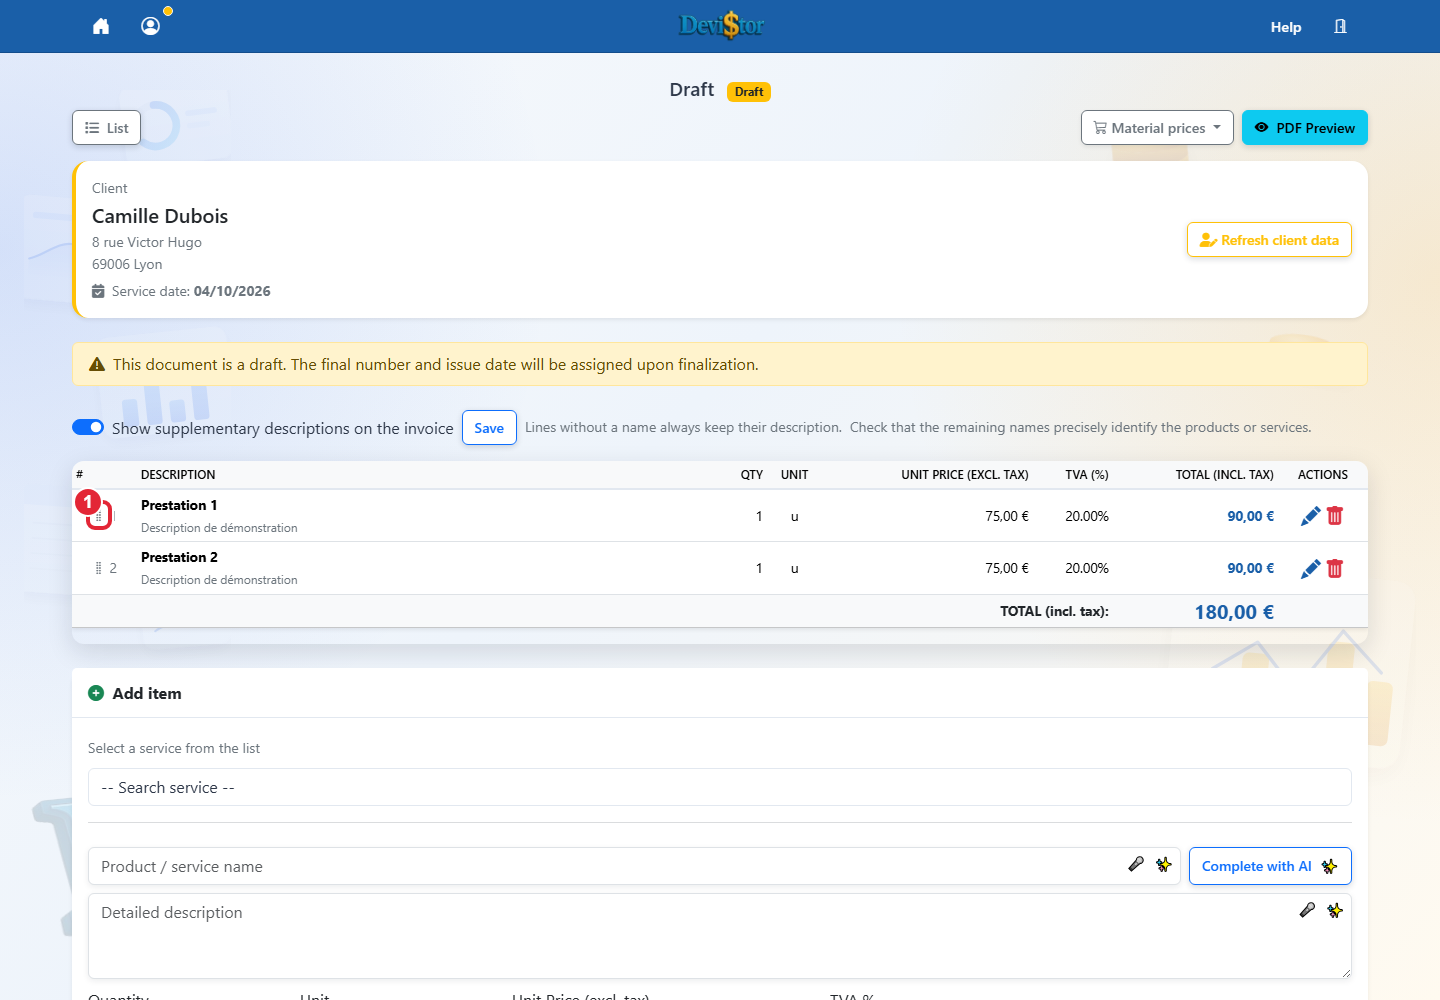
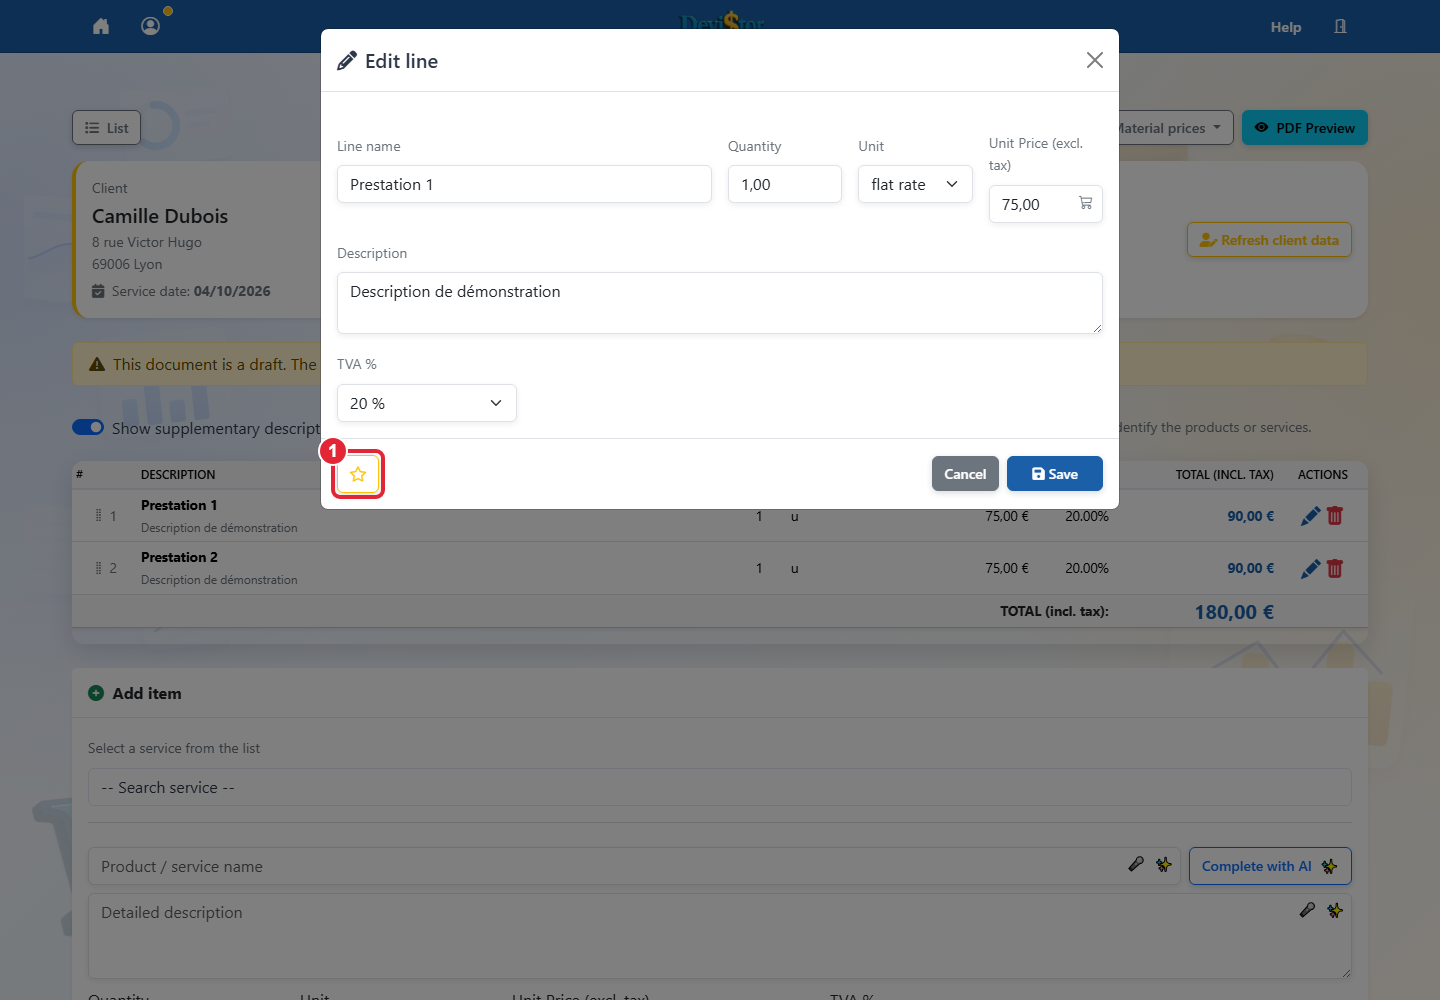
Application screenshot — demonstration data. 1 — Show supplementary descriptions on the invoice. Click to enlarge.Application screenshot — demonstration data. 1 — Move. Click to enlarge.Application screenshot — demonstration data. 1 — Save this item to my global list of services/products for future use. Click to enlarge.
Open a draft document. Click a line’s pencil to edit its name, description, quantity or price, then save.
A line can have a name up to 300 characters or only a description. Activate the star in the edit window to save the service to your catalogue.
Drag the ⋮⋮ handle to reorder lines. On invoices created from quotes, reorder within each section; sections remain fixed.
On a draft invoice, turn off Show additional descriptions to shorten the PDF. Lines without names keep their descriptions. Deposit amounts remain locked and sent quotes cannot be edited.
29. Create a foreign customer and a bilingual document
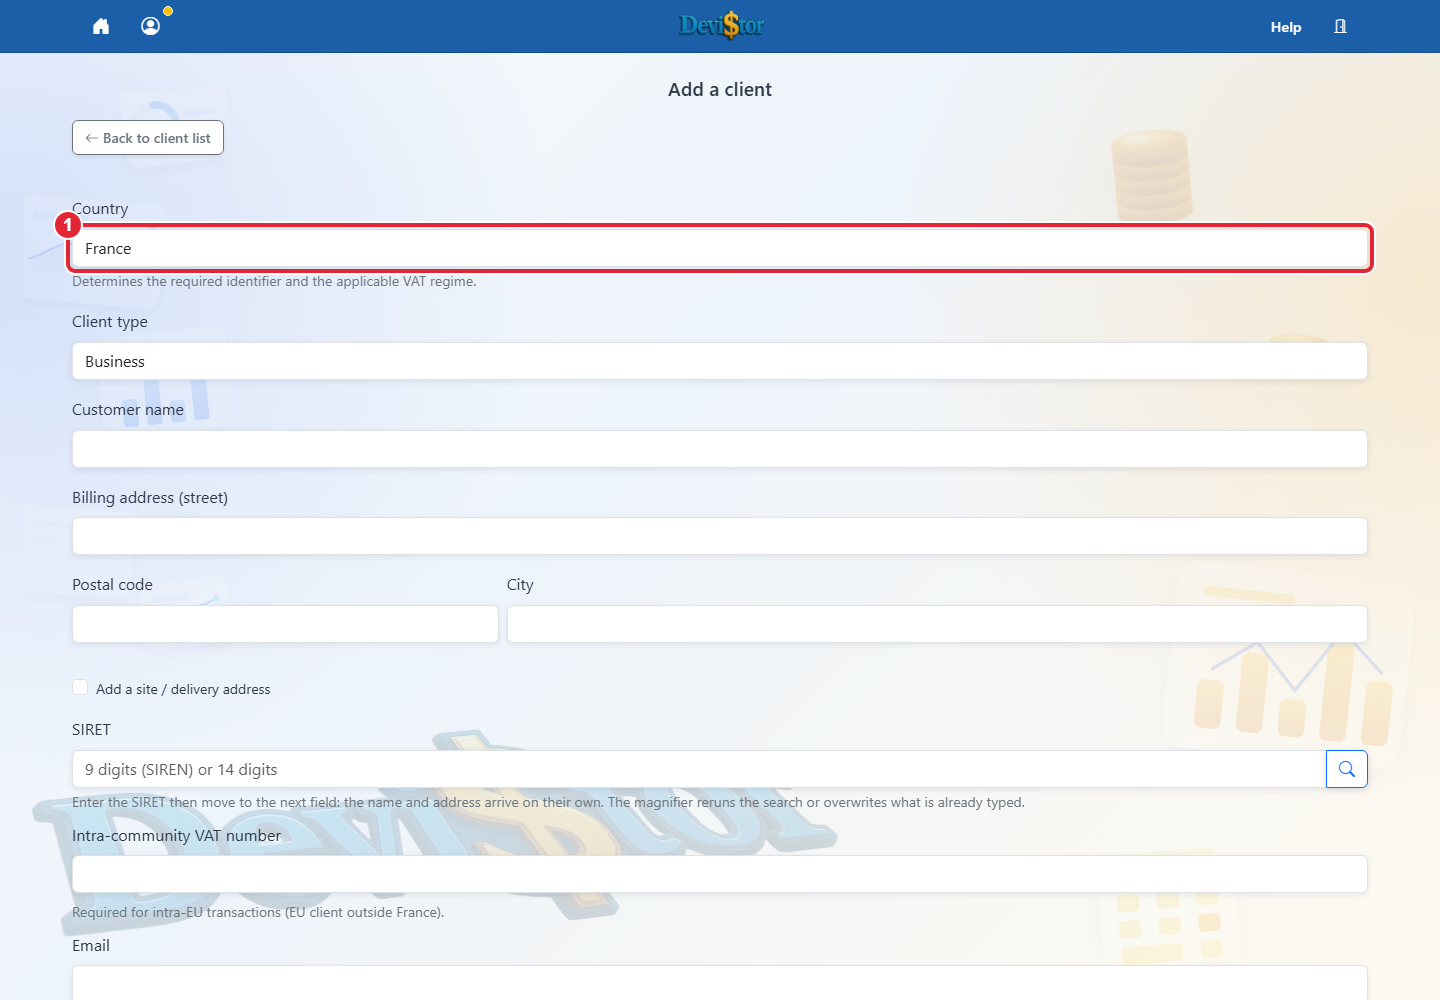
In Customers / Add, first select the country and customer type. Identification fields follow the selected country.
Use SIREN/SIRET for a French company. For an EU company, provide the requested VAT number with its country prefix. Outside the EU, use the local identifier where needed.
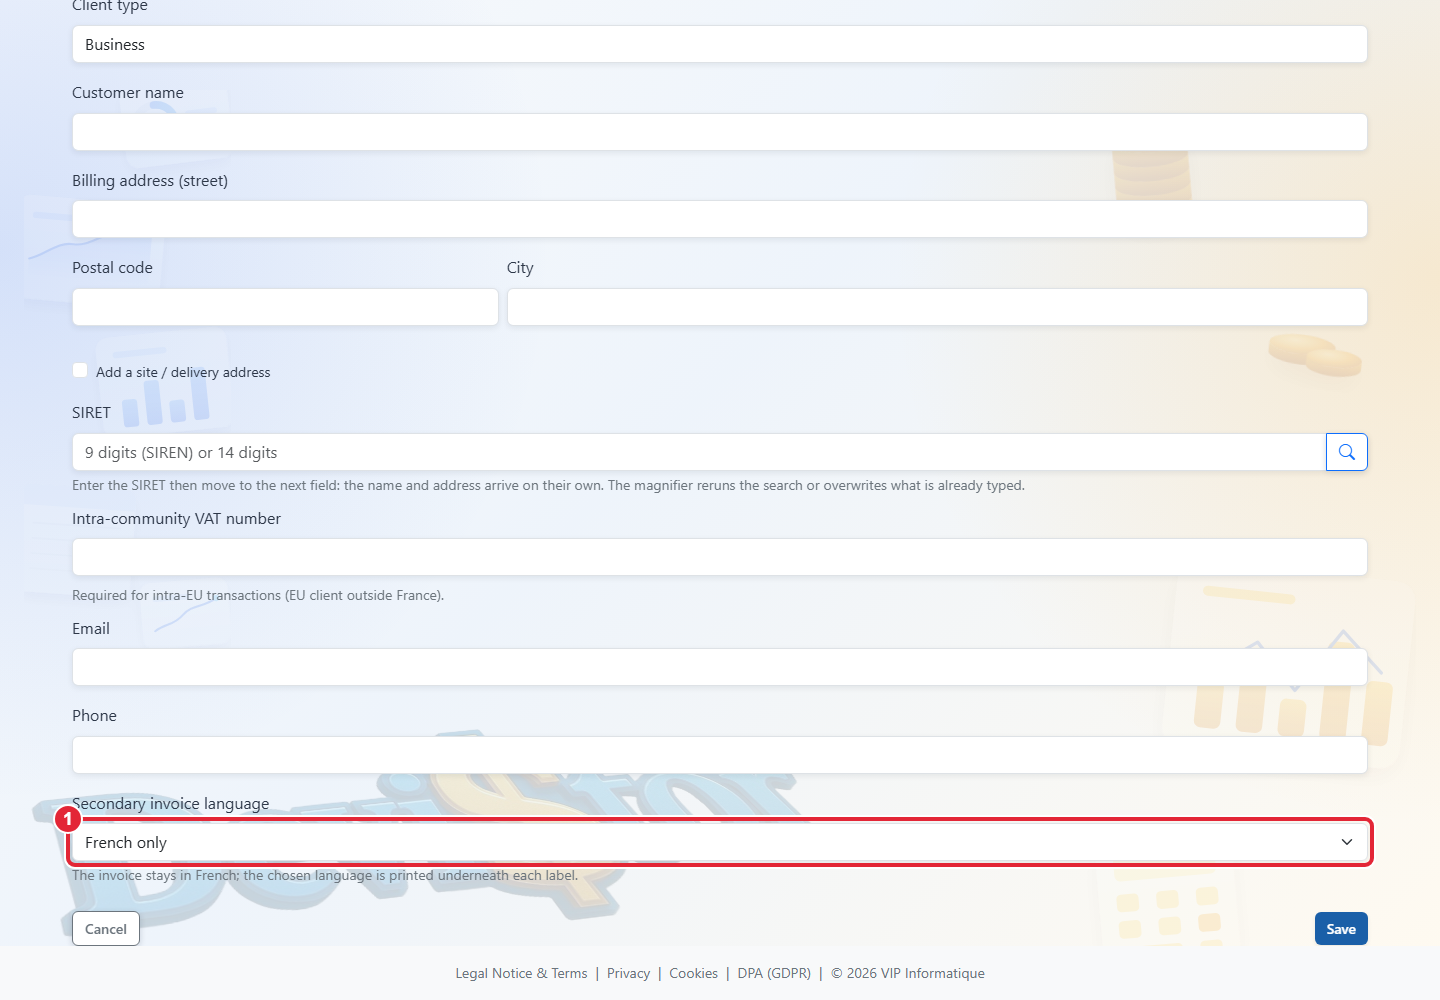
Select the desired second language under Document language and save the customer.
Create the quote or invoice and check the proposed VAT treatment and preview. French remains the primary language alongside the selected second language. Document language is separate from your interface language.